
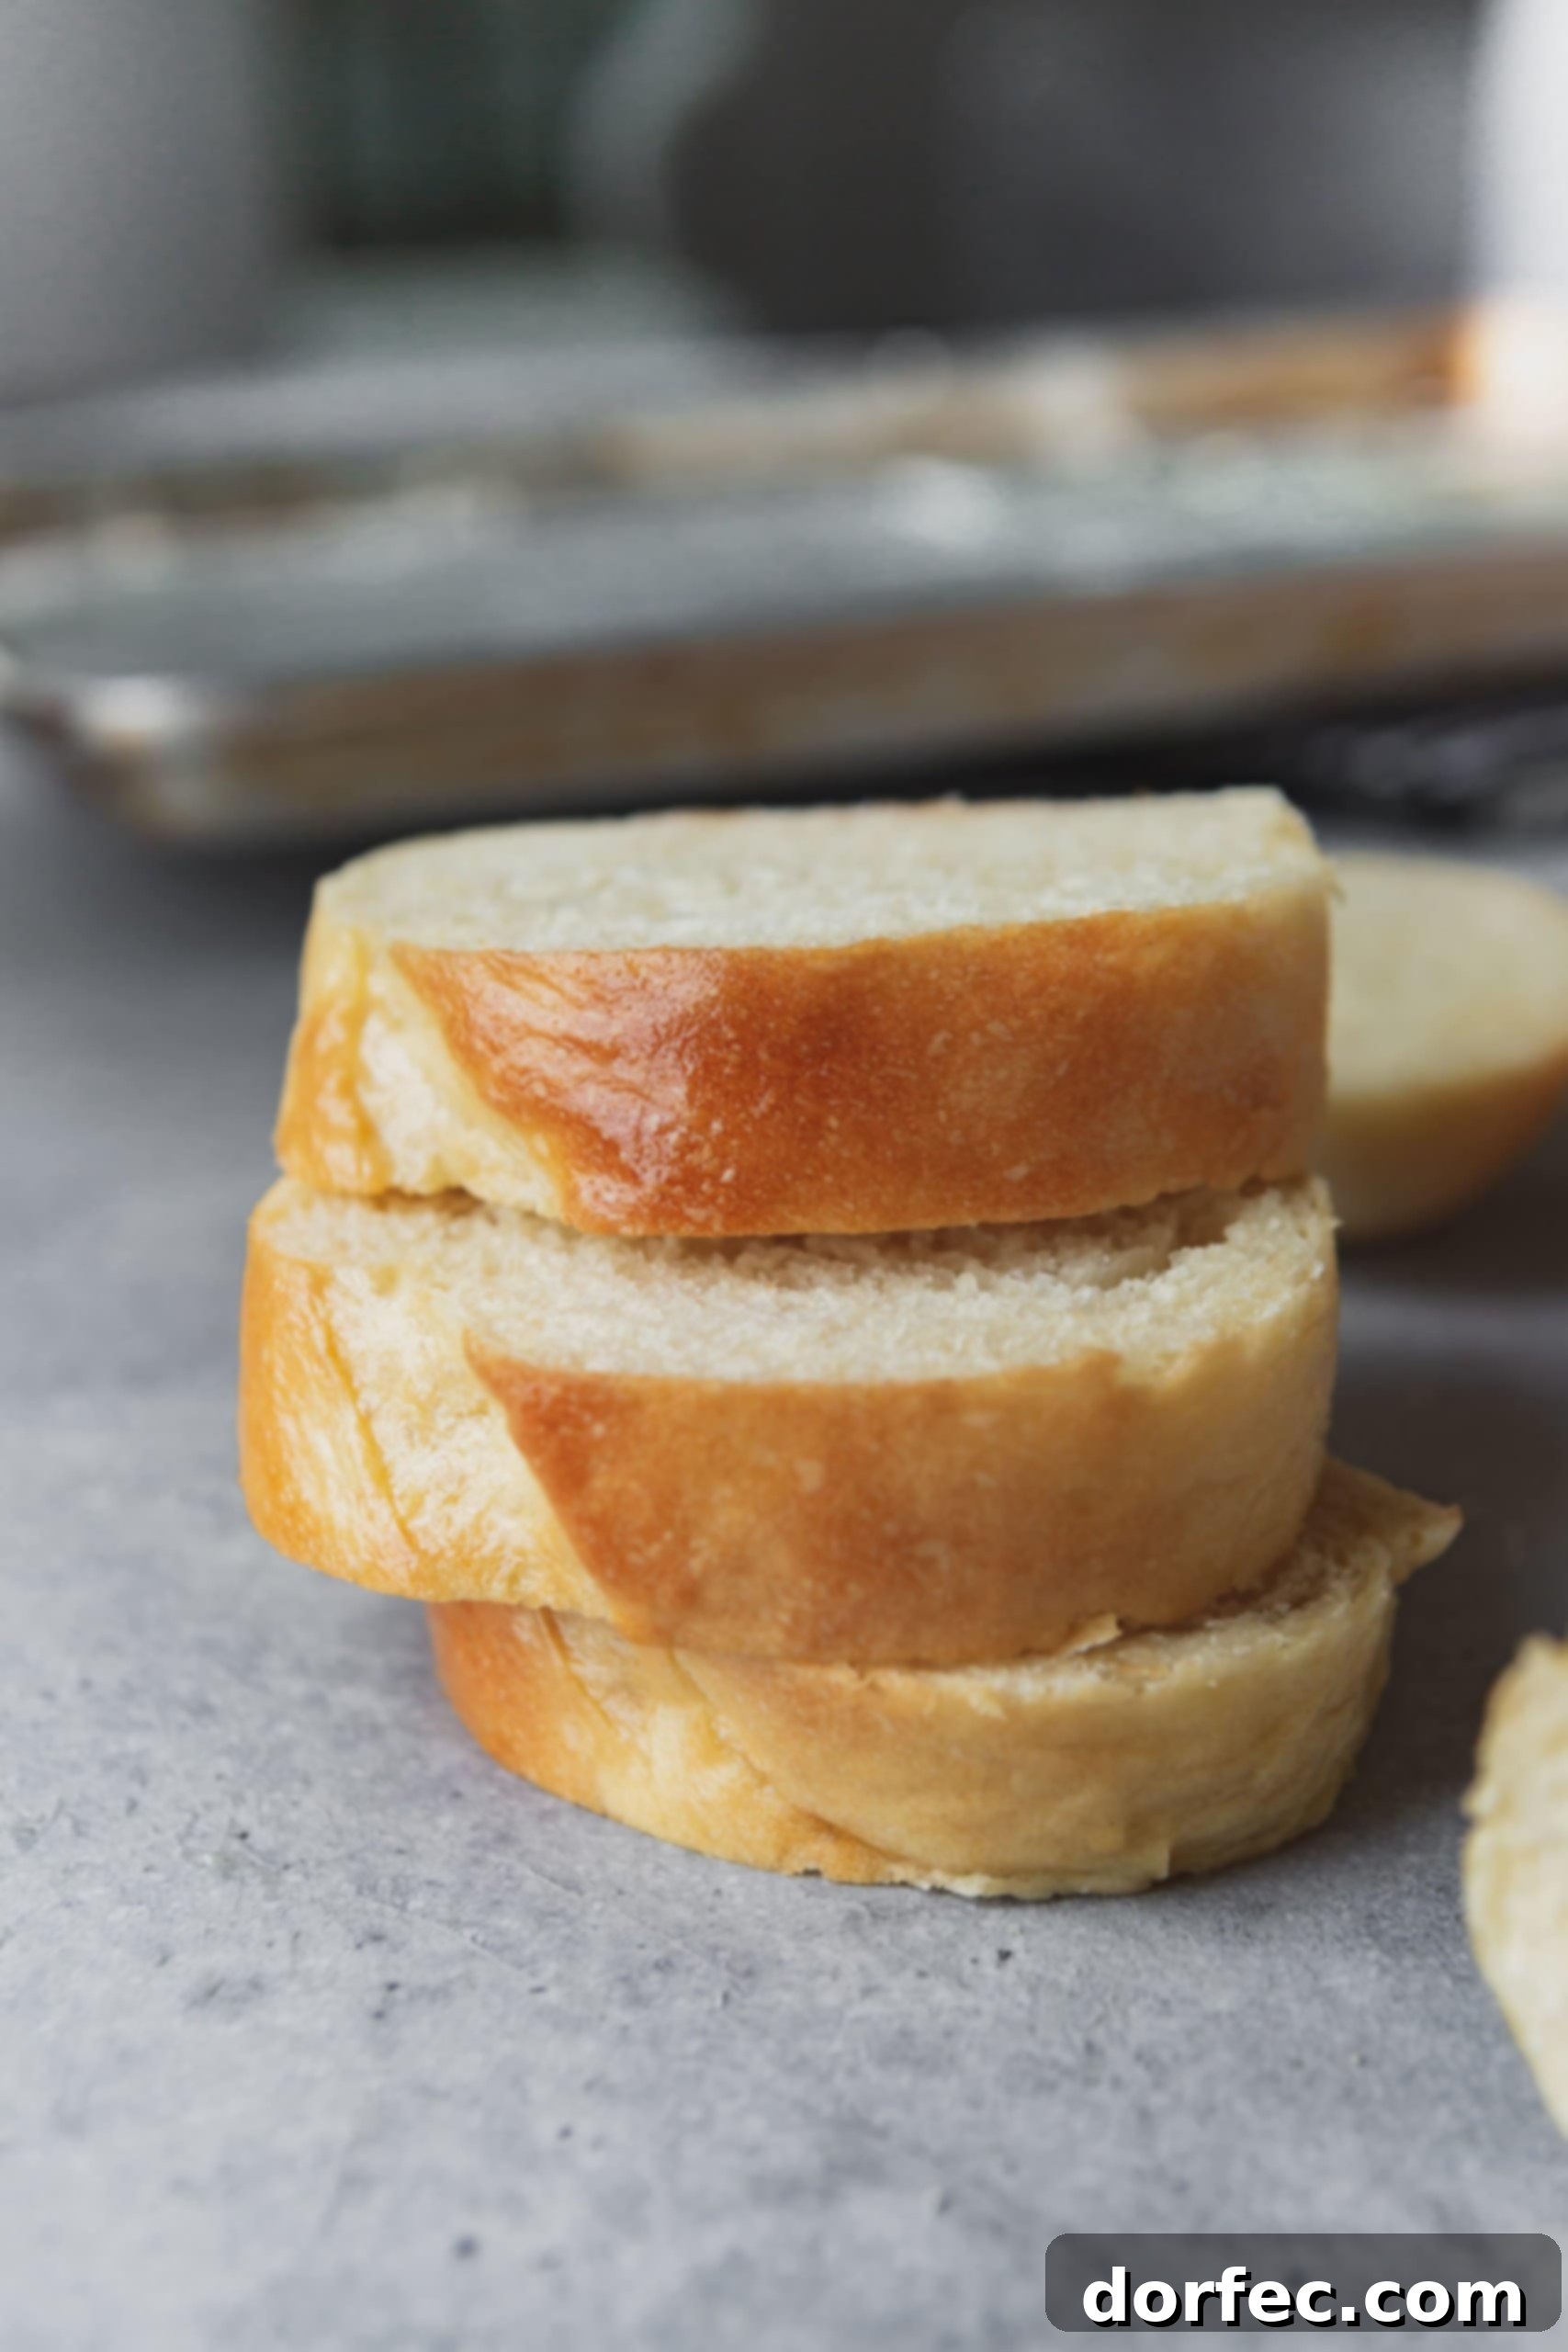
There’s nothing quite like the aroma of freshly baked bread filling your kitchen, and this easy homemade French bread recipe delivers that joy every time. This isn’t just any recipe; it’s the exact one I mastered during my college cooking class, and it has consistently produced perfectly soft loaves with that signature crisp, golden crust that true French bread is known for. It’s a timeless classic that will undoubtedly become a staple in your home.
What makes this recipe truly special is its versatility and generosity. You’ll bake not one, but two magnificent loaves, allowing you to enjoy one immediately and conveniently freeze the second for later. Plus, if you’re a fan of the ultimate comfort food, this bread serves as the foundation for the absolute best garlic bread you’ll ever taste! Its sturdy yet tender crumb holds up beautifully to rich flavors, making it an ideal canvas for culinary creativity.
My journey into the world of baking, particularly with this French bread, began unexpectedly in a college cooking class I took with my husband, Cade. We envisioned it as a lighthearted elective, a fun diversion during our early marriage. Little did we know, it would lay the groundwork for a shared passion, transforming our kitchen into a hub of family cooking and inspiring us to share our cherished recipes with a wider audience. In many ways, the foundation of our culinary adventures traces back directly to this very homemade French bread. It’s more than just a recipe; it’s a piece of our history, now ready to become a part of yours.
Why Bake Homemade French Bread? The Unbeatable Advantages
While store-bought baguettes and loaves are readily available, there’s an undeniable magic that comes with baking French bread from scratch. The benefits extend far beyond just flavor:
- Unmatched Freshness: Nothing compares to bread pulled straight from your own oven. The crust is at its crispiest, the interior at its softest, and the aroma is simply intoxicating.
- Superior Flavor & Texture: Homemade bread typically boasts a richer, more complex flavor profile and a superior texture that often surpasses mass-produced alternatives. You control the quality of ingredients, leading to a better end product.
- Cost-Effective: Basic bread ingredients are incredibly affordable. Making your own French bread is significantly cheaper than purchasing artisan loaves regularly.
- Customization: Once you’ve mastered the basic recipe, you can experiment with additions like herbs, cheese, or different types of flour to tailor it to your preferences.
- A Rewarding Experience: The process of transforming simple ingredients into a beautiful loaf of bread is deeply satisfying. It’s a culinary skill that builds confidence and brings immense joy.
- No Preservatives: You know exactly what goes into your bread, free from any unwanted additives or preservatives often found in commercial products.
Embrace the gratifying experience of baking and treat yourself and your loved ones to the unparalleled taste of freshly baked easy French bread!
Essential Ingredients for Your Homemade French Bread
One of the most appealing aspects of this perfect French bread recipe is its simplicity. You only need a handful of pantry staples – just 6 key ingredients. If you consider water a given, then it’s even fewer! Here’s your straightforward shopping list, though you likely have most, if not all, of these on hand already:
- Warm Water: Crucial for activating the yeast. The temperature should be between 105-115°F (40-46°C) – warm to the touch but not hot.
- Instant Yeast: Our go-to choice for consistent results. It activates quickly and doesn’t require pre-proofing if you’re in a hurry (though we’ll still activate it for assurance).
- Granulated Sugar: A small amount of sugar acts as food for the yeast, helping it to activate and providing a slight sweetness that balances the bread’s flavor. It also contributes to browning.
- Canola Oil (or Vegetable Oil): Adds tenderness to the crumb and helps keep the bread from drying out too quickly. It also contributes to a softer crust.
- Fine Sea Salt: Essential for flavor! Salt also helps control yeast activity and strengthens the gluten structure. Don’t skip it, and avoid table salt as fine sea salt provides a cleaner taste.
- All-Purpose Flour: The backbone of our French bread. We’ll delve deeper into why this simple flour is our top choice below.
It’s highly probable that these humble ingredients are already in your kitchen, making it incredibly convenient to whip up some delightful homemade French bread without a special trip to the store. Let’s get baking!
Choosing the Right Flour for the Best French Bread
Many home bakers mistakenly believe that “bread flour” is always superior for bread making. While bread flour, with its higher protein content, does develop more gluten and can lead to a chewier loaf, for French bread, we’re often aiming for a delicate balance: a slightly crunchy exterior with a soft, airy, and tender interior. All-purpose flour provides just the right amount of gluten for this balance, giving you a beautiful rise without an overly dense or rubbery crumb. It’s accessible, affordable, and produces fantastic results every time.
How to Make an Easy French Bread Recipe: A Step-by-Step Guide
The thought of baking homemade French bread might seem a little daunting at first, conjuring images of complex techniques and unpredictable outcomes. However, there’s absolutely no need to worry! This recipe is designed to be straightforward and approachable, even for novice bakers. We’re going to break down the entire process into simple, manageable steps, guiding you from a few basic ingredients to two beautiful loaves of perfect French bread.
Step 1: Activate the Yeast – The Foundation of a Good Rise
In a medium-sized glass measuring cup or a small bowl, combine the warm water (ensure it’s between 105-115°F / 40-46°C, as hotter water can kill the yeast and colder water won’t activate it effectively), instant yeast, and granulated sugar. Stir gently until the sugar dissolves. Set this mixture aside for 5-10 minutes. During this time, the yeast should “bloom” or foam on the surface. This bubbly activity is your assurance that the yeast is alive and active, ready to give your bread its magnificent rise. If it doesn’t foam, your yeast might be old or the water temperature was incorrect, and it’s best to start over.
Step 2: Combine Initial Dry and Wet Ingredients
In the bowl of a stand mixer fitted with a dough hook attachment, add about half of the total flour (approximately 3 cups if you’re aiming for 5.5-6 cups total), the canola or vegetable oil, and the fine sea salt. Mix on low speed for about 30 seconds to combine these ingredients thoroughly. This initial mix helps distribute the salt and oil evenly before the yeast mixture is introduced.
Step 3: Integrate Yeast Mixture and Remaining Flour
Pour the activated yeast mixture into the stand mixer bowl with the flour, oil, and salt. Begin mixing on low speed. Gradually add the remaining flour, about 1/2 cup at a time, allowing each addition to incorporate before adding more. Continue adding flour until the dough comes together and is only slightly sticky to the touch, and begins to pull away from the sides of the bowl. The total amount of flour needed can vary slightly depending on humidity and how precisely you measured, but typically it will be between 5.5 to 6 cups. Once all flour is incorporated, increase the mixer speed to medium-low and let the dough mix and knead for an additional 3-5 minutes. This develops the gluten, which is essential for the bread’s structure.
Step 4: The First Two Rests and Kneads
After the initial kneading, cover the mixer bowl with plastic wrap or a clean kitchen towel. Allow the dough to rest undisturbed for 10 minutes. This short rest, known as an autolyse, allows the flour to fully hydrate and the gluten to begin relaxing. After 10 minutes, return the bowl to the stand mixer and knead the dough again on medium-low speed for just 1 minute. This brief second knead further develops the gluten. Once again, cover the bowl and let the dough rest for another 10 minutes.
Step 5: Repeating the Resting and Kneading Cycles
Repeat the 1-minute knead and 10-minute rest cycle for an additional 4 times. This method of intermittent kneading, common in artisan bread making, helps build strength and elasticity in the dough with less effort than continuous kneading. After the final cycle, lightly oil a separate clean bowl. Transfer the dough to this oiled bowl, turning it over once to ensure all sides are lightly coated in oil. This prevents the dough from sticking and keeps the surface from drying out during the longer rise.
Step 6: The Primary Rise (Bulk Fermentation)
Cover the oiled bowl tightly with plastic wrap or a damp kitchen towel. Place it in a warm, draft-free spot in your kitchen. Allow the dough to rise for 1 full hour, or until it has doubled in size. The exact timing can vary based on your kitchen’s temperature; a warmer environment will expedite the rise. This crucial step, known as bulk fermentation, is where the yeast works its magic, developing flavor and volume.
Step 7: Shaping Your French Bread Loaves
Once the dough has doubled, gently punch it down to release the air. Lightly drizzle a little oil onto a clean counter surface and spread it around to create a non-stick workspace. Transfer the dough to the oiled counter and divide it evenly into two halves. Take one half and gently press it into a rectangular shape, roughly the size of a 9×13 inch baking pan (our college professor always kept one nearby as a visual guide). Starting from one of the long edges, tightly roll the rectangle of dough up towards the opposite long edge, pressing gently with your fingertips as you roll to seal out any air bubbles. Continue until you have a cylinder.
Step 8: The Final Rise (Proofing)
Carefully transfer each formed loaf, seam-side down, onto a large baking sheet lined with parchment paper. Ensure there’s enough space between the loaves for them to expand. Cover the baking sheet loosely with a clean kitchen towel and let the loaves rise again in a warm, draft-free location for another 1 hour, or until they have nearly doubled in size. This final rise, or proofing, is essential for a light and airy interior.
Step 9: Preparing for Baking – Scoring
While the loaves are proofing, preheat your oven to 400°F (200°C). Position an oven rack in the center. Once the loaves have completed their final rise, gently score the top of each dough with a very sharp blade (a bread lame, a razor blade, or a sharp knife works well). Make 3-4 diagonal slashes, about 1/2 inch deep. This step is not just for aesthetics; it allows the bread to expand predictably in the oven, preventing uncontrolled cracking and helping achieve that beautiful, open crumb structure.
Step 10: The Bake – Achieving that Perfect Crust
Carefully place the baking sheet with the scored loaves into the preheated oven. Immediately, and quickly, toss 4-5 ice cubes directly onto the bottom of the oven (or into a cast iron pan placed on the bottom rack beforehand). Quickly shut the oven door to trap the steam.
Bake the loaves for 15-20 minutes. Keep an eye on them, and if the crust starts browning too quickly, you can loosely cover them with aluminum foil for the remaining bake time to prevent over-browning while allowing the interior to fully cook.
Step 11: The Finishing Touch – Butter and Serve!
Once baked to a beautiful golden brown, remove the bread from the oven. For an extra touch of flavor and a softer crust, immediately lather both hot loaves generously with butter. The butter will melt into the warm crust, creating an irresistible sheen and adding rich flavor. Allow the bread to cool for a few minutes before slicing and serving. Enjoy the fruits of your labor!
Frequently Asked Questions About Baking French Bread
What Kind of Yeast Should I Use for French Bread?
We actually have a dedicated post on yeast, but for this easy French bread recipe, I almost exclusively use instant yeast. It’s incredibly reliable and consistently delivers perfect results. Unlike active dry yeast, instant yeast doesn’t strictly require proofing beforehand, though we do a quick activation step here just for assurance and to kickstart the process. For best results, I always keep a large bag of instant yeast stored in the freezer. This extends its shelf life significantly, ensuring it stays fresh and potent for months, if not years.
Can I Make French Bread Without a Stand Mixer? (Hand-Kneading Tips)
Absolutely! While a stand mixer makes the kneading process incredibly easy, making French bread by hand is a traditional and deeply rewarding experience. It also gives your arm muscles a fantastic workout! Just follow the instructions for combining ingredients with a sturdy spatula or wooden spoon, then turn the dough out onto a lightly floured surface. Knead the dough vigorously by hand for about 10-15 minutes, or until it becomes smooth, elastic, and passes the windowpane test (where you can stretch a small piece of dough thin enough to see light through it without tearing). You’ll still follow the resting cycles, which are especially helpful for hand-kneading, allowing the gluten to relax between sessions.
Why Is Scoring French Bread Important Before Baking?
Scoring the dough, or making strategic slashes on the surface of your loaves just before they go into the oven, is more than just a decorative touch. It serves several crucial functions:
- Controlled Expansion: As bread bakes, the sudden heat of the oven causes a rapid expansion of gases within the dough (known as “oven spring”). Scoring creates weak spots that allow the dough to expand predictably in these areas. Without scoring, the crust might crack randomly or unevenly in places you don’t desire, ruining the aesthetics and potentially affecting the texture.
- Enhanced Volume and Shape: By directing the expansion, scoring helps the loaf achieve maximum volume and a desirable shape, often contributing to a taller, more elegant loaf.
- Crispier Crust: The exposed edges of the scores caramelize and crisp up beautifully, adding to the overall texture and appeal of the crust.
- Aesthetics: Different scoring patterns can add an artistic signature to your loaves, making them look even more professional and appealing.
Always use a very sharp blade to ensure clean cuts that encourage optimal expansion.
How Can I Achieve a More Golden Crust on My French Bread?
Achieving that perfectly golden-brown crust is a common goal for many home bakers. Here are a few reliable tricks to help you get there:
- Egg Wash: For a deeper golden sheen, you can brush the top of your loaves with an egg wash (one egg beaten with a tablespoon of water or milk) just before baking. This also helps any seeds or toppings adhere.
- Milk Wash: A simple milk wash (just milk or cream) can also encourage browning and create a slightly softer crust.
- Oven Rack Adjustment: Sometimes, simply moving your oven rack a little closer to the top heating element can do the trick. Just be mindful not to move it too close, as this can lead to uneven browning or burning.
- Sugar Content: Ensure you haven’t reduced the small amount of sugar in the recipe, as sugar contributes to caramelization and browning.
- Baking Time: Don’t be afraid to bake for the full recommended time, or even a few minutes longer, if your bread hasn’t reached your desired golden hue. Keep an eye on it to prevent burning.
- Oven Calibration: Ovens can vary significantly. If your bread consistently bakes light, your oven might run cool. An oven thermometer can help you ensure accurate temperature.
Experimentation is key to finding the “sweet spot” with your specific oven and preferences.
Creative Ways to Enjoy Your Homemade French Bread
While this might seem like an unnecessary section – after all, who needs instructions on enjoying heavenly bread? – French bread’s versatility truly shines in countless culinary applications. It’s truly magnificent on its own, especially fresh out of the oven with a generous slather of butter. But here are some of our favorite ways to savor every delicious bite:
- Soup’s Best Friend: I honestly refuse to eat soup unless there’s some delectable bread to sop up every last drop! It’s an absolute must with hearty stews and creamy soups. Pair it with our Lasagna soup, comforting chicken noodle soup, our legendary THE soup, or truly any soup you can imagine!
- The Perfect Pasta Companion: A slice of French bread is the quintessential accompaniment to any pasta dish, soaking up rich sauces and adding a delightful textural contrast. Enjoy it with a robust Bolognese, classic spaghetti, or a creamy Fettuccine Alfredo.
- Gourmet Sandwiches & Pizzas: It’s the ultimate base for creative meals. Transform it into easy French bread pizza for a quick dinner, or craft a hearty Philly cheesesteak bread. Use it as the star for delicious sandwiches like our savory French dip or a fresh Caprese panini.
- Sweet Breakfast & Dessert Treats: Don’t limit it to savory! French bread makes an incredible base for sweet dishes. Use it to make the best French toast you’ve ever had – French bread for French toast just makes sense! It’s also fantastic for comforting bread pudding or a decadent French toast bake.
- Simple & Irresistible: Of course, sometimes the simplest pleasures are the best. Enjoy it plain, with a generous spread of butter, our delightful honey butter, or transformed into the best garlic bread on the globe!
Oh man, just thinking about all these possibilities has me literally drooling! The relationship between carbs and me is a solid, long-lasting bond of pure bliss!
How to Properly Freeze Your Homemade French Bread for Later
As mentioned, this fantastic easy French bread recipe conveniently yields two loaves, which is perfect for enjoying one fresh and saving the other for a busy day. Freezing homemade French bread is incredibly simple and effective, preserving its freshness for weeks!
Here’s how to do it:
- Ensure Complete Cooling: This is the most crucial step. Allow your baked French bread loaves to cool completely at room temperature. Wrapping warm bread will trap moisture and lead to soggy, icy bread once thawed.
- Wrap Tightly: Once fully cooled, wrap each loaf individually and very tightly. You can use multiple layers of plastic wrap (Saran Wrap) directly around the bread, ensuring no air gaps.
- Add a Second Layer: For extra protection against freezer burn, wrap the plastic-wrapped loaf again in aluminum foil. This creates a double barrier.
- Place in a Freezer Bag: For ultimate preservation, place the double-wrapped loaf into a large freezer-safe Ziploc bag. Squeeze out as much air as possible before sealing.
- Freeze: Place the prepared loaves in the freezer. They will keep beautifully for up to 3 months.
When you’re ready to enjoy your frozen French bread, simply remove it from the freezer. You can either:
- Thaw at Room Temperature: Unwrap the loaf and let it sit on the counter until it reaches room temperature. Then slice and enjoy.
- Warm in the Oven: For that “freshly baked” experience, unwrap the frozen loaf and place it directly into a preheated oven at 350°F (175°C) for about 10-15 minutes, or until warmed through and the crust is crisp again. This is my preferred method!
I once had a friend who received a loaf of French bread as a Christmas gift every year from his parents. They would genuinely wrap it up because he loved it that much, and it truly speaks to how utterly delightful French bread can be. This memory always makes me smile and confirms the universal appeal of a perfectly baked loaf.
This easy French bread recipe is truly the best of the best! You’ll adore how simple it is to prepare and how many joyful culinary possibilities it unlocks. Get ready to impress yourself and everyone who tastes it!
Discover More Delightful & Easy Bread Recipes You’ll Love:
- Homemade Baguette
- Buttermilk Biscuits
- Skillet Cornbread
- Easy Hoagie Rolls
- Feta Muffins
- Awesome Cheesy Herb Rolls
- Homemade Naan
- Best Potato Rolls
- Easy No-Knead Artisan Bread
- One Hour Rolls
- 7-Up Biscuits
- Whole Wheat Potato Rolls
- Explore all our BREAD RECIPES here!
Easy French Bread Recipe
10 servings
Ingredients
- 2 1/4 Cups Warm Water
- 1 Tablespoon Instant Yeast
- 2 Tablespoons Sugar
- 5-5 1/2 Cups Flour
- 1 Tablespoon Canola Oil or Vegetable Oil
- 2 1/2 teaspoons Fine Sea Salt
Instructions
- In a glass measuring cup, add the warm water, yeast and sugar. Stir to combine and set aside to foam.
- In a standing mixer, add 3 of the 6 cups of flour, oil and the salt, mix to combine.
- Add the yeast and water mixture and mix on low using a dough hook. Gradually add in more flour by 1/2 cup until the dough is slightly sticky but has pulled away from the sides of the bowl. You should use 5 1/2-6 cups total flour in this recipe. Continue to mix for 2-3 minutes.
- Cover the bowl with plastic or a towel and set aside for 10 minutes. Place the bowl back in the mixer and mix again for another minute and then allow to rest for 10 minutes.
- Continue for 4 more cycles of allowing the dough to rest and then kneading it just as you do with many artisan breads. If you do not have time, (our professor had told us she usually skips the kneading and resting part but I never do) you can add a drizzle of oil to a clean bowl and then place the dough in, immediately turning it over so that the oil coats all the dough. Cover and allow to rest for 1 hour.
- Place a little oil directly on your counter and spread it out. Now place the dough on the oiled counter and divide the dough in half.
- Press each section into a thick rectangle the size of a 9×13″ pan (our professor always set one next to the dough). Roll the dough up starting from the long edge and pressing gently to seal out any air bubbles.
- Finally, pinch the edge to seal. Arrange seam side down on a large baking sheet lined with parchment paper and cover with a towel to rise for an hour.
- Place the oven rack in the center and heat to 400. Using a sharp blade, slash through the dough to create a marked topping.
- Place the bread in the oven and throw 4 ice cubes into the bottom of the pan to create steam and shut the oven door.
- Bake for 15-20 minutes, covering with foil if needed. Remove from the oven and open a stick of butter then rub all over the top. Enjoy!
Nutrition
, Calories: 546kcal
, Carbohydrates: 112g
, Protein: 15g
, Fat: 3g
, Saturated Fat: 1g
, Trans Fat: 1g
, Sodium: 587mg
, Potassium: 158mg
, Fiber: 4g
, Sugar: 3g
, Vitamin C: 1mg
, Calcium: 24mg
, Iron: 7mg
Nutrition information is automatically calculated, so should only be used as an approximation.
REMEMBER TO SUBSCRIBE TO our FREE Oh Sweet Basil NEWSLETTER AND RECEIVE EASY RECIPES DELIVERED INTO YOUR INBOX EVERY DAY!
When you try a recipe, please use the hashtag #ohsweetbasil on INSTAGRAM for a chance to be featured in our stories! FOLLOW OH, SWEET BASIL ON FACEBOOK | INSTAGRAM | PINTEREST | TWITTER FOR ALL OF OUR LATEST CONTENT, RECIPES AND STORIES.