
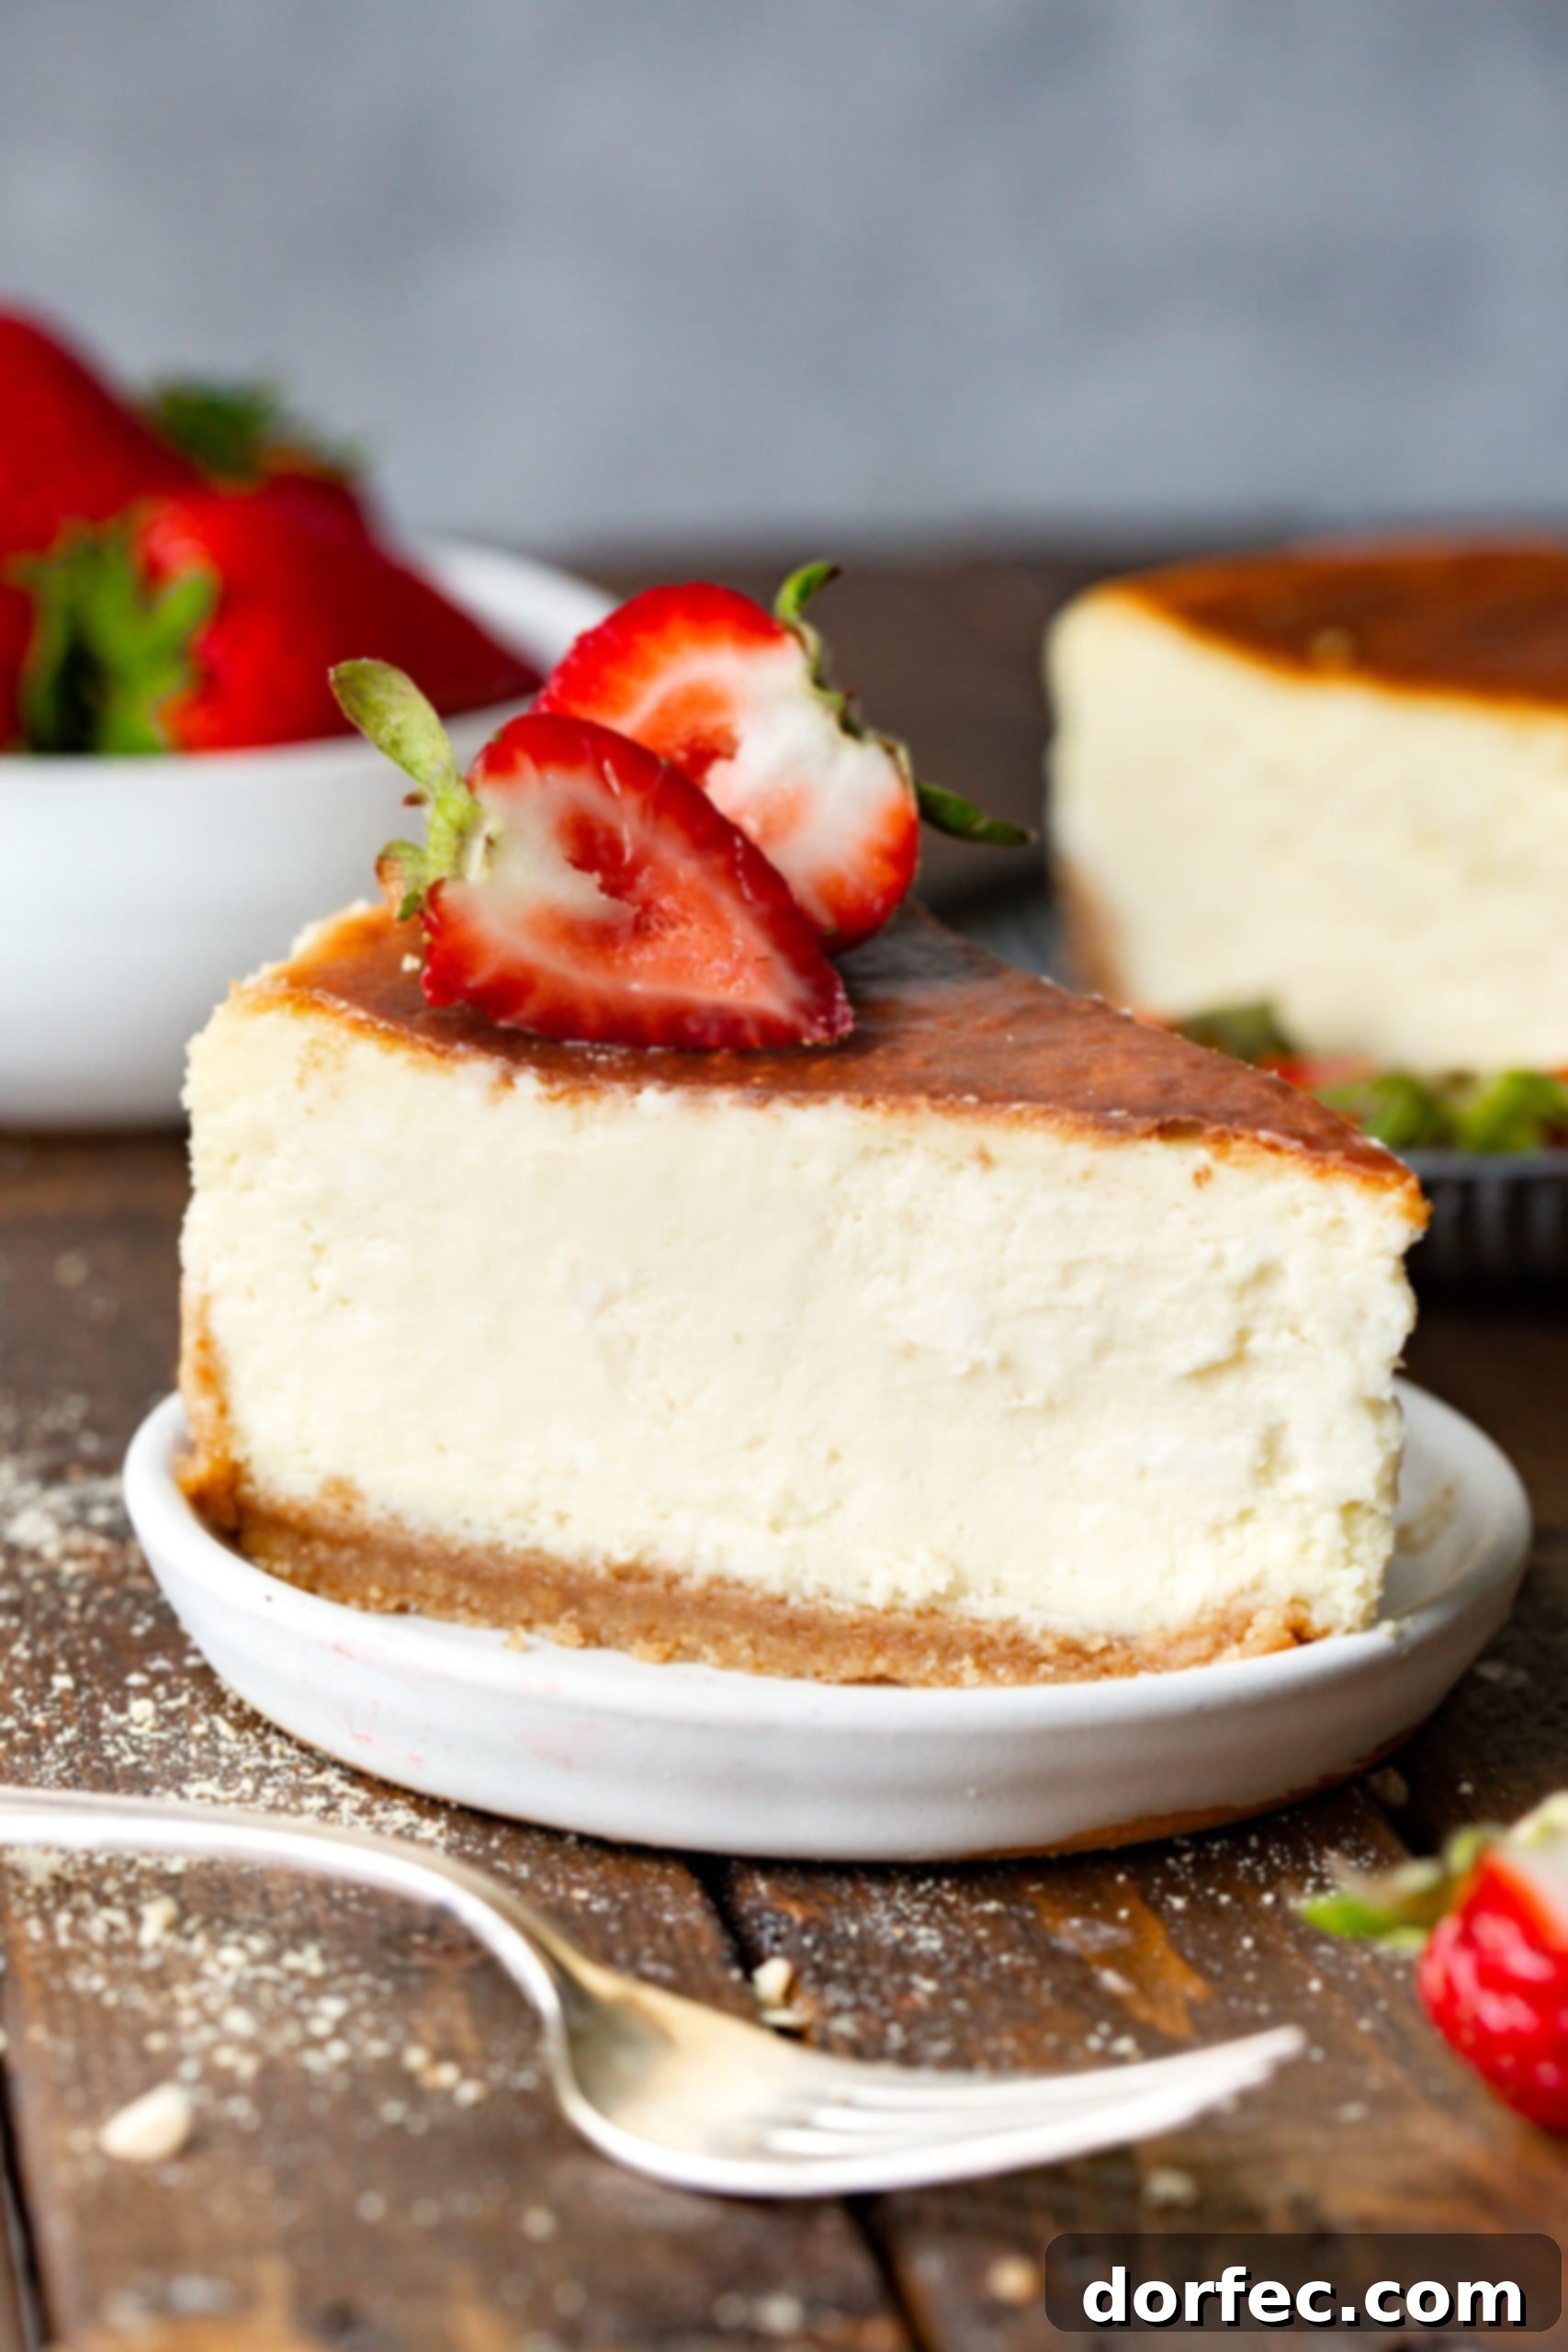
Welcome to the definitive guide for baking the best cheesecake recipe you’ll ever taste! Forget complicated techniques and frustrating cracks; this comprehensive recipe is designed to be rich, incredibly creamy, and entirely achievable for every home baker. We’re about to unlock all the secrets to a perfectly baked, absolutely irresistible homemade cheesecake, ensuring your dessert dreams become a delicious reality.
Mastering the Cheesecake: Essential Baking Secrets
Baking a flawless cheesecake might seem daunting, but with the right techniques, it becomes a joy. We’ve gathered the most crucial tips to guarantee a smooth, crack-free, and sumptuously creamy cheesecake every time. Let’s dive into the foundational elements that make all the difference.
Tip 1: The Indispensable Foil Water Bath Barrier
One of the most common anxieties for cheesecake bakers is dealing with cracks and water leakage. Our first, and perhaps most vital, secret weapon against these issues is properly wrapping your springform pan in heavy-duty aluminum foil. This creates an impenetrable barrier, protecting your cheesecake from the water bath and promoting an even, gentle bake. Think of it as a protective cocoon: the foil ensures that no water infiltrates the crust or filling, while the surrounding water bath provides consistent, moist heat, leading to that coveted smooth top and perfectly uniform texture. Using non-stick foil can offer an extra layer of protection and ease of handling. This simple step is so effective, it’s practically a guarantee against those dreaded cracks!
The Allure of the Graham Cracker Crust
For many, the crust is the unsung hero of a great cheesecake, and a classic graham cracker crust holds a special place in our hearts (and stomachs!). Growing up, I’d often sneak bites of the crust from the fridge when my mom wasn’t looking – a testament to its irresistible charm. Today, while my palate has matured to appreciate the entire cheesecake, a poorly made one still leaves me disappointed. This recipe, however, delivers a graham cracker crust that is truly exceptional. It’s thick, buttery, and provides the perfect crunchy counterpoint to the silky-smooth filling. This isn’t just a recipe; it’s a keeper, one you’ll want to print and have on hand for every occasion.
Unveiling the Perfect Cheesecake Experience
Let’s talk about what makes this particular cheesecake stand out from the rest. It’s a symphony of textures and flavors, meticulously crafted for maximum enjoyment. Understanding these characteristics will not only inspire you but also guide you in achieving perfection.
Texture: Prepare for an extraordinarily creamy, impossibly smooth, and rich experience. Every bite boasts an even, luxurious consistency from the golden top all the way through to the center. Complementing this velvety interior is the star of the show for many: that crunchy, buttery graham cracker crust that provides a delightful textural contrast and remains a cherished favorite.
Flavor: This cheesecake strikes the ideal balance of tangy and sweet, hitting all the right notes without being overpowering. The subtle tartness of the cream cheese is perfectly offset by just enough sugar, creating a harmonious flavor profile that allows for endless topping possibilities. Whether you prefer classic fruit sauces or decadent chocolate, this base flavor is designed to complement any addition you desire.
Difficulty: We rate this recipe as medium difficulty. While it’s not a quick “dump-and-go” dessert, it is absolutely within reach for bakers of all skill levels. The key lies in following our detailed, fail-proof tips, which are designed to guide you through each step and ensure a successful outcome. With a little patience and attention to detail, you’ll be amazed at what you can create.
Time: A truly exceptional cheesecake demands a bit of foresight. From start to finish, this recipe requires over 12 hours. But don’t let that intimidate you! The vast majority of this time is dedicated to resting and chilling, allowing the cheesecake to slowly cool, set, and develop its unparalleled texture and flavor. The active prep and bake time are much shorter, making it a perfect project for a weekend or special occasion when you can plan ahead.
The Simple Yet Powerful Ingredients for the Best Cheesecake
It’s truly remarkable how a dessert so decadent and impressive can be crafted from such a humble list of ingredients. The magic happens in the quality of these components and how they’re combined. Here’s what you’ll need to assemble your masterpiece:
Crust Ingredients:
- Graham Crackers: The foundation of our beloved crust. While any brand works, Honey Maid is a personal favorite for its classic flavor. You can purchase pre-ground crumbs for convenience or grind whole crackers yourself using a blender or food processor for optimal freshness and texture control.
- Granulated Sugar: Adds a touch of sweetness to balance the buttery richness of the crust, ensuring it’s not overly plain.
- Unsalted Butter: Essential for binding the graham cracker crumbs together, creating a firm yet tender crust that holds its shape beautifully and imparts a rich flavor. Melted butter is key for even distribution.
Cheesecake Filling Ingredients:
- Cream Cheese: The heart and soul of cheesecake. Use full-fat cream cheese (like Philadelphia brand) for the richest, creamiest texture and best flavor. Ensure it’s completely softened to room temperature to prevent lumps and ensure smooth mixing.
- Granulated Sugar: Sweetens the creamy filling, balancing the tanginess of the cream cheese.
- Salt: A pinch of salt enhances all the flavors, preventing the cheesecake from tasting flat and bringing out the best in the dairy and vanilla.
- Vanilla Extract: Pure vanilla extract is non-negotiable for that classic, comforting cheesecake aroma and flavor.
- Lemon Extract: A small amount of lemon extract provides a subtle, bright tang that elevates the cheesecake, preventing it from being too heavy. It’s a secret ingredient that makes a big difference.
- Large Eggs (plus 3 yolks): Eggs are crucial binders that help the cheesecake set. Using extra yolks adds an incredible richness, contributing to the ultra-creamy, almost custard-like texture. Ensure all eggs and yolks are at room temperature.
- Sour Cream: Contributes a delightful tang and helps achieve that incredibly smooth, velvety texture while adding moisture. Must be at room temperature.
- Heavy Cream: (Optional, or can substitute with additional sour cream) Adds an extra layer of richness and silkiness to the filling, resulting in an even more luxurious mouthfeel. Refer to recipe notes for substitution details.
Tips for Cheesecake Success: Avoiding Common Pitfalls
We’ve all been there: spending precious time and ingredients on a cheesecake, only for it to crack, sink, or refuse to set. The disappointment is real! But fear not, these proven strategies will help you conquer any cheesecake challenges and achieve perfect results every time.
The Essential Springform Pan
Attempting to bake or serve a cheesecake in a standard cake pan is a recipe for disaster. A 9-inch springform pan is an absolute must-have for cheesecake baking. Its removable sides allow you to effortlessly unmold your delicate creation without any damage, making slicing and serving infinitely easier. Investing in a good quality springform pan will transform your cheesecake baking experience.
The Golden Rule: Room Temperature Ingredients
This tip is non-negotiable for a truly smooth and crack-free cheesecake. Your cream cheese, sour cream, and eggs must all be at room temperature. Here’s why:
- Cream Cheese: Softened cream cheese blends seamlessly, ensuring a lump-free, silky-smooth batter. Cold cream cheese will result in a clumpy filling and an uneven texture.
- Sour Cream: Room temperature sour cream easily incorporates into the cream cheese mixture, contributing to the overall smooth consistency.
- Eggs: Room temperature eggs emulsify much better with the other ingredients. Their fats distribute more evenly throughout the batter, which is critical for the cheesecake’s structure and helps prevent cracks during baking. Adding eggs one at a time, ensuring each is fully incorporated before adding the next, further aids in this emulsification process.
Resist the Urge: Do NOT Open the Oven Door
Once your cheesecake is baking, the oven door should remain firmly shut until the prescribed cooling period. Drastic and sudden changes in temperature are one of the primary culprits behind cheesecake cracks. The sudden influx of cool air causes the cheesecake to contract rapidly, leading to unsightly fissures on the surface. Trust the process and keep the heat sealed in.
Embrace the Water Bath for Baking Perfection
- A water bath, also known as a bain-marie, is a game-changer for cheesecake. It introduces a moist, even heat environment in your oven, which prevents the cheesecake from overbaking around the edges while the center remains undercooked. This gentle, consistent heat helps the cheesecake bake evenly, reduces the likelihood of cracks, and results in that signature silky, custard-like texture.
- As mentioned earlier, wrapping your springform pan securely in heavy-duty foil (we recommend two layers) is paramount when using a water bath. This ensures that no water seeps into your crust, preventing a soggy bottom and guaranteeing a perfect bake.
The Virtue of Patience: Time to Rest and Chill
Baking a cheesecake is only half the journey; the cooling and chilling phases are equally critical for its final texture and appearance. Rushing these steps will compromise your efforts:
- After your cheesecake has baked for the initial hour, turn off the oven but leave the cheesecake inside with the door closed for another 35 minutes. This slow, gradual cooling within the warm oven is essential to prevent sudden temperature shock, which can cause cracks.
- Next, gently run a knife around the edge of the cheesecake (while still in the pan) to loosen it slightly from the sides. This prevents the edges from clinging to the pan as the cake cools and contracts, further reducing the risk of cracks. Then, close the oven door again and let it sit for another 2-4 hours.
- Finally, remove the cheesecake from the oven and the water bath. Allow it to cool completely to room temperature on a wire cooling rack. This allows air to circulate evenly around the entire cake.
- Once completely cool, wrap the cheesecake tightly in plastic wrap and transfer it to the refrigerator for at least 8 hours, or ideally overnight. This extended chilling period allows the cheesecake to fully set, firm up, and develop its dense, creamy texture and full flavor. Only after this chilling period should you remove the sides of the springform pan, slice, and serve with your favorite toppings.
Elevate Your Cheesecake: Delicious Topping Ideas
While this classic cheesecake is magnificent on its own, adding a topping can transform it into an even more spectacular dessert. Are you a purist, or do you love to adorn your cheesecake? I’m definitely in the latter camp! Here are a few irresistible ideas to inspire you:
- Fresh Raspberry or Strawberry Sauce: A vibrant, tangy fruit sauce beautifully cuts through the richness of the cheesecake.
- Assorted Fresh Berries: A medley of fresh strawberries, raspberries, blueberries, or blackberries adds natural sweetness, a burst of flavor, and a pop of color.
- Rich Chocolate Fudge Sauce: For the ultimate indulgence, a warm, gooey chocolate sauce is always a winner.
- Fluffy Whipped Cream: A dollop of freshly made whipped cream adds a light, airy contrast.
- Decadent Salted Caramel Sauce: The sweet and salty combination is simply divine with creamy cheesecake.
- Bright Lemon Curd: For a zesty, tangy twist that enhances the cheesecake’s inherent citrus notes.
- Toasted Coconut Flakes: Adds a lovely texture and a tropical touch.
- Mini Chocolate Chips or Elegant Chocolate Shavings: Simple yet effective for a chocolatey crunch.
- Homemade Apple Pie Filling or Cherry Pie Filling: Turn your cheesecake into a seasonal delight with warm, spiced fruit fillings.
- Crushed Oreos or Other Cookies: For a playful crunch and a boost of flavor.
Common Cheesecake Questions Answered
Baking a cheesecake can bring up a few queries, especially for newcomers. Here are answers to some of the most frequently asked questions to ensure your baking journey is smooth.
How Can You Tell When a Cheesecake is Done?
The perfect cheesecake will have a slight, delicate jiggle in the very center when you gently shake the pan. The outer two inches or so will appear set, while the middle will still have a wobble. This slight jiggle is a good sign, not a sign of being undercooked. It indicates that the cheesecake has baked just enough and will continue to set up beautifully during the slow cooling process in the oven and later in the refrigerator. Resist the urge to overbake, as this is a primary cause of cracks!
Why Do Cheesecakes Crack? The Top 5 Reasons
Cheesecake cracks are a common frustration, but understanding their causes can help you avoid them. Through years of perfecting this recipe, I’ve pinpointed the main culprits:
- Cold Ingredients: As emphasized in our tips, using cream cheese, eggs, and sour cream that aren’t at true room temperature will lead to a lumpy batter that bakes unevenly and is prone to cracking.
- Overmixing the Batter: Once the cream cheese is smooth, avoid overmixing, especially after adding the eggs. Excessive mixing incorporates too much air into the batter, which expands during baking and then collapses as it cools, causing cracks. Mix only until smooth and just combined.
- Sudden Temperature Changes: Opening the oven door during baking or cooling, or removing the cheesecake too quickly from the warm oven, exposes it to cool air. This rapid temperature drop causes the cake to contract too quickly, resulting in cracks.
- Lack of a Water Bath (and proper foil wrapping): A water bath creates a moist, even heat environment, essential for a gentle, crack-free bake. Without it, the cheesecake can dry out and crack. Ensure your springform pan is meticulously wrapped in heavy-duty foil to prevent water from seeping in.
- Over-Baking: This is arguably the most common reason for cracks. An overbaked cheesecake becomes dry and stiff, and as it cools, it will inevitably crack. Always look for that signature “slight jiggle” in the center to know it’s done, then proceed with the slow cooling method.
Cheesecake Storage & Freezing Tips
Once you’ve mastered the art of baking the perfect cheesecake, knowing how to store it properly ensures you can enjoy its deliciousness for longer.
Does Cheesecake Need To Be Refrigerated?
Yes, cheesecake is a dairy-based dessert and must always be stored in the refrigerator. Cover it loosely with plastic wrap or place it in an airtight container to prevent it from absorbing other odors and drying out. When stored correctly, your cheesecake will remain fresh and delicious for up to 5 days in the fridge.
Can You Freeze Cheesecake?
Cheesecake freezes exceptionally well, making it a fantastic make-ahead dessert or a way to enjoy leftovers over time. For best results, I recommend cutting the cheesecake into individual slices before freezing. Place the individual slices on a baking sheet and freeze them uncovered for a couple of hours until solid. Once frozen, wrap each slice tightly in plastic wrap, then place all the wrapped pieces into an airtight freezer-safe container or a heavy-duty ziploc bag. This double-layer protection helps prevent freezer burn. Cheesecake can be stored in the freezer for up to a month. To thaw, simply transfer a slice (or the whole cake) to the refrigerator overnight.
Now is the time to banish any lingering fears or hesitation about making cheesecake from scratch! With these detailed tips and our incredible recipe, you are fully equipped to bake what we confidently believe is the best cheesecake recipe of all time. Get ready to impress yourself and everyone lucky enough to try a slice!
More Delicious Cheesecake Recipes to Explore:
- Lime Cheesecake with Triple Berry Sauce
- Lemon Curd Cheesecake Tart
- New York Cheesecake
- Mini Strawberry Cheesecakes
- No Bake Mini Cheesecakes with Raspberry Sauce
- Easy Baked Cheesecake with Fresh Cherry Sauce
- Mini Twix Caramel Cheesecakes
- Mini Dutch Apple Cheesecakes
- No Bake Caramel Cheesecake Bars
- Swirled Raspberry Lemon Cheesecake Bars
Best Cheesecake Recipe
Pin
Ingredients
Crust
- 1 Graham Cracker Crust
Cheesecake Filling
- 5 Blocks Cream Cheese, softened, 40oz
- 1 1/2 Cups Sugar
- 1/8 teaspoon Salt
- 2 teaspoons Vanilla
- 1/2 teaspoons Lemon Extract
- 5 Large Eggs, plus 3 egg yolks, large, room temperature
- 2 Tablespoons Sour Cream
- 1/3 Cup Heavy Cream, *see note
Instructions
-
Preheat the oven to 350 degrees F.
-
Spray a 9” springform pan with nonstick spray all along the inside.
-
Wrap foil around the outside of the pan all along the bottom and up the sides of the pan with tinfoil a couple of times to protect it from the water bath.
-
Set pan aside.
-
In a large bowl, combine the crust ingredients and press firmly into the bottom and bake for 8 minutes. Cool while you prepare the filling.1 Graham Cracker Crust
For the Filling
-
In a standing mixer fitted with a whisk attachment, or a large bowl with a hand mixer, beat the cream cheese until completely smooth, scraping down the sides of the bowl as needed.5 Blocks Cream Cheese
-
Add in the sugar, salt, vanilla and lemon extract and beat again until smooth.1 1/2 Cups Sugar, 1/8 teaspoon Salt, 2 teaspoons Vanilla, 1/2 teaspoons Lemon Extract
-
One at a time, add each egg and yolk, beating in between each addition.5 Large Eggs
-
Switch to a spoon or rubber spatula and stir in the sour cream and heavy cream.2 Tablespoons Sour Cream, 1/3 Cup Heavy Cream
-
Pour over the crust and smooth the top out.
-
Place the cheesecake in a large cake pan or roasting pan. Fill the pan with 2” of hot water to act as a water bath.
-
Gently carry the cheesecake to the oven and bake for 1 hour.
-
Turn the oven off and leave the cheesecake alone for 35 minutes. Run a hot or greased knife around the edge and shut the door for another 2-4 hours.
-
Remove the cheesecake from the oven.
-
Allow to cool on a cooling rack, thus encouraging air to circulate around the cheesecake until it has cooled completely.
-
Cover with saran wrap and chill for 8-10 hours before serving.
Recipe Notes
Cheesecake will keep for 5 days in the refrigerator.
Nutrition
Calories: 335kcal,
Carbohydrates: 52g,
Protein: 5g,
Fat: 12g,
Saturated Fat: 5g,
Polyunsaturated Fat: 1g,
Monounsaturated Fat: 6g,
Trans Fat: 1g,
Cholesterol: 116mg,
Sodium: 182mg,
Potassium: 78mg,
Fiber: 1g,
Sugar: 42g,
Vitamin A: 322IU,
Vitamin C: 1mg,
Calcium: 32mg,
Iron: 1mg
Nutrition information is automatically calculated, so should only be used as an approximation.
REMEMBER TO SUBSCRIBE TO our FREE Oh Sweet Basil NEWSLETTER AND RECEIVE EASY RECIPES DELIVERED INTO YOUR INBOX EVERY DAY!
When you try a recipe, please use the hashtag #ohsweetbasil on INSTAGRAM for a chance to be featured in our stories! FOLLOW OH, SWEET BASIL ON FACEBOOK | INSTAGRAM | PINTEREST | TWITTER FOR ALL OF OUR LATEST CONTENT, RECIPES AND STORIES.