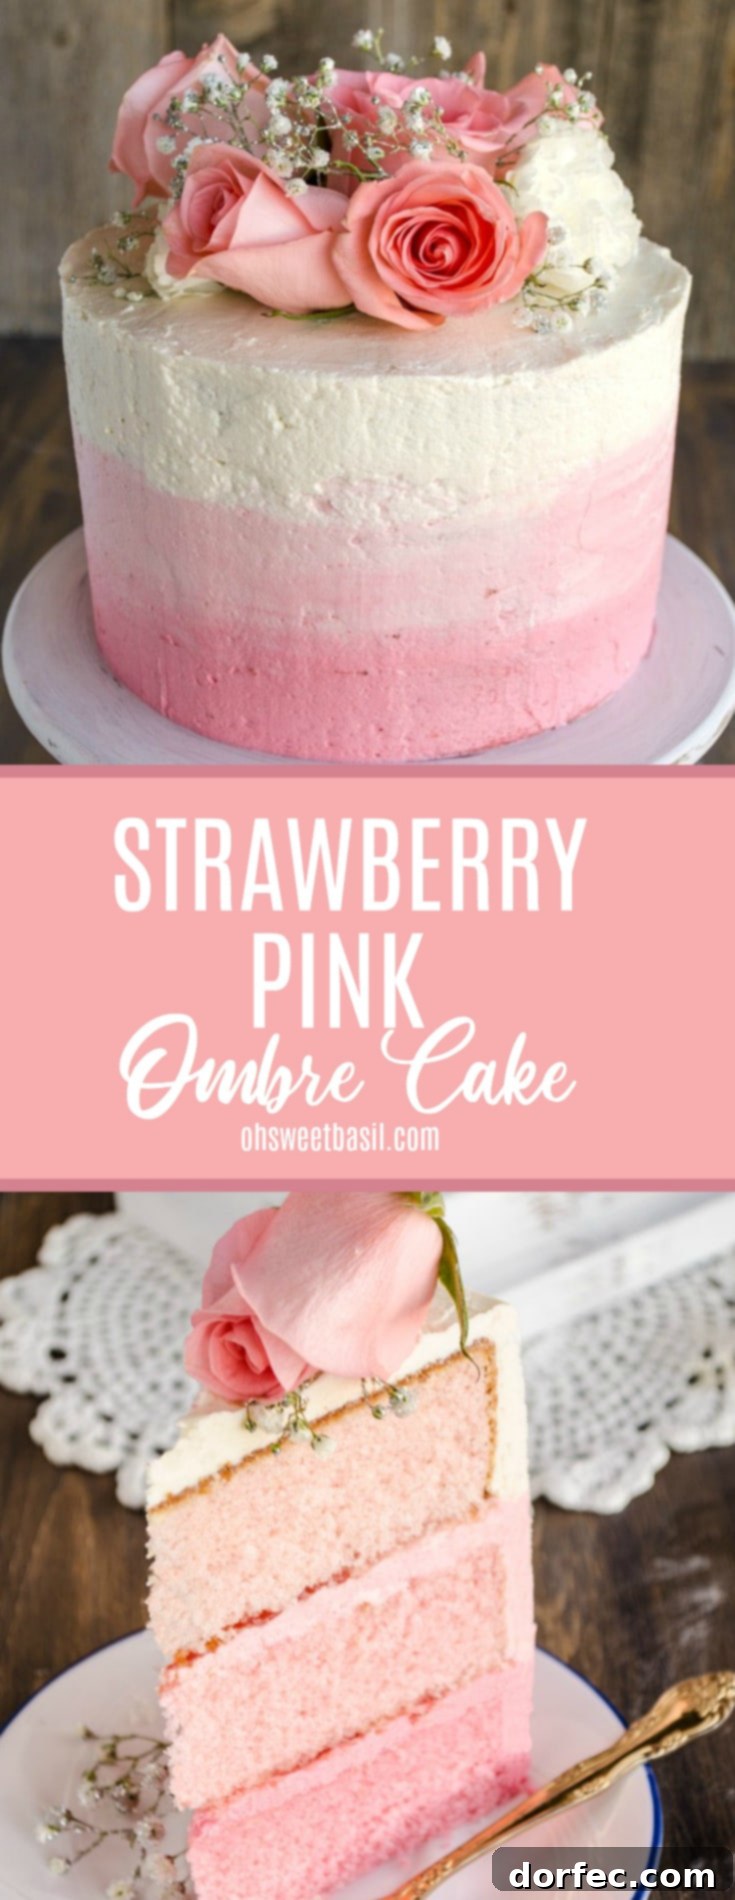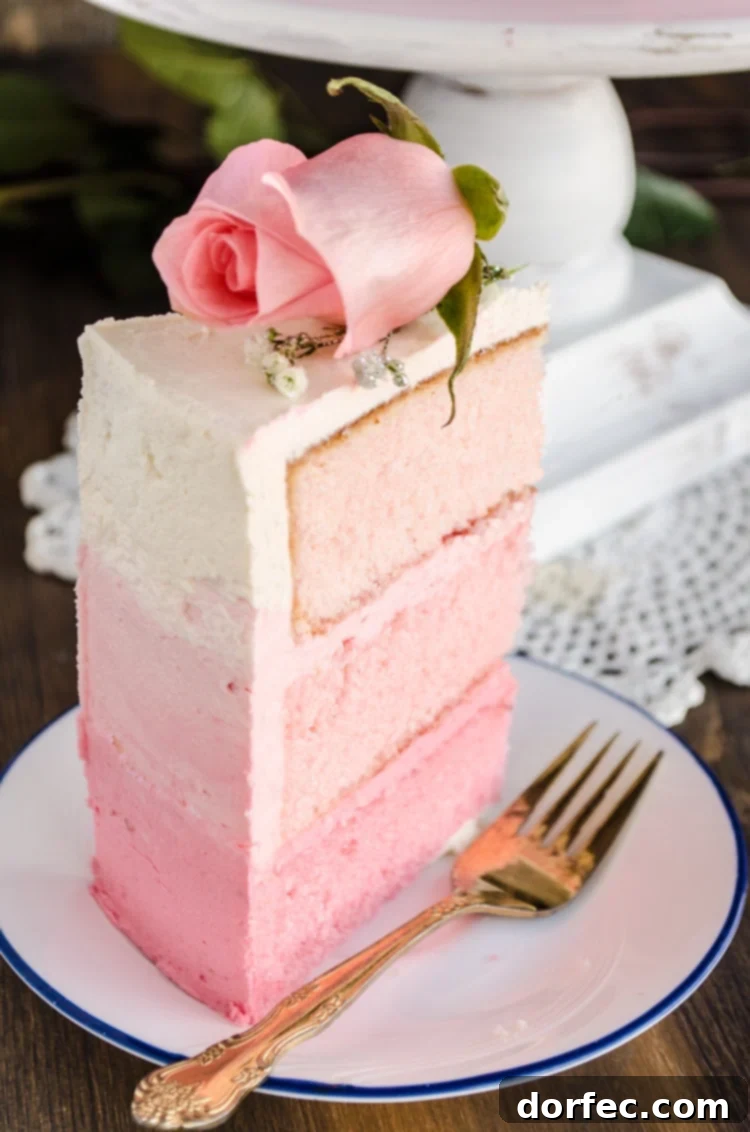
Unveiling the most captivating Ombre Strawberry Cake Recipe, a true showstopper destined to be the centerpiece of any special celebration. From heartfelt Mother’s Day gatherings to joyous baby showers or honoring cancer survivors, this stunning pink ombre cake is an effortlessly elegant dessert that anyone can create and cherish.
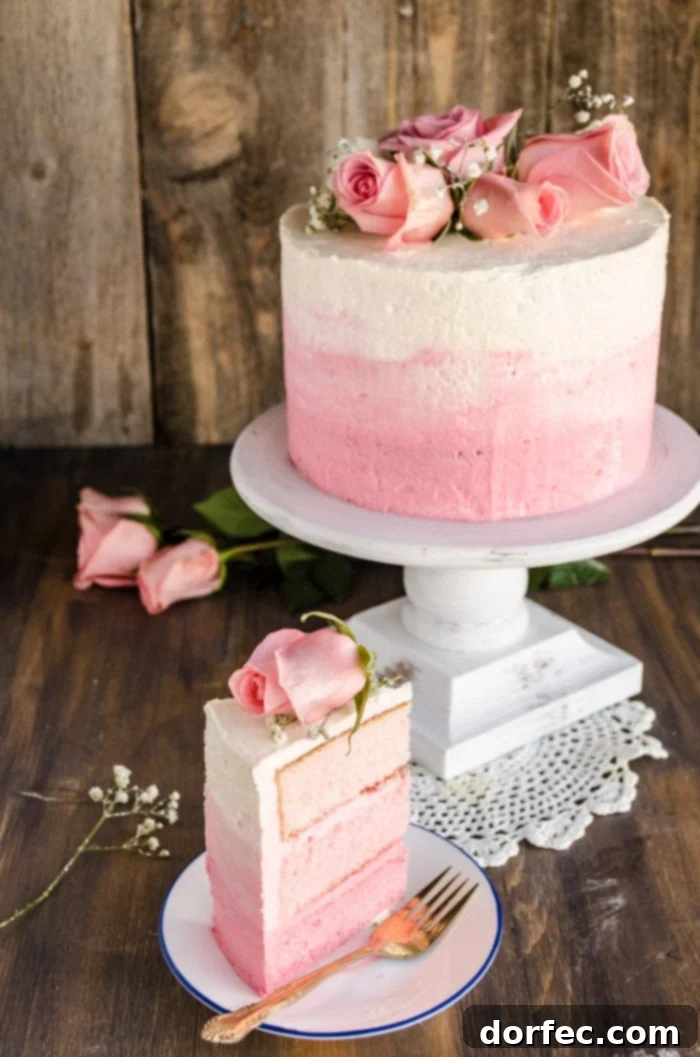
As Mother’s Day approaches, what better way to express your love and gratitude to the extraordinary women in your life than with a breathtaking Ombre Strawberry Cake? This isn’t just a dessert; it’s a vibrant expression of affection, a culinary masterpiece that promises to delight both the eyes and the palate. Its beautiful gradient of pink hues makes it an ideal choice for a variety of festive occasions, truly embodying the spirit of celebration.
This magnificent pink ombre cake commands attention as a gorgeous centerpiece, yet its creation is surprisingly straightforward. Forget about needing advanced decorating techniques or a pastry chef’s certification – this recipe is designed for bakers of all skill levels to achieve stunning results. Whether you’re planning for Mother’s Day, a charming baby shower, spreading awareness for breast cancer, or setting a romantic tone for Valentine’s Day, this delectable strawberry cake recipe is guaranteed to leave a lasting impression. Prepare to embark on a delightful baking adventure that culminates in a truly unforgettable dessert!
Essential Ingredients for Your Ombre Strawberry Cake
Crafting this exquisite Ombre Mother’s Day Strawberry Cake Recipe requires a selection of fresh, high-quality ingredients to ensure both its stunning appearance and its irresistible flavor. Here’s a comprehensive list of what you’ll need to create each delicious component of this beautiful dessert:
For the Cake Layers:
- All-Purpose Flour: The foundation for light and tender cake layers.
- Cake Flour: Essential for achieving a delicate, fine crumb, differentiating it from regular flour.
- Granulated Sugar: Sweetens the cake and contributes to its moist texture.
- Baking Powder: The primary leavening agent, ensuring a perfect rise.
- Salt: Balances the sweetness and enhances all the flavors.
- Butter, Melted: Adds richness and moisture to the cake batter.
- Milk, Room Temperature: Ensures smooth incorporation and a tender crumb.
- Egg Whites: Contribute to the cake’s light color and fluffy texture.
- Strawberry Extract: Infuses each layer with a vibrant, authentic strawberry flavor.
- Vanilla Extract: A classic flavor enhancer that complements the strawberry beautifully.
For the Luscious Frosting and Filling:
- Unsalted Butter, Softened but Still Cool: The base for a rich and creamy buttercream. Using unsalted butter allows you to control the overall saltiness.
- Red Liquid Food Coloring or Wilton Paste: Crucial for achieving the stunning pink ombre effect in both the cake and the frosting. Wilton paste offers more concentrated color.
- Strawberry Jam or Preserves: Provides a burst of fruity goodness and a delightful textural contrast as a filling between the cake layers.
The Secret to Perfectly Baked Cakes: Magic Cake Release
Bid farewell to the frustration of cakes sticking to the pan! Our simple yet highly effective Magic Cake Release method guarantees your cake layers will slide out effortlessly and perfectly every single time. This technique is especially vital when working with delicate cake layers like those in our ombre strawberry cake, ensuring pristine edges and a beautiful presentation.
How to Master the Magic Cake Release:
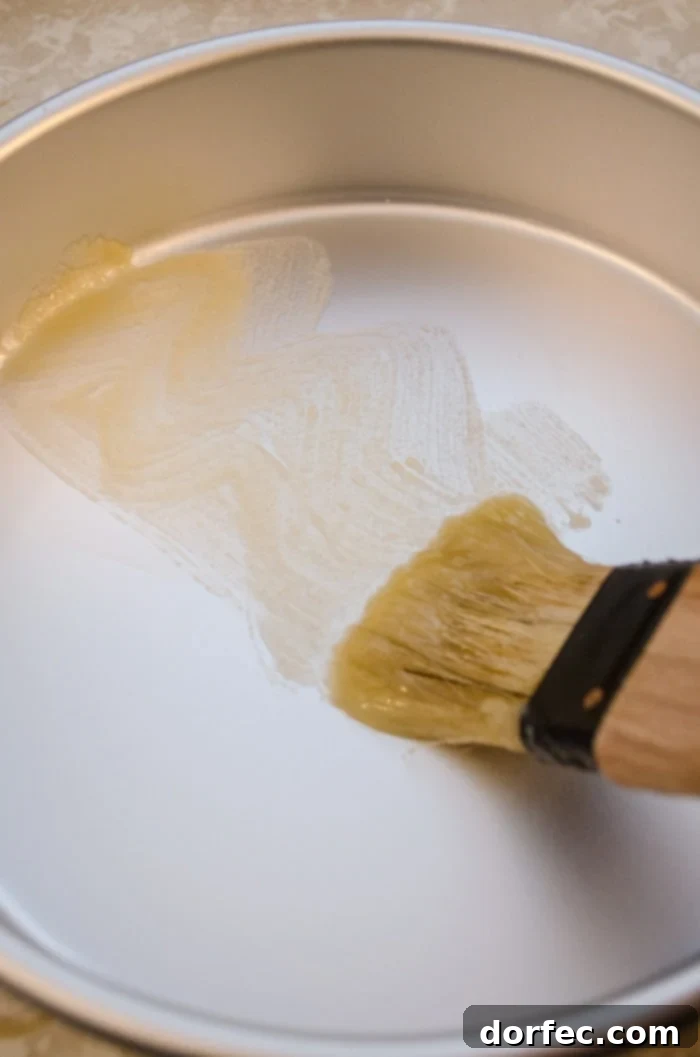
- Create the Paste: In a small bowl, combine equal parts melted butter and all-purpose flour. For chocolate cakes, you can substitute cocoa powder for the flour to maintain the rich color and flavor. Typically, 2-3 tablespoons of each ingredient will suffice for a standard 8-inch round cake pan.
- Apply Evenly: Using a pastry brush, generously apply this paste to every nook and cranny of your baking pan. Make sure to cover the bottom, sides, and all edges thoroughly, leaving no spot uncoated. This creates an impermeable barrier that prevents sticking.
- Bake with Confidence: Once your pans are prepped, pour in your carefully prepared cake batter, bake as directed, and revel in the joy of a flawless release. This method works wonders not only for round cake pans but is also a lifesaver for intricate bundt cakes!
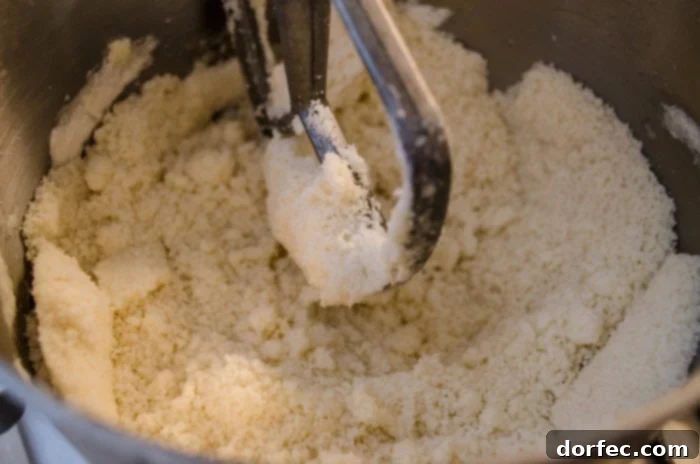
Now, let’s put this essential technique into practice. With your three round cake pans perfectly prepped and your oven preheating to the ideal temperature, it’s time to whip up a silky-smooth white cake batter. To achieve its signature light and velvety texture, we’ll combine the liquid ingredients and dry ingredients in separate bowls. An unorthodox but crucial step involves beating softened butter into the dry mix until it takes on a sandy consistency. This scientific approach helps create a truly tender crumb that will make your ombre strawberry cake incredibly moist and delightful.
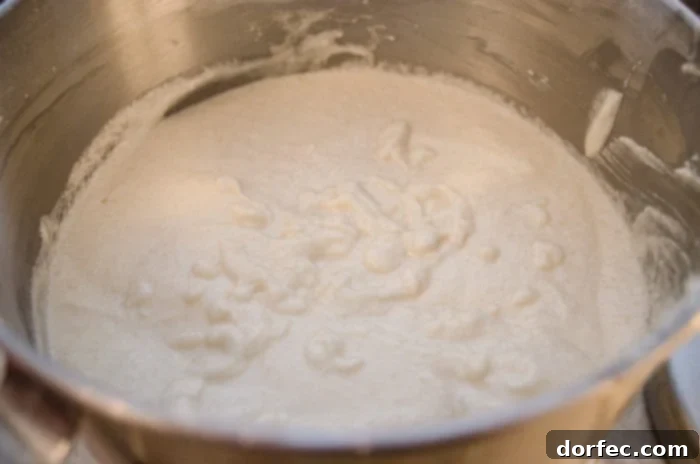
Finally, incorporate the remaining liquid ingredients, including the essential strawberry and vanilla extracts, to complete your aromatic cake batter. The aroma alone will have you eagerly anticipating the delicious outcome!
Mastering the Ombre Effect for Your Strawberry Cake
The enchanting ombre effect is what truly makes this Strawberry Cake Recipe a visually stunning and unforgettable dessert. Achieving this beautiful gradient of color is simpler than you might imagine, but it does require a touch of precision and careful observation. Remember, when it comes to food coloring, a little goes a long way! Exercise caution as you add color; too much, and your hues may become darker than desired. It’s also important to note that liquid food coloring and concentrated Wilton gels or pastes are not interchangeable. Gels are significantly more potent, so use them very sparingly to avoid over-coloring.
Step-by-Step Guide to Ombre Layers:
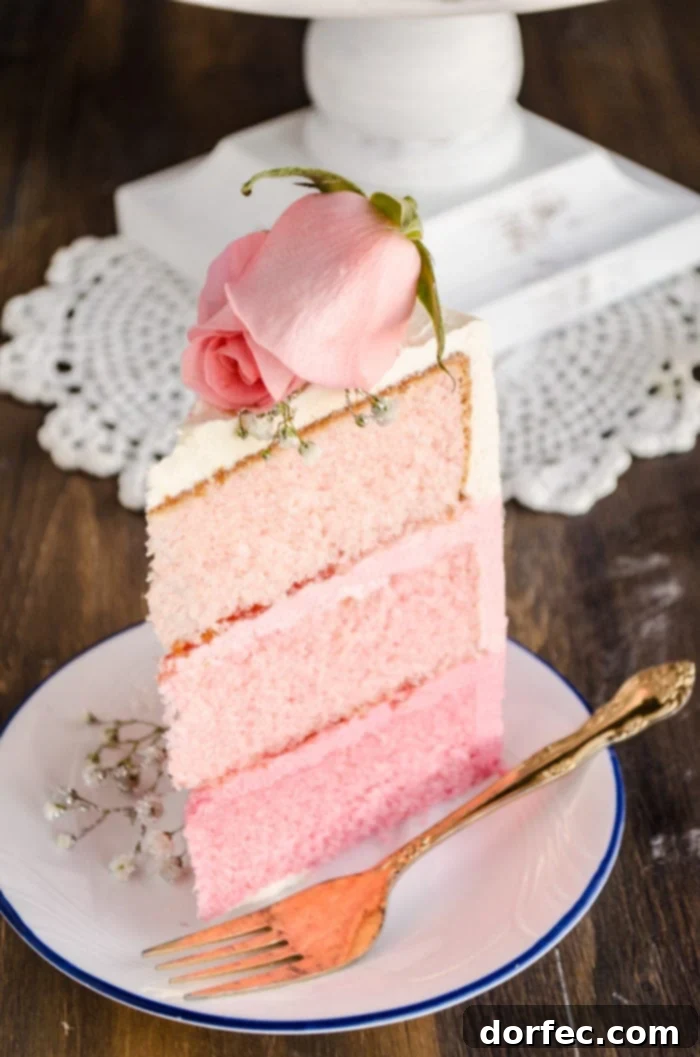
- Even Batter Division: After your complete cake batter is prepared and perfectly smooth, carefully divide it as evenly as possible into three separate mixing bowls. Accuracy here ensures a balanced color gradient in your final cake.
- Precise Layer Coloring:
- Darkest Layer (Bowl 1): Add 2 teaspoons of liquid red food coloring. Whisk gently but thoroughly until the color is fully blended, ensuring no streaks remain. This will be your deepest pink hue.
- Medium Layer (Bowl 2): Introduce 1 teaspoon of liquid red food coloring. Mix well until a consistent, medium pink shade is achieved. Compare it to the darkest layer to ensure a noticeable difference.
- Lightest Layer (Bowl 3): For the palest shade, add just 1/4 to 1/2 teaspoon of liquid red food coloring. Gradually adjust the intensity to your preference by adding a single drop or two at a time. The key is to ensure each shade is distinct, creating a beautiful transition.
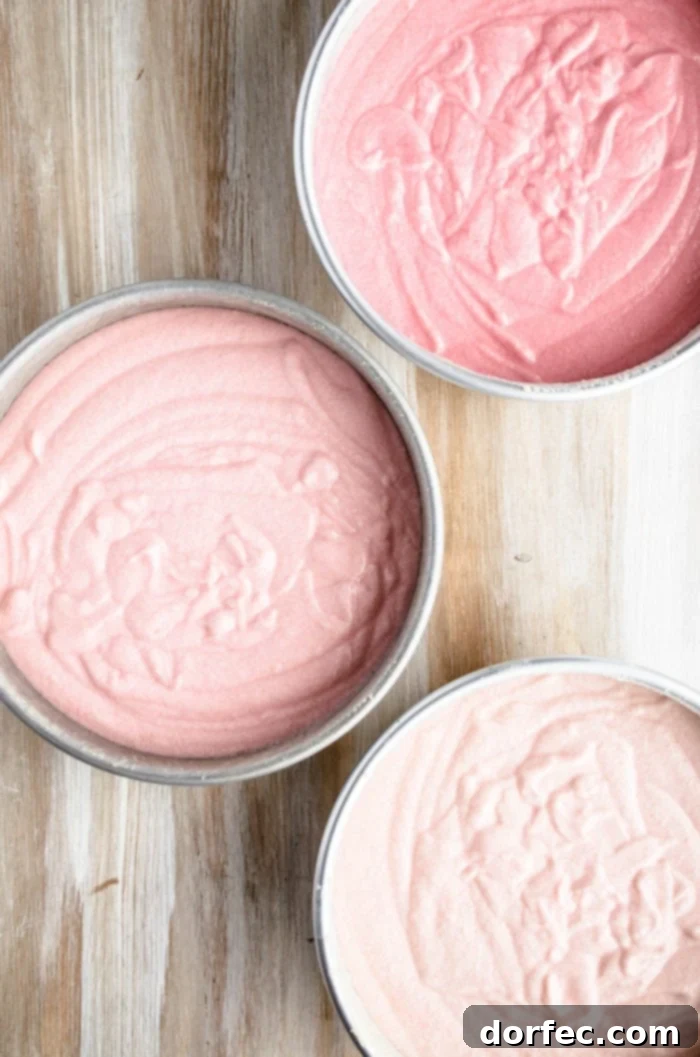
- Baking the Ombre Layers: Pour each bowl of vibrantly colored batter into your prepared cake pans. Gently tap the pans on your counter a few times to release any trapped air bubbles and to help even out the batter’s surface. Bake the cakes in a preheated oven at 350°F (175°C) for approximately 20–25 minutes. To check for doneness, insert a toothpick into the center of each cake; it should come out clean.
- Proper Cake Cooling: Once baked, allow your cakes to cool in their pans on wire racks for about 5 minutes. This brief resting period helps the cakes firm up. Then, carefully invert them onto the wire racks to cool completely. This crucial step can take at least an hour, or ideally an hour and a half, to ensure the cakes are fully cooled and easy to handle. If you’re short on time, you can accelerate the cooling process by placing the hot cakes (still on the wire racks) in the fridge or freezer for a shorter duration.
Optimizing Oven Rack Placement for Your Strawberry Cake Layers
For the absolute best results and most even baking of your Ombre Strawberry Cake layers, we recommend baking each cake layer individually on the center oven rack. This ensures consistent heat distribution and prevents uneven browning.
However, if your oven capacity or time constraints make individual baking impractical, you can place two layers on the upper oven rack and one layer on the lower rack. When using this method, it’s imperative to keep a very close eye on all the layers. Oven temperatures can vary, and racks can have different hot spots, so some cakes may bake faster than others. Test each layer with a toothpick independently to determine its doneness. As soon as a layer finishes baking (when a toothpick inserted in its center comes out clean), remove it promptly from the oven to prevent over-baking, and allow the remaining layers to continue baking until they are also perfectly done.
Crafting the Perfect Ombre Frosting
While your beautifully colored cake layers are cooling, it’s the perfect time to prepare your luscious frosting. The choice of frosting is entirely yours; select your favorite! I personally adore using a rich Italian Meringue Buttercream (and I always double the recipe to ensure there’s plenty for this three-layer cake). However, if you’re looking for a simpler approach, a good quality store-bought white frosting works wonderfully, especially since you’ll be customizing its color. The most important thing is to ensure you have an ample amount – when in doubt, it’s always better to prepare double the quantity needed!
Coloring Your Ombre Frosting:
- Divide the Frosting: Once your chosen frosting is prepared to a smooth, spreadable consistency, divide it evenly into three separate bowls. This parallels the division of your cake batter, ensuring a consistent ombre theme.
- Tinting for the Gradient:
- Darkest Shade (Bowl 1): Tint this portion with 2 teaspoons of red liquid food coloring for the deepest pink. Mix until the color is uniform and vibrant.
- Medium Shade (Bowl 2): Add 1 teaspoon of red food coloring to achieve a balanced, medium pink hue. Blend thoroughly.
- Lightest Shade (Bowl 3): For the softest pink, incorporate just 1/4 to 1/2 teaspoon of red food coloring. Adjust the amount as necessary, adding a tiny drop at a time, to create a smooth and gradual transition between the three shades.
Assembling and Frosting Your Stunning Strawberry Ombre Cake
Bringing together your perfectly baked layers and beautifully colored frosting is where the magic truly happens. This step-by-step guide will ensure a professional-looking finish for your Ombre Strawberry Cake.
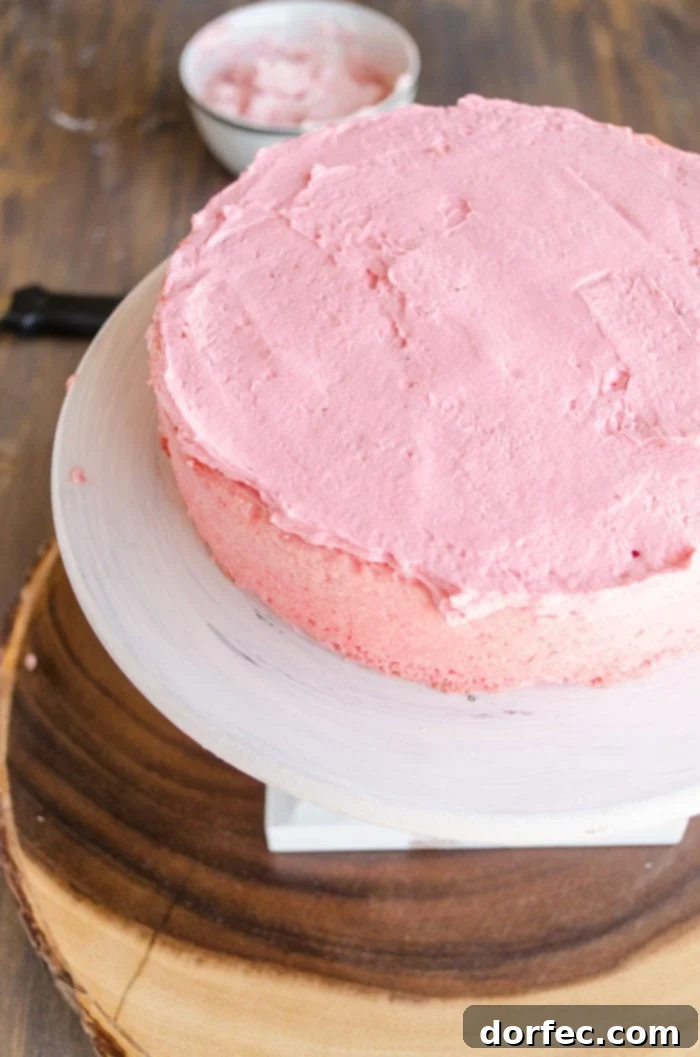
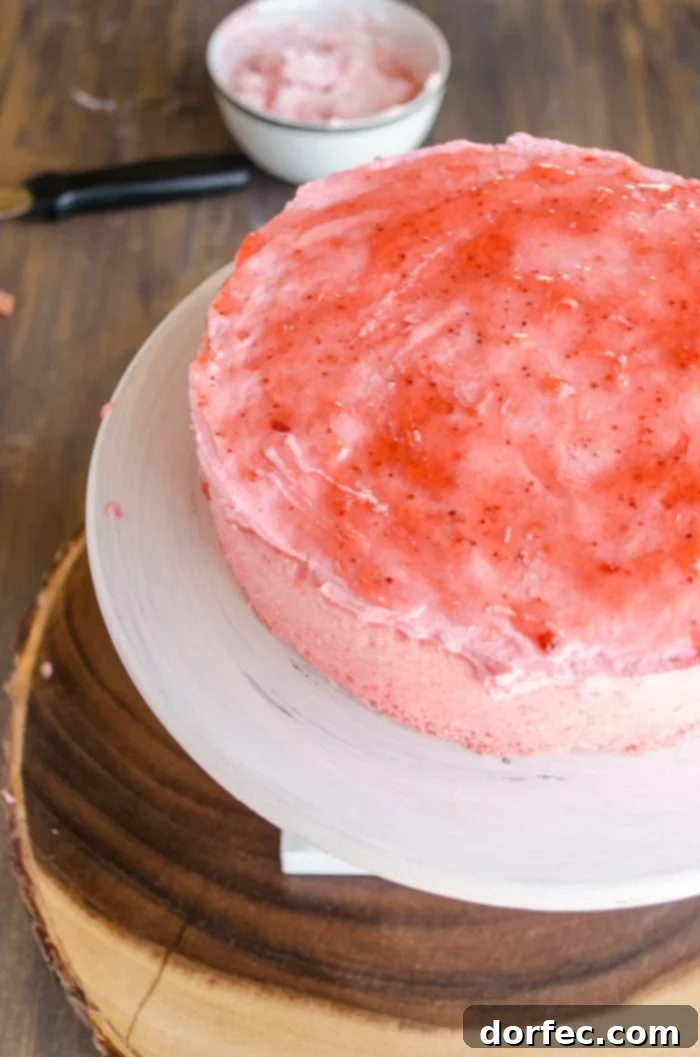
- The Essential Crumb Coat: Begin by placing a small spoonful of your darkest frosting onto your serving platter or cake plate. This acts as a stabilizer, preventing the cake from sliding. Carefully place the darkest of your three cooled cake layers on top of this frosting dab. Evenly spread a generous layer of your darkest pink frosting on top, about 1/4 to 1/2 inch thick. Now, add a delightful layer of strawberry jam over the frosting, spreading it almost to the edges. Gently place the next darkest cake layer on top. Repeat this process for the remaining layers, ending with the lightest cake layer. Once all layers are stacked, apply a very thin, even layer of the lightest frosting over the entire cake – this is your “crumb coat.” Its purpose is to trap any loose crumbs, ensuring a smooth, pristine finish for your final frosting layers. Place the crumb-coated cake in the freezer for 15–20 minutes to allow this layer to set firmly.
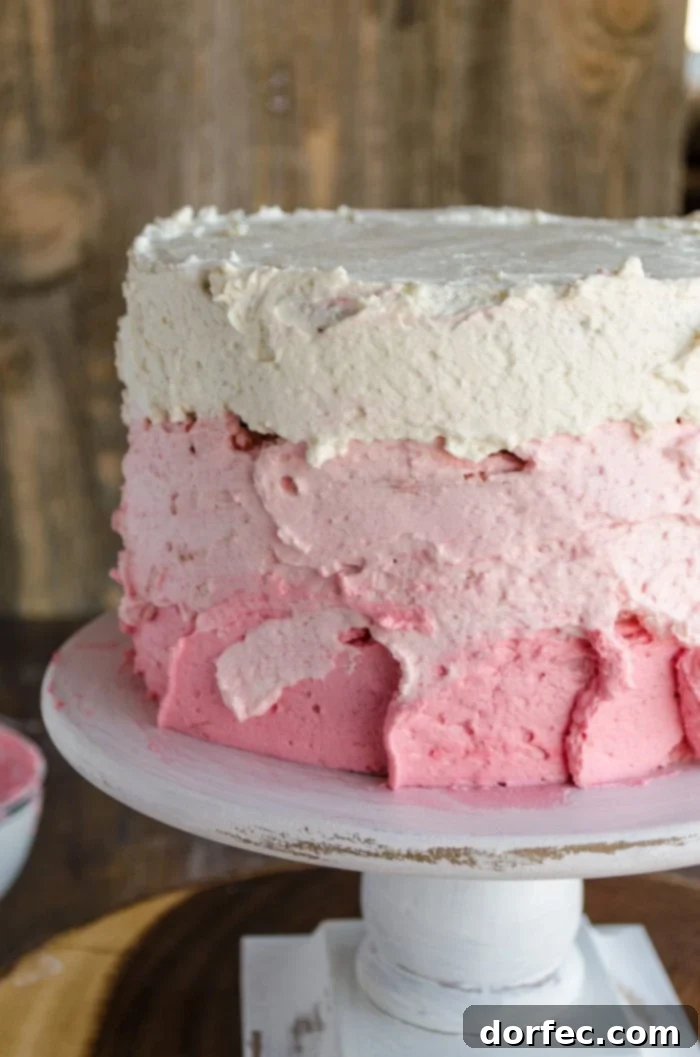
- Layering the Ombre Frosting: Once the crumb coat is firm, remove your cake from the freezer. Now, it’s time to apply the ombre effect to the outside. Spread the darkest pink frosting generously around the bottom third of the cake. Next, apply the medium pink frosting to the middle third, carefully blending its top edge into the darker layer below. Finally, use the lightest pink frosting for the top third of the cake’s sides and generously cover the entire top surface, blending its bottom edge into the middle layer for a seamless gradient. Don’t be shy with the frosting here – it adds to the visual appeal and, more importantly, tastes incredibly delicious!
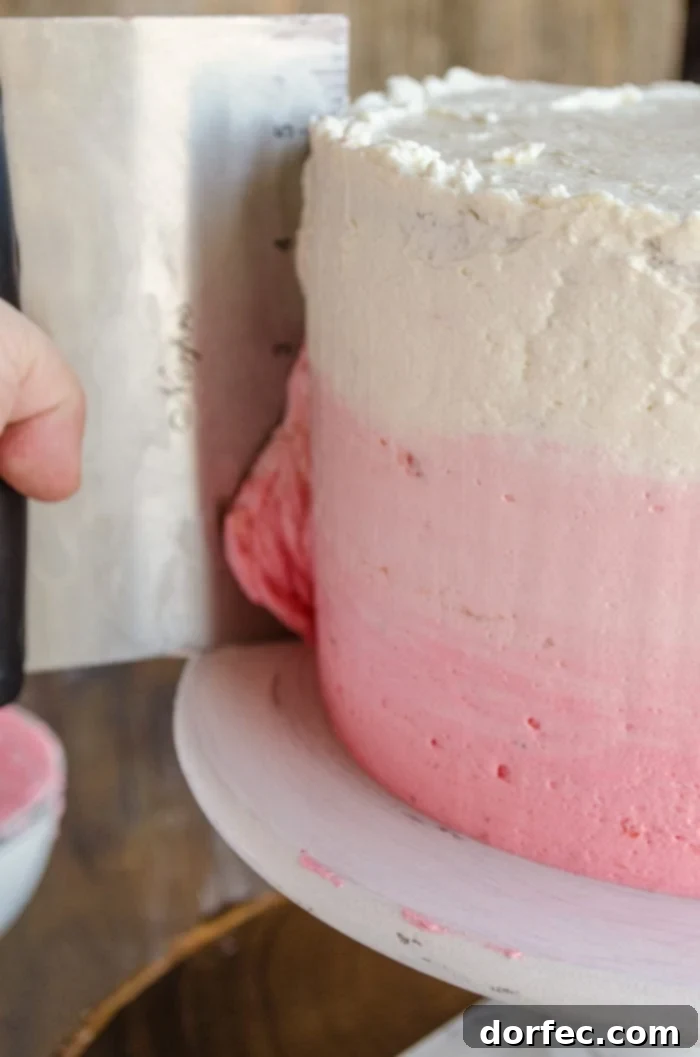
- Achieving a Smooth Finish: With all that glorious frosting applied, it’s time to smooth out the sides to reveal the stunning ombre effect. Grab a tool with a long, flat edge – options include a ruler, a bench scraper, or a large offset spatula. You don’t need to be a professional decorator; with a lazy Susan or rotating cake stand and a bench scraper (my personal go-to tools!), you can achieve a wonderfully smooth finish. Slowly spin the cake while holding your chosen tool vertically and steadily against the sides, gently scraping and smoothing the frosting. Watch as the colors beautifully meld into a perfect, Instagram-worthy gradient!
Does the Type of Cake Pan Truly Matter for Baking Success?
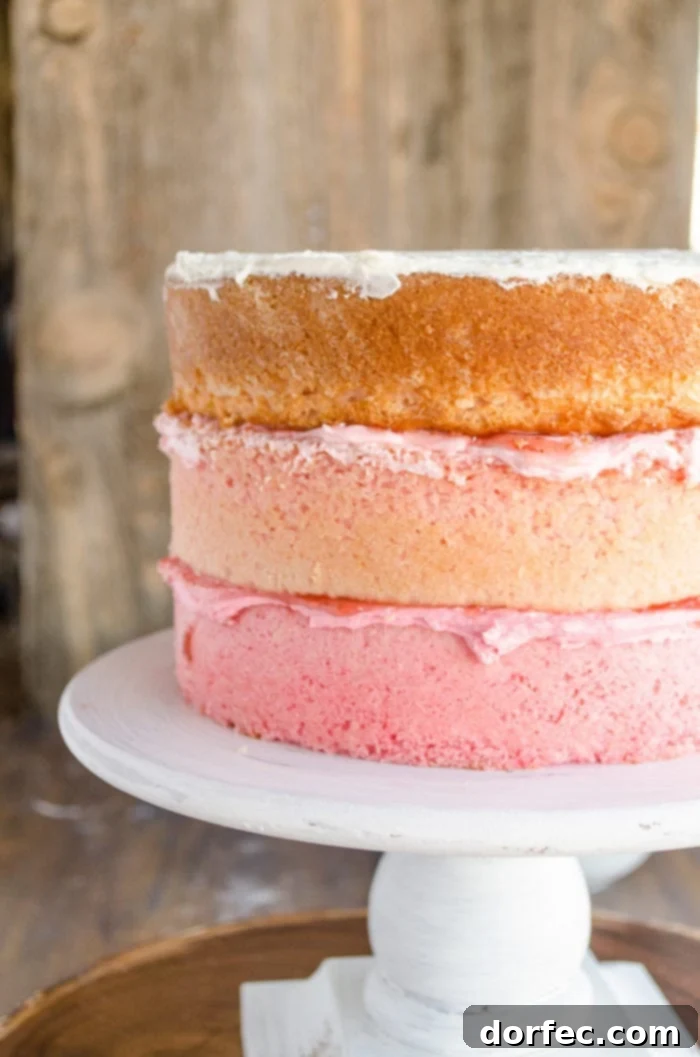
Indeed, the type and condition of your cake pans can significantly impact your baking results, as I discovered firsthand with this very recipe! You might notice that my topmost cake layer in the accompanying photos is slightly more browned than the others. This noticeable difference was a direct consequence of the pans I used.
The bottom two cake layers were baked in brand-new, high-quality Wilton pans, which typically offer excellent, even heat distribution. In contrast, the top layer was made in a very old, well-loved pan I had borrowed. Despite all three layers baking for the same duration and finishing simultaneously, the older pan clearly led to a different browning pattern. Older, darker, or thinner pans can absorb and conduct heat differently, often resulting in quicker browning and sometimes a drier texture compared to lighter, thicker, or newer pans. This highlights the importance of using consistent bakeware for uniform results, especially when aiming for a picture-perfect multi-layered cake like our Ombre Strawberry Cake.
The Grand Finale: Finishing Touches and Elegant Presentation
Once your exquisite Ombre Strawberry Cake is beautifully frosted and smoothed, pop it into the refrigerator. Refrigerating your cake is a crucial step that not only helps to set the frosting but also keeps the cake fresh and prevents it from drying out, ensuring every slice is as delicious as the first. For optimal flavor and texture, allow the cake to come to a slightly cooler room temperature for about 15-20 minutes before serving.
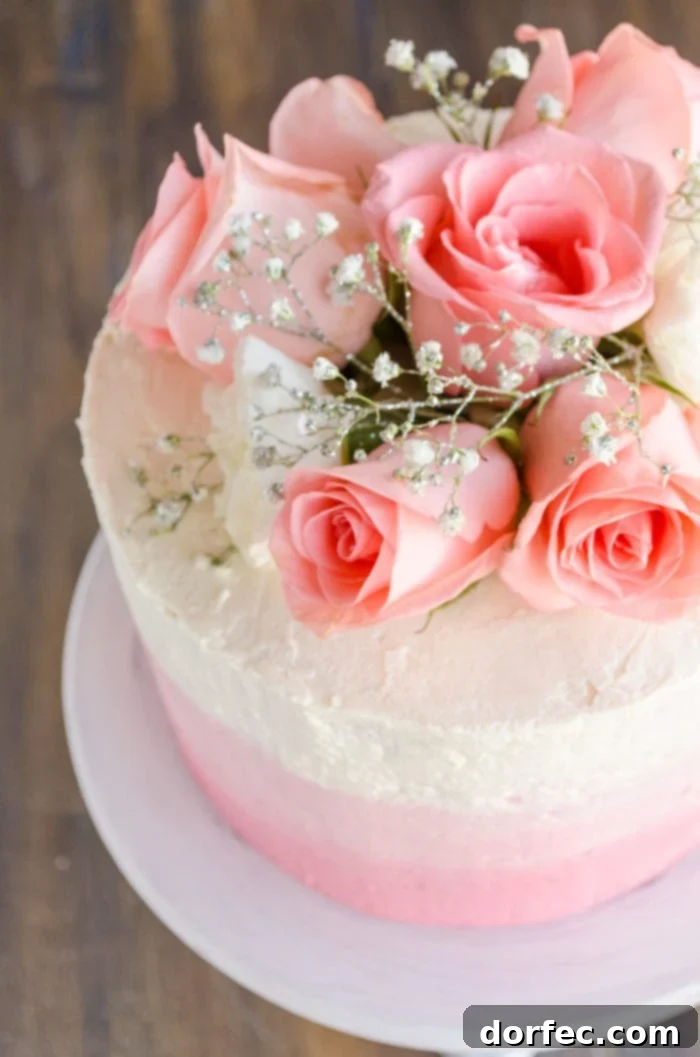
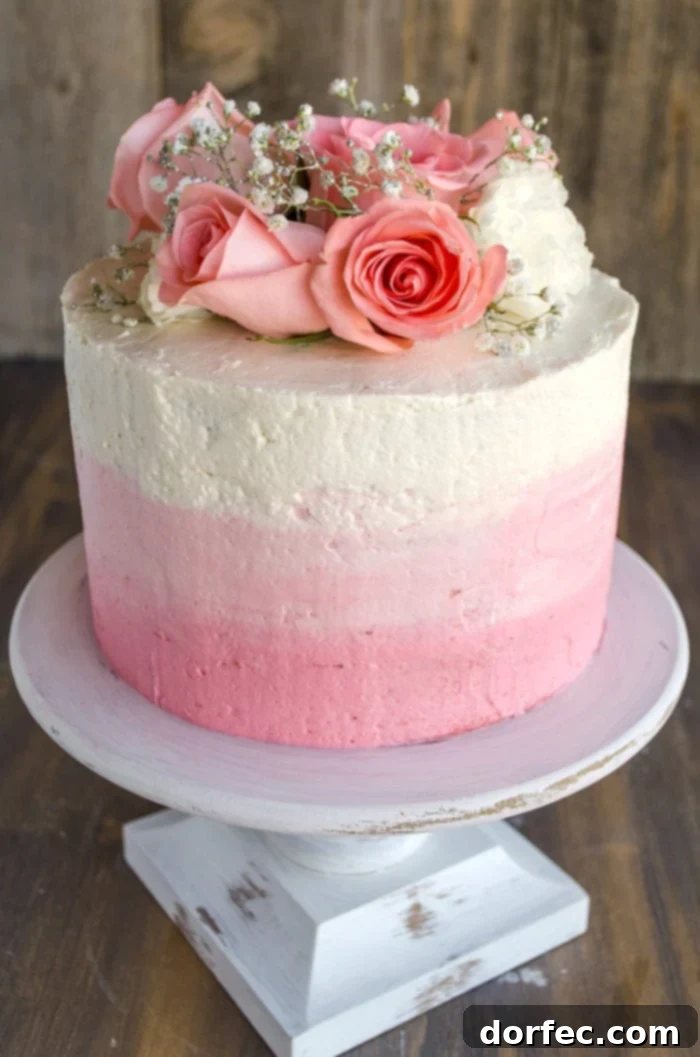
Just before it’s time to showcase your magnificent creation, add some truly elegant finishing touches. Adorn the top of your cake with freshly cut roses, delicate carnations, and airy sprigs of baby’s breath. I was incredibly lucky to find these absolutely gorgeous flowers – including some sparkly baby’s breath – at my local grocery store, and they elevated the cake’s appearance to a whole new level!
When you’re ready to serve your stunning Ombre Mother’s Day Strawberry Cake Recipe, simply remove the decorative flowers as needed before slicing. You can even place a small sprig of baby’s breath or a single rose petal on each serving plate as a lovely garnish (though, of course, real flowers are just for show and not for eating!). Or, consider a heartwarming gesture: hand out the individual flowers to any little girls present; it’s a delightful way to make them feel extra special and add an unforgettable memory to your celebration!
Can I Make This Strawberry Cake Recipe Dye-Free for a Natural Touch?
Absolutely! If you prefer to avoid artificial food dyes or simply wish to embrace a more natural approach, you can easily achieve beautiful shades of pink for your perfect Mother’s Day Strawberry Cake. Nature provides wonderful alternatives that not only impart vibrant color but can also enhance the nutritional value of your cake and frosting.
Beet juice, beet powder, and freeze-dried strawberries are fantastic natural options. To use beet juice, simply add a few drops to your frosting or cake batter until you reach your desired pink hue. For a more concentrated color without adding excess liquid, a pinch of beet powder works wonders. Freeze-dried strawberries are another excellent choice: blend them into a fine powder and mix it into your batter or frosting. This method offers the dual benefit of adding a lovely pink tint and infusing a delicate, authentic fruity flavor that complements the strawberry extract beautifully. Experiment with quantities to achieve your ideal ombre gradient, knowing you’re creating a delicious and naturally colored masterpiece.
Other Irresistible Cake Recipes You Will Love:
If you’ve enjoyed creating this beautiful Ombre Strawberry Cake, you might be looking for more delightful cake recipes to share with your loved ones. Explore these other fantastic options from our kitchen:
- Pink Mother’s Day Cake
- The Most Perfect Moist Chocolate Cake
- Vanilla Cake with Fresh Strawberry Frosting
- No-Bake Mini Cheesecakes with Raspberry Sauce
- Chocolate Cherry Cake
- No Bake Mini Chocolate Cheesecakes
- Cookies and Cream Red Velvet Molten Lava Cakes
Ombre Strawberry Cake Recipe
Ingredients
- 3 Tablespoons All-Purpose Flour
- 3 Tablespoons Butter, melted
- 1 ½ Cup Milk, room temperature
- 9 Egg Whites, room temperature
- 5 teaspoons Strawberry Extract
- 2 teaspoons Vanilla Extract
- 3 ⅓ Cups Cake Flour
- 2 ¼ Cups Granulated Sugar
- 6 teaspoons Baking Powder
- 1 ½ teaspoons Salt
- 18 Tablespoons Unsalted Butter, softened but still cool (for frosting)
- 1-1 ½ Tablespoons Red Liquid Food Coloring, much less if using Wilton paste
- 1/2 Cup Strawberry Jam or Preserves
Instructions
Making the Cake Layers
-
Prepare three 8-inch round cake pans using the “Magic Cake Release” method. Stir 3 tablespoons of all-purpose flour and 3 tablespoons of melted butter together to form a smooth paste. Brush this paste generously over the entire inside surface of each cake pan, reaching all the way to the rim. Adjust your oven racks: position one rack in the middle if all three pans fit comfortably. If not, use both upper and lower-middle positions. Preheat your oven to 350°F (175°C).3 Tablespoons All-Purpose Flour, 3 Tablespoons Butter (melted, for pan prep)
-
In a separate mixing bowl, whisk together the room temperature milk, egg whites, strawberry extract, and vanilla extract until well combined. Set this liquid mixture aside.1 ½ Cup Milk, 9 Egg Whites, 5 teaspoons Strawberry Extract, 2 teaspoons Vanilla Extract
-
In a large mixing bowl (or the bowl of a stand mixer), combine the cake flour, granulated sugar, baking powder, and salt. Mix thoroughly. Add the softened but cool unsalted butter to this dry mixture. Beat at low speed until no white streaks of butter remain and the mixture resembles coarse, wet sand. This step is crucial for the cake’s unique tender texture.3 ⅓ Cups Cake Flour, 2 ¼ Cups Granulated Sugar, 6 teaspoons Baking Powder, 1 ½ teaspoons Salt, 18 Tablespoons Unsalted Butter (for cake batter)
-
Gradually beat in about 2 cups of the reserved milk/egg mixture into the flour-butter mixture for about one and a half minutes, scraping down the sides of the bowl as needed. Then, add the remaining liquid mixture and beat until it is just fully incorporated and smooth, typically about one minute longer. Be careful not to overmix.
-
Divide the finished cake batter as evenly as possible into your three separate mixing bowls. To create the ombre effect, stir 2 teaspoons of liquid red food coloring into the first bowl for the darkest pink. Add 1 teaspoon into the second bowl for a medium pink. Finally, incorporate 1/4 to 1/2 teaspoon into the third bowl for the lightest shade. Adjust the coloring to your liking by adding a few more drops if necessary, ensuring distinct color differences. Whisk each bowl thoroughly to ensure no streaks of color remain.1-1 ½ Tablespoons Red Liquid Food Coloring
-
Pour each bowl of colored batter into its respective prepared cake pan. Gently tap the pans on the counter a few times to release any air bubbles and to help even out the surface. Place the pans in the preheated oven, either on a single middle rack or distributed on upper and lower racks as determined earlier. Bake for approximately 20-25 minutes, or until a toothpick inserted into the center of each cake comes out clean.
-
Once baked, cool the cakes in their pans on a wire rack for about 5 minutes. Then, carefully invert them onto a cooling rack and allow them to cool completely for about an hour and a half. For faster cooling, you can place the cakes (still on the wire racks) in the fridge.
-
While the cake layers are cooling, prepare your desired frosting recipe. Once made, divide the frosting into three bowls and tint each bowl with red food coloring to create the same ombre gradient as your cake layers, adjusting as necessary for distinct shades of pink.
Cake Assembly and Frosting
-
To assemble, place a small spoonful of your darkest frosting onto your chosen serving platter or cake plate; this will act as a stabilizer for the cake. Carefully center the darkest of the three cooled cake layers on top of the frosting. Evenly spread a layer of the darkest pink frosting on top, about 1/4 to 1/2 inch thick, ensuring it reaches almost to the edges. Next, add a generous layer of strawberry jam or preserves over the frosting. Gently place the next darkest cake layer on top. Repeat this layering process with the medium cake layer, medium frosting, and another layer of strawberry jam, then top with the lightest cake layer. Once all layers are stacked, spread a very thin, even layer of the lightest frosting over the entire cake (sides and top) to create a “crumb coat.” This traps any loose crumbs, creating a smooth surface for your final frosting. Freeze the cake for 15-20 minutes to set the crumb coat.1/2 Cup Strawberry Jam or Preserves
-
Remove the crumb-coated cake from the freezer. Begin applying the darkest pink frosting to the bottom third of the cake’s sides, spreading it evenly. Next, apply the medium pink frosting to the middle third of the cake, gently blending its upper edge into the darker layer. Finally, apply the lightest pink frosting to the top third of the sides and generously cover the entire top surface of the cake, blending it into the middle layer for a smooth gradient. Using a clean ruler, bench scraper, or large offset spatula, smooth out the sides of the cake. Hold your scraper vertically against the cake and slowly spin the cake around, allowing the frosting colors to blend beautifully. This step is made easier with a lazy Susan or rotating cake stand, but it is not strictly necessary. Refrigerate the cake until you are ready to serve. Just before presenting your stunning Ombre Strawberry Cake to friends and family, adorn the top with freshly cut roses or other desired flowers.
Recipe Notes
This Ombre Strawberry Cake will keep fresh for 3-4 days when stored properly in the refrigerator.
Nutrition Information
Nutrition information is automatically calculated, so should only be used as an approximation.