
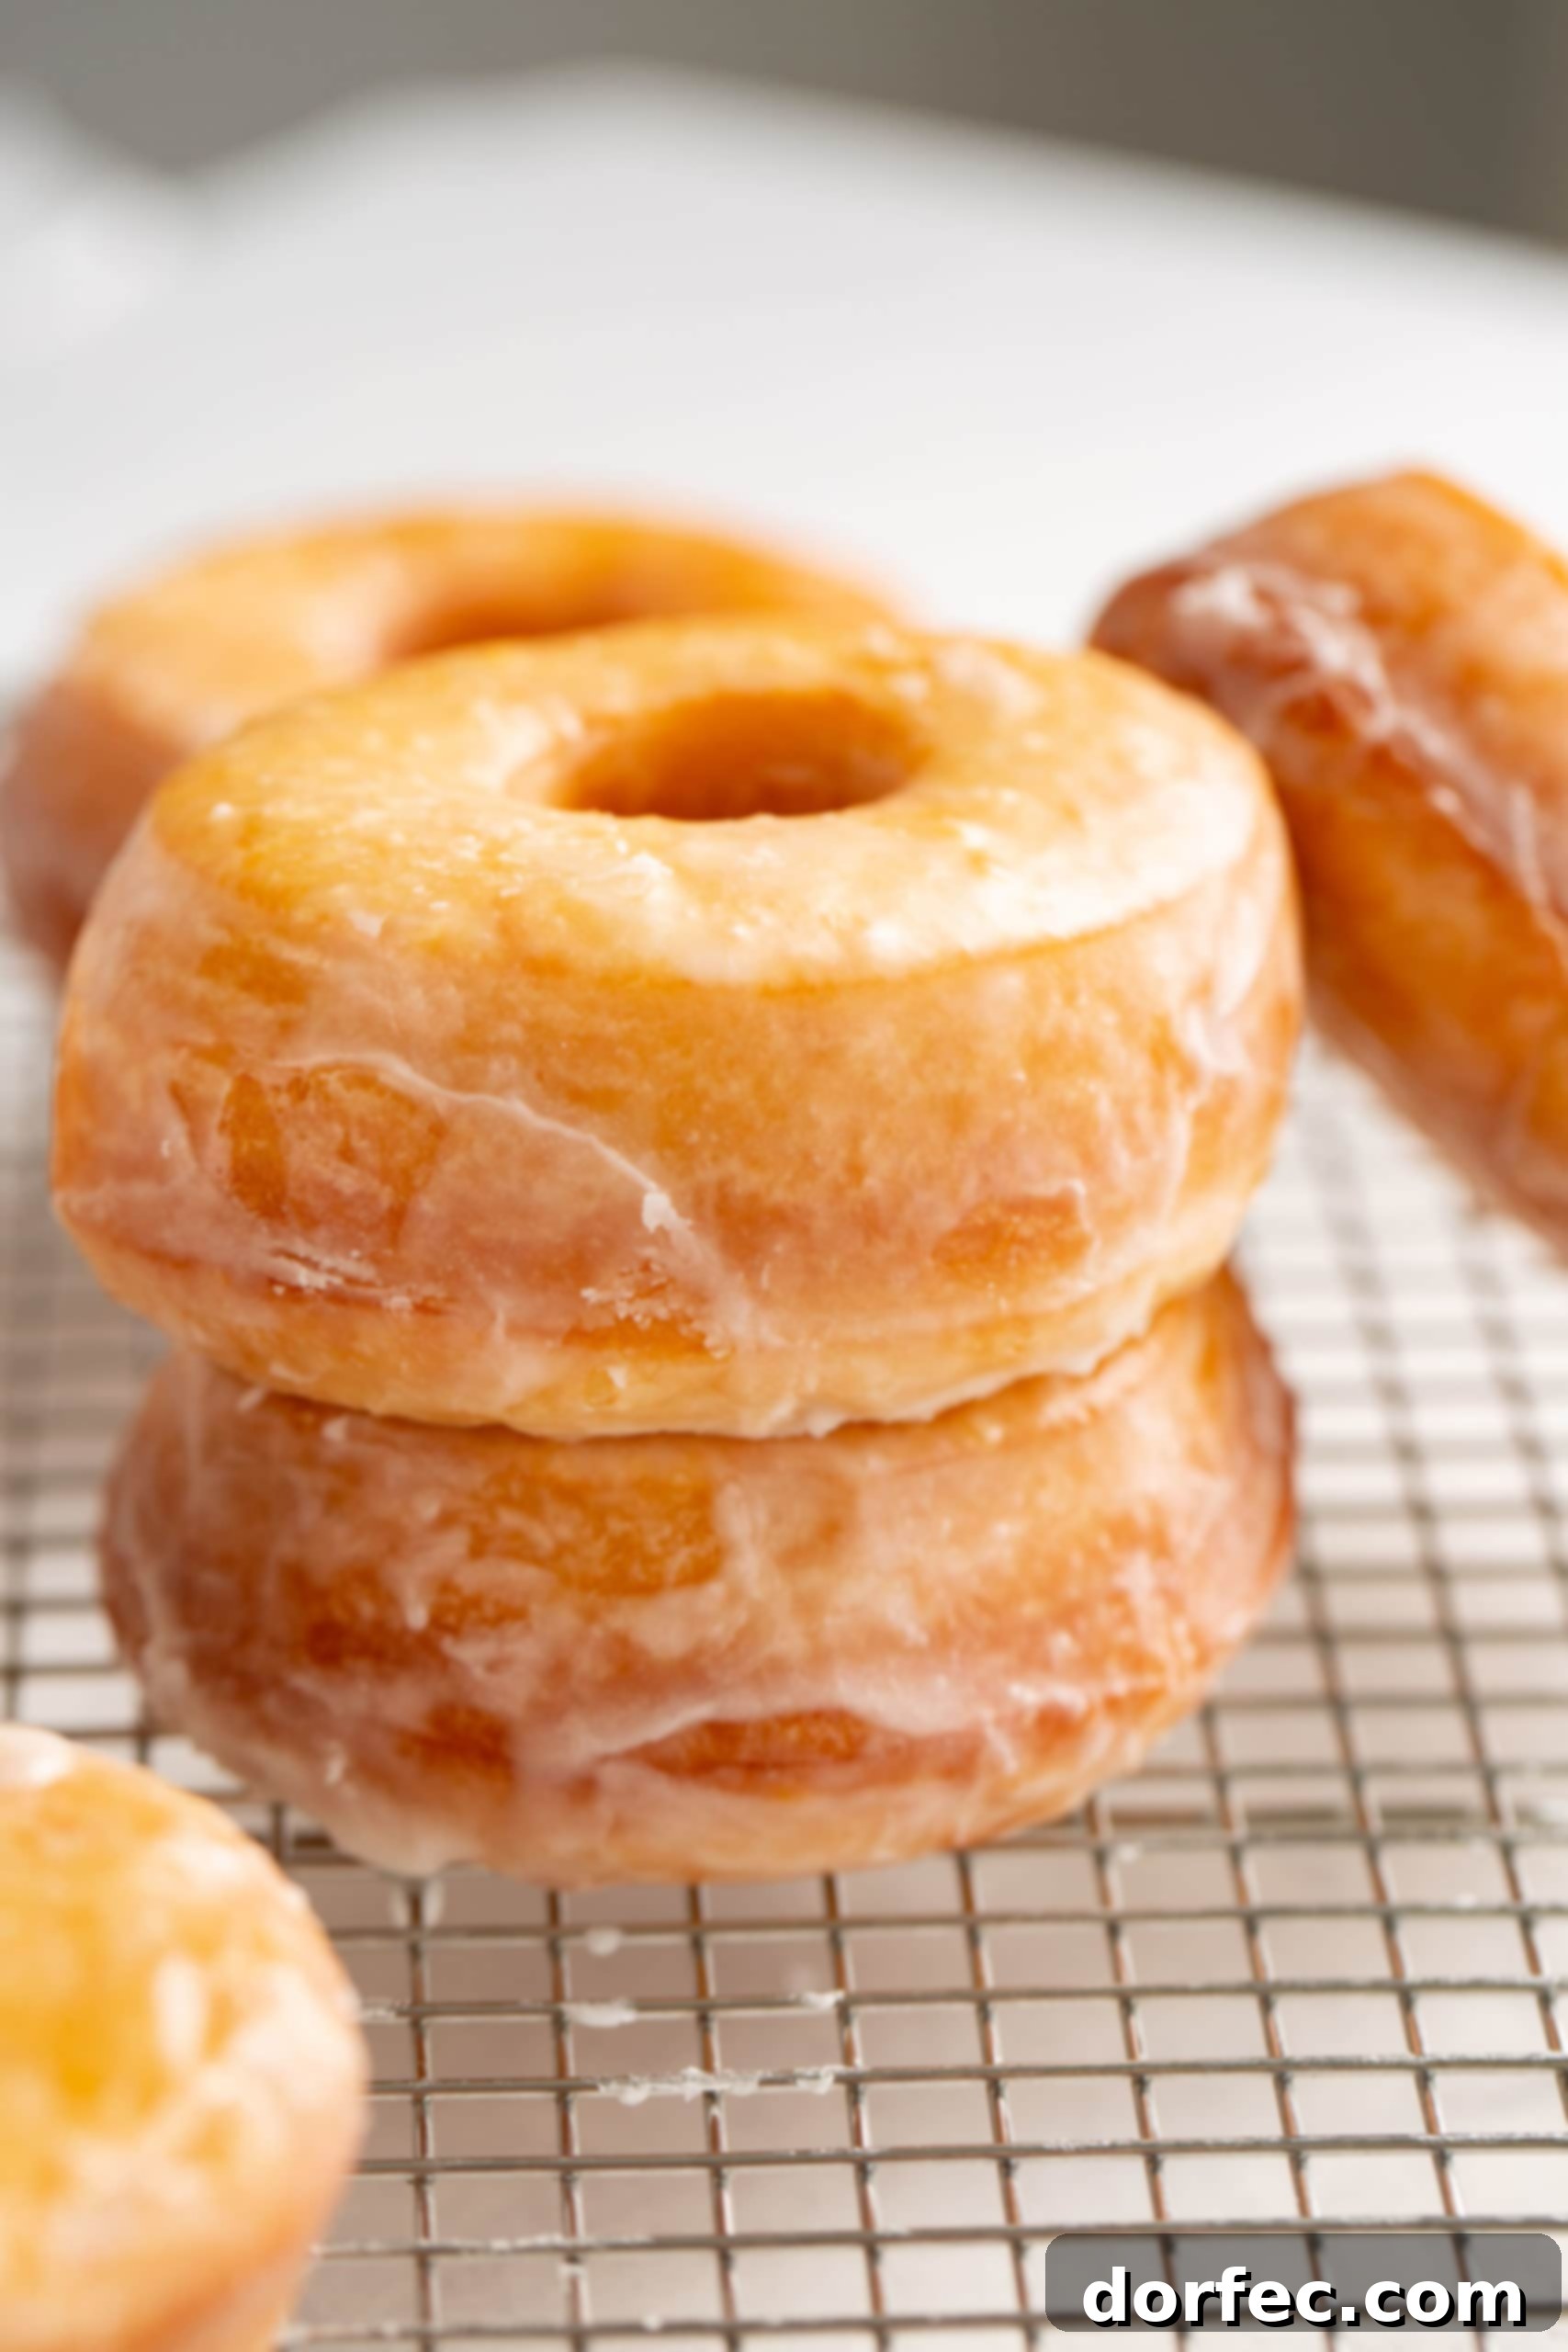
Imagine biting into a soft, pillowy cloud of sweet deliciousness, perfectly coated in a sugary glaze that melts in your mouth. That’s the magic of **homemade donuts**, and once you experience it, you’ll never look back! This comprehensive **donut recipe** guides you through creating these golden treasures right in your own kitchen, promising smiles and delighted gasps from everyone, especially your kids. Get ready to transform simple ingredients into an unforgettable treat that will quickly become a cherished family tradition.
You might be wondering about the spelling: “donuts” versus “doughnuts.” Historically, “doughnuts” was the more common spelling, rooted in the way the dough was prepared – small “nuts” of fried dough. However, over time, the simplified “donuts” gained popularity, especially in the United States, largely thanks to Dunkin’ Donuts. Today, both spellings are widely accepted and understood, so whether you prefer the classic “doughnuts” or the modern “donuts,” rest assured, you’re talking about the same delightful fried pastries. For this recipe, we’ll primarily use “donuts” for simplicity and contemporary flair.
The Heartwarming Tradition of Homemade Donuts
For many, certain foods evoke powerful memories, and homemade donuts often hold a special place in family traditions. Growing up, Christmas Eve at our house was a tapestry of cherished customs. The entire month leading up to it was a whirlwind of activity: carefully preparing gifts, dedicating time to serving our community and church, baking sweet treats for neighbors, and crafting thoughtful presents for friends at school. But the culmination of all this festive preparation arrived on Christmas Eve itself.
Our Christmas Eve holiday dinner was usually a comforting spread of honey-baked ham and creamy funeral potatoes. My mom loved this arrangement because it meant Christmas Day could be a relaxed affair, spent noshing on delicious leftovers, much like Thanksgiving. This allowed even Mom to fully unwind. After dinner, we’d gather to play games and read our favorite Christmas books, all while indulging in the warm, irresistible goodness of homemade donuts.
Funnily enough, as a child, I didn’t always adore those donuts. They often weren’t quite fluffy or sweet enough to capture my young palate. But oh, how times have changed! Now, with this perfected recipe, I find myself utterly unable to resist their golden allure. These aren’t just donuts; they’re a delicious connection to childhood memories, now elevated to new heights of flavor and texture, making them a true highlight of any family gathering or weekend morning.
Essential Ingredients for Your Best Homemade Glazed Donuts
Crafting the perfect homemade donut starts with simple, wholesome ingredients that you likely already have in your pantry. No exotic or hard-to-find items here – just straightforward components that come together to create culinary magic. The key lies in understanding the role each ingredient plays in achieving that coveted golden, fluffy texture and irresistible sweet glaze. Here’s a breakdown of what you’ll need for this incredibly satisfying **homemade donut recipe**:
For the Fluffy Donuts
- All-Purpose Flour: The foundation of our donut dough. Using the right amount is crucial for texture.
- Granulated Sugar: Provides sweetness to the dough and helps activate the yeast.
- Instant Yeast: This is what gives our donuts their wonderful rise and airy structure. Instant yeast is convenient as it doesn’t require proofing beforehand.
- Whole Milk: Adds richness and tenderness to the dough. Scalding it initially helps create a more tender crumb.
- Water: Essential for hydrating the dough and activating the yeast.
- Salt: Balances the sweetness and enhances the overall flavor of the donuts.
- Large Eggs & Egg Yolk: Contribute to the dough’s richness, color, and structure, making the donuts wonderfully tender.
- Unsalted Butter: Incorporates flavor and richness, resulting in a soft, melt-in-your-mouth texture. Cut into tablespoons for easier incorporation.
- Shortening (or Lard): Adds to the tenderness and helps create a fine, delicate crumb. Like butter, cut into tablespoons.
- Vegetable Oil (for frying): The medium for cooking our donuts to golden perfection. You’ll need a good quantity to ensure proper frying.
- Wooden Dowel (optional, for dripping glaze): A helpful tool for achieving an even glaze coating and allowing excess to drip away.
For the Irresistible Glaze
- Powdered Sugar: The base of our classic, quick-setting donut glaze. Its fine texture ensures a smooth finish.
- Hot Water: Dissolves the powdered sugar to create a silky, pourable glaze.
- Vanilla Extract: Adds a warm, aromatic flavor that perfectly complements the fried dough.
The precise measurements for each of these ingredients are conveniently listed in the detailed recipe card, which you’ll find at the end of this post. Make sure to consult it for exact quantities to ensure your **homemade glazed donuts** turn out perfectly every time!
Crafting Perfect Glazed Donuts: A Step-by-Step Guide
Making homemade donuts might seem like an involved process at first glance, but I assure you, this recipe is incredibly straightforward and genuinely fun! It’s a fantastic kitchen project to get the whole family involved, with steps suitable for various age groups. From mixing the dough to the exciting moment of frying, every stage offers an opportunity for hands-on participation and creating lasting memories. Let’s dive into the process of creating these delicious **fluffy glazed donuts**.
Preparing the Dough for Ultimate Fluffiness
- Scald the Milk: Begin by gently heating the whole milk in a saucepan over medium heat until small bubbles form around the edges and a light skin appears on top. Crucially, do not let it boil. This scalding process helps break down proteins, resulting in a more tender donut crumb.
- Combine with Water: Carefully remove the scalded milk from the heat and pour it into a glass measuring cup that already contains the water. Allow this mixture to cool down until it’s comfortably warm to the touch (around 105-115°F). If it’s too hot, it will kill the yeast; if too cold, the yeast won’t activate properly.
- Activate the Yeast: Once the milk and water mixture is warm, sprinkle the instant yeast and a teaspoon of sugar over the top. Stir gently and set it aside for about 5-10 minutes. You’ll know the yeast is active when it becomes foamy and bubbly, indicating it’s alive and ready to work its magic.
- Mix Dry Ingredients: In the bowl of a stand mixer fitted with the dough hook attachment, combine the flour and the remaining granulated sugar. Mix them briefly to ensure they are well incorporated.
- Incorporate Wet Ingredients: With the mixer running on low speed, slowly pour in the activated yeast mixture. Once mostly combined, add the salt and both eggs (two whole eggs and one extra egg yolk for extra richness). Continue mixing until a shaggy dough forms.
- Add Fats: Gradually add the softened butter and shortening, one tablespoon at a time, alternating between the two. Mix thoroughly after each addition. Don’t worry if the butter seems to slap around the bowl at first; it will eventually integrate into the dough. Continue kneading with the dough hook until the dough is sticky but cohesive, pulling away from the sides of the bowl. This kneading develops the gluten, crucial for that signature chewy-soft texture.
- First Rise and Chill: Lightly oil a large bowl. Transfer the sticky dough to this bowl, flipping it once to coat the entire surface with oil. Cover the bowl with a clean kitchen towel and let it rise in a warm place for about 2 hours, or until roughly doubled in size. Following this initial rise, cover the bowl tightly with plastic wrap and transfer it to the refrigerator. Allow the dough to chill overnight, or for a minimum of 8 hours. This prolonged chill is vital for flavor development and easier handling.
Shaping Your Golden Rings
- Roll Out the Dough: The next morning, remove the chilled dough from the fridge. Lightly grease your work surface or use a large silicone baking mat (my preferred method) to prevent sticking. Roll out the dough evenly until it is about 1/4 inch thick, forming a rectangle roughly 12×16 inches.
- Prepare Baking Sheets: Line two large baking sheets with parchment paper and lightly spray them with a nonstick cooking spray. This prevents the donuts from sticking and makes transfer easier.
- Cut Out Donuts: Using a donut cutter, or a combination of a large biscuit cutter (for the outer ring) and a small biscuit cutter (for the center hole), cut out your donut shapes. Gather any dough scraps, gently knead them together, let them rest for about 15 minutes, and then re-roll and cut out more donuts. Alternatively, for a fun twist, simply deep-fry the irregularly shaped scraps – kids especially love these “crazy shapes”!
- Second Rise: Carefully transfer the cut donuts to the prepared baking sheets, ensuring they have enough space between them to rise without touching. Cover the sheets with a clean kitchen towel and let the donuts rise in a warm, draft-free spot for 1 to 2 hours, or until they look visibly puffy and light. If you’re short on time, you can preheat your oven to 170°F for 10 minutes, turn it off, and then place the covered baking sheets inside for a quicker rise.
- Prepare the Glaze: While the donuts are undergoing their second rise, prepare the simple yet irresistible glaze. In a medium casserole dish, whisk together the powdered sugar, hot water, and vanilla extract until completely smooth and free of lumps. Set this aside. Also, prepare your glazing station: place two short cups on your counter with a long wooden dowel or a long wooden spoon resting across them, ready for dripping excess glaze.
- Heat the Oil: In a large Dutch oven or deep pot, pour enough vegetable oil (about 8-10 cups, depending on your pot size) to reach a depth of about 2-3 inches. Heat the oil over medium heat until it reaches a consistent temperature of 350°F (175°C). PRO TIP: Always use a candy or deep-fry thermometer to accurately monitor the oil temperature. Maintaining the correct temperature is paramount; oil that’s too cool will result in greasy donuts, while oil that’s too hot will burn the exterior before the interior cooks through.
- Prepare for Draining: Line another large baking sheet with two layers of paper towels. This will be your station for draining excess oil from the freshly fried donuts.
Frying and Glazing to Perfection
- Fry the Donuts: Carefully cut the parchment paper around each individual donut. This makes transferring them to the hot oil much easier and safer, as you can gently lift them with the paper and then turn them over into the oil without deflating them.
- PRO TIP: Fry only a few donuts at a time (2-3, depending on your pot size) to avoid overcrowding the pan. Overcrowding will significantly lower the oil temperature, leading to greasy, undercooked donuts.
- Monitor and Flip: Cook the donuts for about 1 to 1 1/2 minutes per side, or until they turn a beautiful golden brown. Using tongs or a slotted spoon, carefully flip them to cook the other side for another minute or so.
- Drain Excess Oil: Once golden on both sides, remove the donuts from the hot oil and immediately transfer them to the paper towel-lined baking sheet to drain any excess oil.
- Glaze While Warm: Allow the donuts to cool slightly, but they should still be warm (not burning hot) when you glaze them. Dip each donut completely into the prepared glaze, ensuring all sides are coated.
- PRO TIP: If you have the wooden dowel set up, string the glazed donuts onto it, positioning a cup under each end to elevate the dowel over the casserole dish. This allows any excess glaze to drip back into the dish, minimizing waste and ensuring a perfect, even coat. If you don’t have a dowel, simply place the dipped donuts on a wire cooling rack set over parchment paper to catch the drips.
- Final Cooling: Once the glaze has stopped dripping and started to set, transfer the donuts to a clean wire cooling rack to cool completely.
- Enjoy! Serve your freshly made homemade glazed donuts and savor every tender, sweet bite! They are best enjoyed the day they are made.
All of these detailed instructions, along with precise measurements and serving information, are conveniently compiled in the comprehensive recipe card located at the bottom of this page. You can easily save or print it for future reference!
Smart Tips & Troubleshooting for Homemade Donut Success
Making homemade donuts is a rewarding culinary adventure, but a few expert tips can ensure your success and help you achieve perfectly light, fluffy, and delicious results every time. Here are some common questions and essential advice to guide you through the process.
What Do I Do with the Excess Dough Pieces?
Don’t let any precious donut dough go to waste! You have a couple of fantastic options for the leftover pieces:
- Donut Holes: The small circles punched out from the center of your donuts are often the most beloved “extras.” Simply deep fry and glaze them just like the larger donuts for delightful, bite-sized treats. They cook even faster, so watch them closely!
- Re-rolling Scraps: For the dough pieces in between the cut donuts, gently gather them, form a ball, and let them rest for about 15 minutes. This allows the gluten to relax, making the dough easier to roll out again. Then, you can re-roll and cut out more donuts. Be mindful not to overwork the dough during this process, as it can lead to tougher donuts.
- “Crazy Shapes”: As mentioned earlier, don’t be afraid to embrace the fun! My kids absolutely love it when we deep fry the irregularly shaped dough scraps. They turn into unique, crispy-chewy morsels that are just as delicious and add an element of playful spontaneity to your homemade donut batch.
Why Does the Dough Need to Chill for So Long?
The overnight (or 8-hour) chilling time for your donut dough is a non-negotiable step for achieving truly superior results. Skipping this stage will compromise the quality of your donuts. Here’s why it’s so critical:
- Butter Solidification: The butter and shortening in the dough need time to solidify. This cold fat creates pockets within the dough, which, when fried, produce incredibly tender, fluffy, and almost flaky donuts. Without chilling, the fat melts too quickly, leading to dense, greasy results.
- Shape Retention: Chilled dough is much firmer and easier to handle. It holds its shape better during the second rise and, most importantly, when it hits the hot oil. This prevents your donuts from spreading out too much or becoming misshapen during frying.
- Flavor Development: The extended chilling period, also known as a “cold fermentation,” allows the yeast to work slowly, developing more complex and nuanced flavors in the dough. This results in donuts with a richer, more profound taste that can’t be achieved with a quick rise.
- Convenience: Chilling overnight perfectly sets you up for fresh, warm donuts for breakfast or brunch. You can prepare the dough the night before and simply finish the process in the morning.
What is the Best Temperature for Frying Donuts?
Maintaining the correct oil temperature is arguably the most crucial factor for perfectly fried donuts. The ideal range for frying donut dough is generally between 350-375°F (175-190°C). I cannot stress enough the importance of using a reliable candy or deep-fry thermometer to constantly monitor and regulate this temperature.
- Too Low (below 350°F): The donuts will absorb too much oil, becoming dense and greasy rather than light and fluffy.
- Too High (above 375°F): The exterior of the donuts will brown and possibly burn too quickly, while the inside remains raw or doughy.
Adjust your stovetop heat as needed to keep the oil within this sweet spot. Patience and a thermometer are your best friends here!
What Type of Oil Should Be Used to Fry Donuts?
Choosing the right oil for frying can impact the flavor and texture of your donuts. We personally prefer the clean, neutral taste of **vegetable oil**, which allows the donut and glaze flavors to shine. However, **peanut oil** and **canola oil** are also excellent choices for deep frying due to their high smoke points and neutral flavors. You’ll need a generous amount for this recipe – typically around 8-10 cups of oil, depending on the size and depth of your Dutch oven or frying pot. Ensure the donuts can float freely without touching the bottom.
Can I Use an Air Fryer to Make Donuts?
Absolutely! If you’re looking for a slightly lighter alternative to deep-fried donuts, an air fryer can yield surprisingly good results. While they won’t have the exact same texture as traditional fried donuts (they’ll be a bit more like baked donuts), they are still wonderfully delicious and convenient.
- Preheat: Preheat your air fryer to 350°F (175°C).
- Prepare Basket: Lightly spray the air fryer basket with cooking spray to prevent sticking.
- Arrange Donuts: Place the risen donut dough in a single layer in the air fryer basket. Do not overcrowd; work in batches if necessary.
- Spray & Cook: Lightly spray the tops of the donuts with cooking spray. Cook for about 4 minutes, then carefully flip them. Continue cooking for another 2-4 minutes, or until they are golden brown and cooked through.
- Glaze: Once cooked, remove the donuts and glaze them immediately as directed in the recipe instructions for traditional frying.
Exciting Glaze Variations to Elevate Your Donuts
While the classic vanilla glaze is undeniably delicious, sometimes you want to add an extra layer of flavor and excitement to your homemade donuts. The beauty of a simple powdered sugar glaze is how easily it can be customized. Here are some fantastic glaze variations that will transform your donuts into an even more special treat:
- Decadent Chocolate Glaze: For the chocolate lovers, simply whisk in 2-3 teaspoons of unsweetened cocoa powder to the basic glaze recipe, along with an extra splash of hot water if needed to maintain a pourable consistency. This creates a rich, fudgy glaze that pairs perfectly with the fluffy donuts.
- Tropical Coconut Glaze: Give your donuts an exotic twist by replacing the vanilla extract with 1/4 to 1/2 teaspoon of coconut extract. A sprinkle of toasted shredded coconut on top before the glaze sets will add a delightful texture and intensify the coconut flavor.
- Zesty Lemon Glaze: For a bright and tangy contrast to the sweet donut, swap out the vanilla for 1-2 teaspoons of fresh lemon juice. A little bit of lemon zest can also be added for an extra burst of citrus aroma. This is particularly refreshing.
- Maple Magic Glaze: Embrace a cozy, comforting flavor by incorporating a half teaspoon of pure maple syrup or maple extract/flavoring into your glaze instead of vanilla. This is especially delightful on a chilly morning!
- Fun & Colorful Glazes: Get creative with food coloring! Add a few drops of your favorite gel food coloring to the plain vanilla glaze to create vibrant, festive donuts. Think pastel colors for spring, bold hues for parties, or seasonal colors for holidays. This is a fantastic way to engage kids in the decorating process.
Remember to adjust the amount of liquid slightly with each addition to ensure your glaze remains smooth and of the perfect dipping consistency.
Storing and Reheating Your Homemade Delights
Homemade donuts are best enjoyed fresh, ideally within a few hours of frying and glazing. However, if you find yourself with leftovers (a rare but possible occurrence!), proper storage and reheating techniques can help preserve their deliciousness.
Reheating for Freshness
To bring your donuts back to a wonderfully soft and warm state, the microwave is your best friend. Reheat individual donuts for just 6-12 seconds. Be cautious not to overheat, as this can make them tough or dry out the glaze. A quick zap is usually all it takes to revive their tender texture.
Can You Freeze Homemade Donuts?
Yes, you can absolutely freeze homemade donuts, though they are always best fresh. To freeze them, ensure they are completely cooled. Then, wrap each donut individually in aluminum foil or plastic wrap, and place them in a heavy-duty freezer bag or an airtight container. They will keep well in the freezer for up to 3 months. When ready to enjoy, thaw them at room temperature, then reheat briefly in the microwave for optimal taste and texture.
How Long Will Homemade Donuts Keep?
Stored properly, homemade donuts will remain fresh for approximately 3-4 days. To maintain their quality, store them in an airtight container at room temperature. Avoid refrigerating them, as the cold air can dry them out and make them stale more quickly. Keeping them sealed prevents them from becoming hard or losing their soft, pillowy texture.
There’s truly no need to rush out to the local bakery on a busy Saturday morning when you can create these magnificent treats right in the comfort of your own home. This incredible **donut recipe** allows you to make cherished memories with your family, filling your kitchen with an aroma that signals pure joy. These donuts are wonderfully tender, gloriously fluffy, and rich with just the right amount of sweetness from their perfect glaze. Whether you prefer to call them “doughnuts” or “donuts,” one thing is for certain: it’s time for some delightful **homemade donut** magic!
Explore More Sweet Fried Treats:
- Deep Fried Strawberry Shortcakes
- Dulce de Leche Churro Donuts
- Apple Pie Bombs
- Deep Fried Peaches
- Mother Clucker Doughnuts
- Lemon Raspberry Donuts
- Spudnut Donuts
Homemade Donut Recipe
13 hrs 25 mins
3 mins
13 hrs 28 mins
36
Ingredients
Donuts
- 1 Cup Whole Milk
- 3/4 Cup Water
- 1 Tablespoon Instant Yeast
- 3/4 Cup Sugar
- 6-6 1/2 Cups Flour
- 1 1/2 teaspoons Salt
- 2 Large Eggs
- 1 Large Egg Yolk
- 1/2 Cup Butter, cut into tablespoons
- 4 Tablespoons Shortening, or lard, cut into tablespoons
- Vegetable Oil for frying
- Wooden Dowel for dripping glaze (optional)
Glaze
- 6 Cups Powdered Sugar
- 1/2 Cup Water, hot
- 1 Dash Vanilla Extract
Instructions
-
In a saucepan over medium heat, add the milk and cook until foamy at the sides and a light skin has appeared on top of the milk; do not boil. Remove from heat and pour into the measuring cup holding the water. Once the milk is only warm (not burning hot, about 105-115°F), add the yeast and 1 teaspoon sugar, then set aside to foam for 5-10 minutes.
-
In the bowl of a standing mixer fitted with the dough hook, add the flour and remaining sugar and mix to combine. Gently pour in the yeast mixture and begin mixing on low speed, then add in the salt, 2 large eggs, and 1 large egg yolk. Mix for 2 minutes. Then, a tablespoon at a time, alternating between the two, add in the butter and shortening, mixing completely after each addition. Do not be worried if you see chunks of butter; it will eventually combine with the flour. Continue to knead until the dough is sticky but has come together. Transfer to a lightly oiled bowl, flipping the dough over once to cover it in oil, and cover with a towel. Allow to rise in a warm place for 2 hours. Cover with plastic wrap and place in the refrigerator overnight (or for 8 hours).
-
Remove the bowl from the fridge and roll out the dough on a lightly greased surface or a very large silpat (which is what I prefer) until about 1/4” thick, or approximately 12×16 inches. Place parchment paper on two cookie sheets and lightly spray with nonstick spray. Set aside.
-
Using a donut cutter or a small and large biscuit cutter, cut out donuts. Allow scraps to rest for 15 minutes, then pull them together and roll them out again to finish cutting. OR, and most of the time I do this, just cut the remaining scraps into crazy shapes for the kids to enjoy! Gently lift donuts onto the parchment-lined baking sheets and cover with a towel for 1-2 hours or until puffy. Alternatively, you could heat an oven to 170°F (77°C) for 10 minutes, turn off the oven, and after a few minutes, put the sheets in to rise a little more quickly.
-
Prepare the glaze by whisking together all ingredients in a casserole dish. Set aside. Also, set aside two short cups and a long wooden dowel or long wooden spoon for glazing.
-
Heat a large Dutch oven over medium heat to 350°F (175°C). Always use a thermometer, as donuts will under or overcook easily, so keeping a proper temperature is key.
-
On a large cookie sheet, line 2 layers of paper towels to absorb excess oil.
-
Cut the parchment paper between donuts. Lift each donut using the parchment paper to transfer it, and gently turn it over so the bottom is up in the oil. Be sure to only cook a few at a time to avoid overcrowding the pan and lowering the oil temperature. Cook for 1-1 1/2 minutes or until golden, then flip and cook another minute on the other side. Remove to the paper towel-lined baking sheets to drain.
-
Once the donuts are only just warm and no longer hot, dip all sides in the glaze. If using a dowel, string them along the dowel, placing a cup under each end to allow the glaze to drip back into the dish. Once they are done dripping, remove to a cooling rack and repeat. If you don’t have a dowel or spoon, just dip and place on a cooling rack over parchment paper to catch drips.
-
Enjoy your freshly made homemade donuts!
Recipe Notes
Nutrition
Nutrition information is automatically calculated, so should only be used as an approximation.
REMEMBER TO SUBSCRIBE TO our FREE Oh Sweet Basil NEWSLETTER AND RECEIVE EASY RECIPES DELIVERED INTO YOUR INBOX EVERY DAY!
When you try a recipe, please use the hashtag #ohsweetbasil on INSTAGRAM for a chance to be featured in our stories! FOLLOW OH, SWEET BASIL ON FACEBOOK | INSTAGRAM | PINTEREST | TWITTER FOR ALL OF OUR LATEST CONTENT, RECIPES AND STORIES.