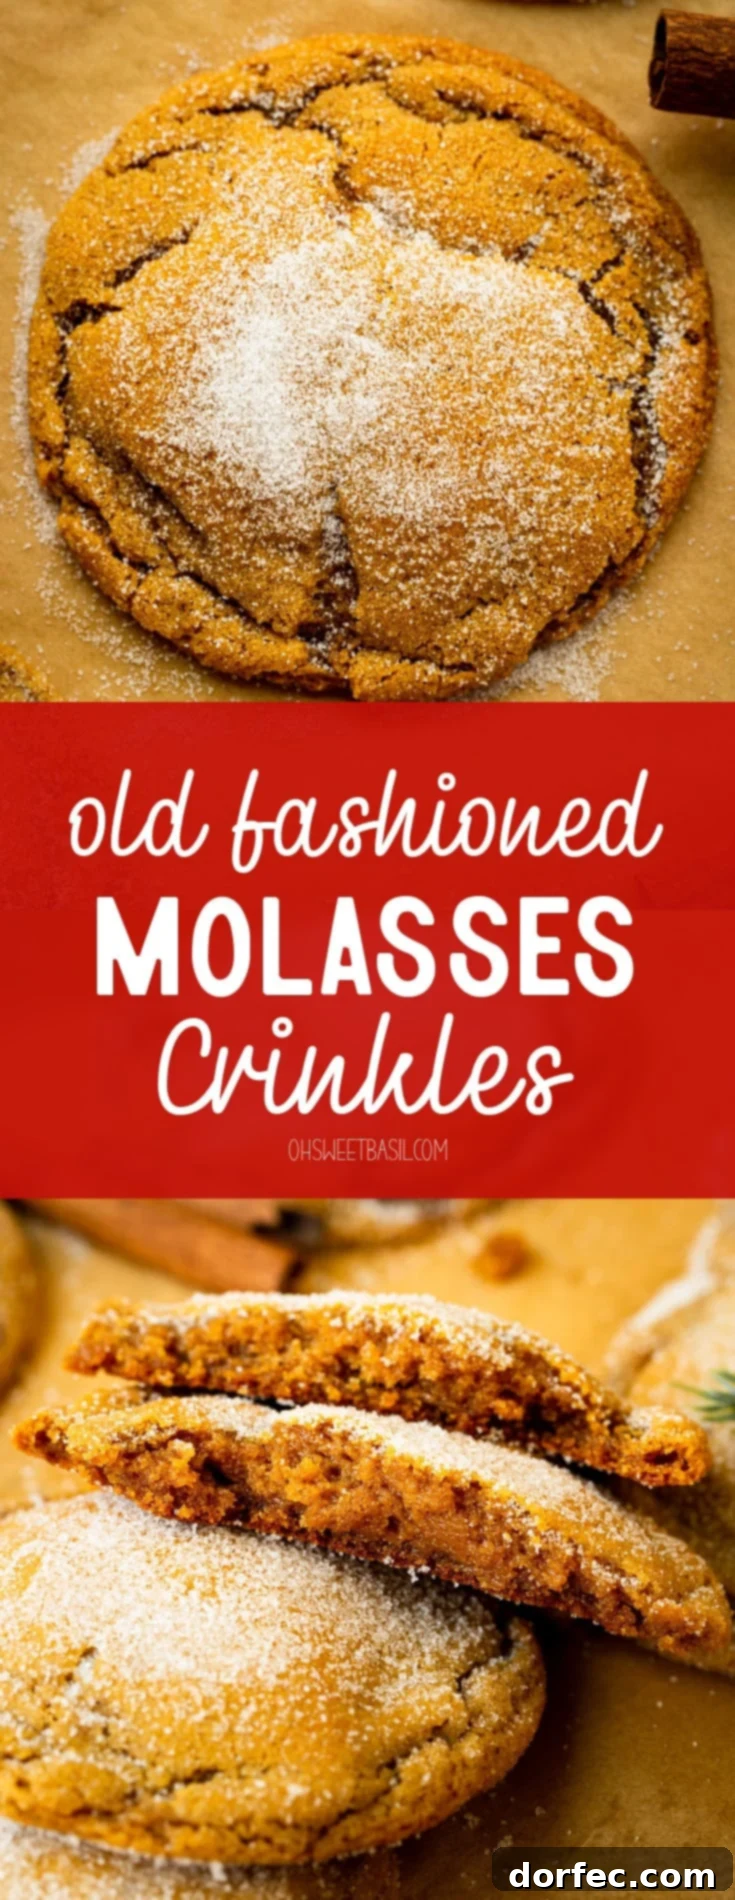
Old-fashioned molasses cookies are a cherished classic, especially as the holiday season approaches. These delightful treats offer a unique blend of warm spices and an irresistibly chewy texture that truly melts in your mouth. If you’re searching for the perfect cookie to bake this festive season, look no further – this recipe for chewy molasses cookies is guaranteed to become a family favorite, bringing warmth and joy to your home.
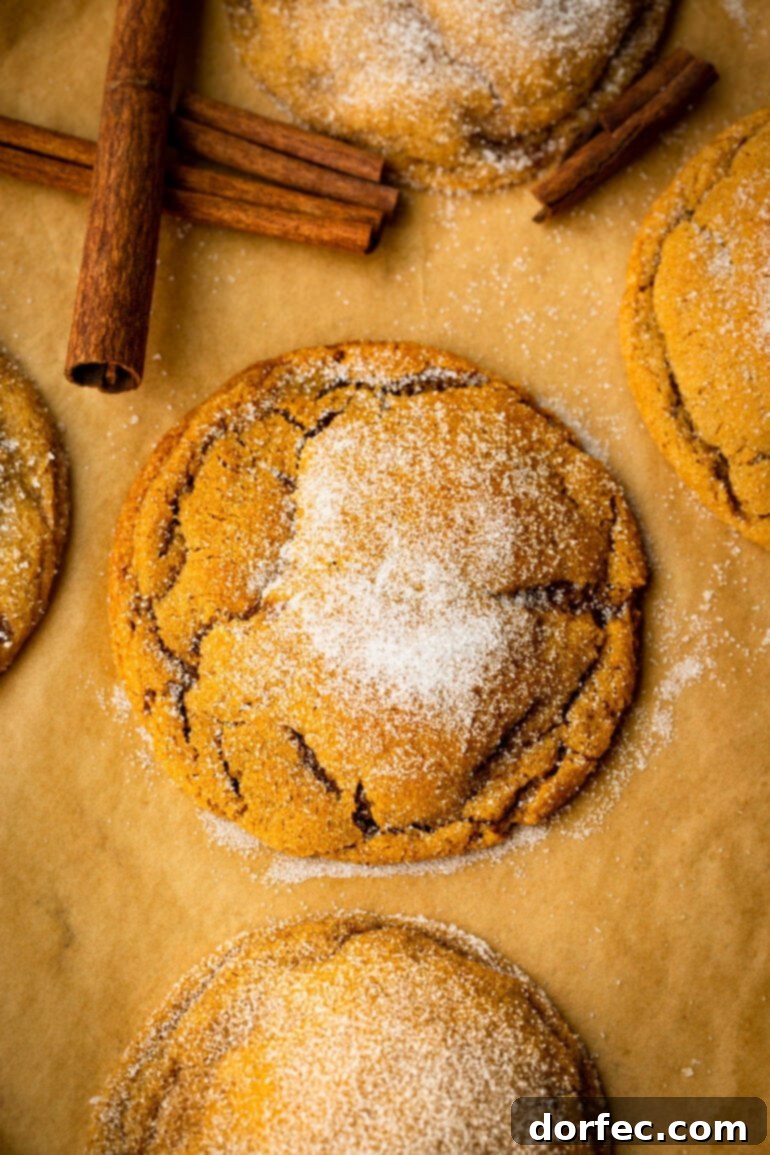
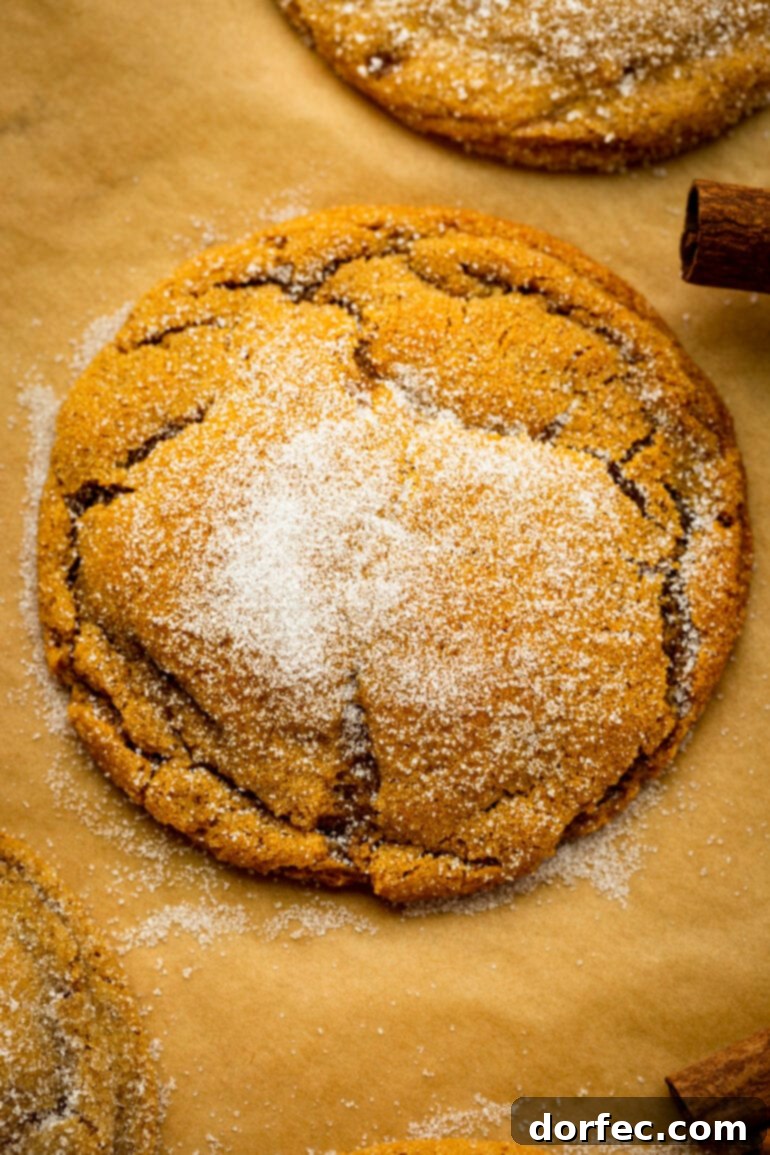
Our recipe for molasses crinkle cookies is not just good; it’s truly exceptional. It’s specifically designed to achieve those beautiful, signature cracks that stretch across the top, delivering an incredible chewiness with every single bite. We’re also excited to share some invaluable tips that will ensure your cookies boast the most stunning, deep crinkles possible, making them as visually appealing as they are delicious.
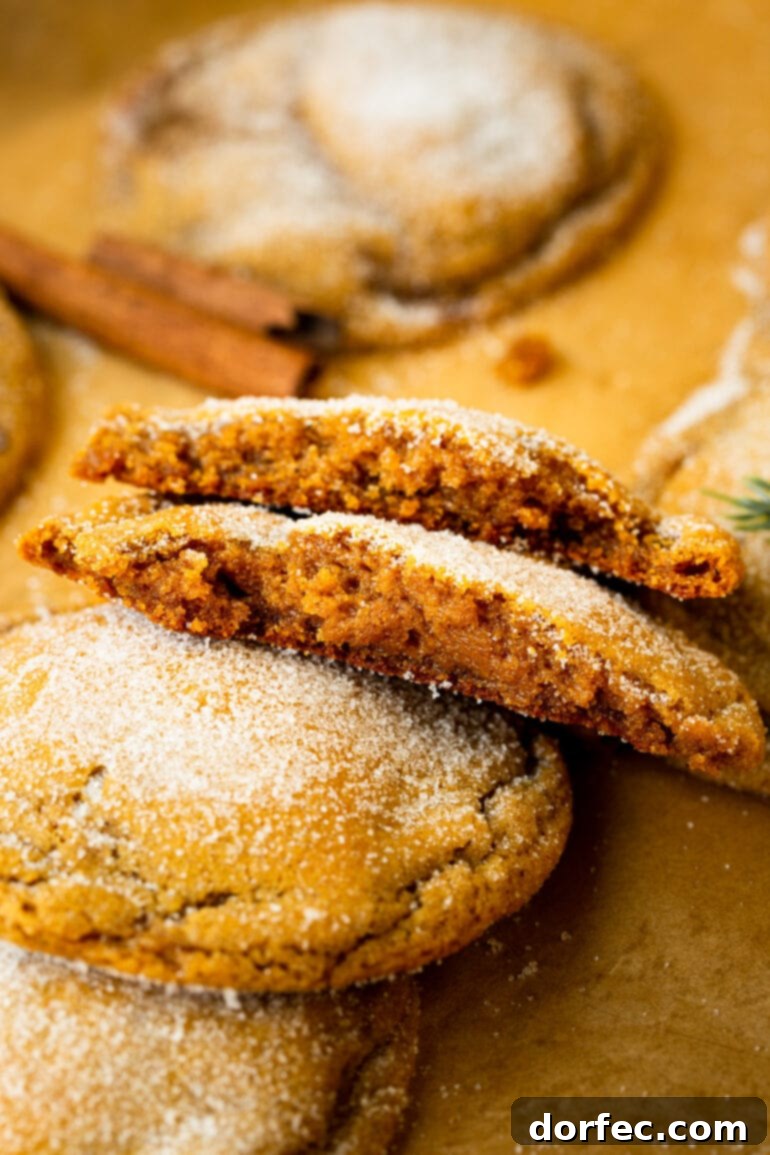
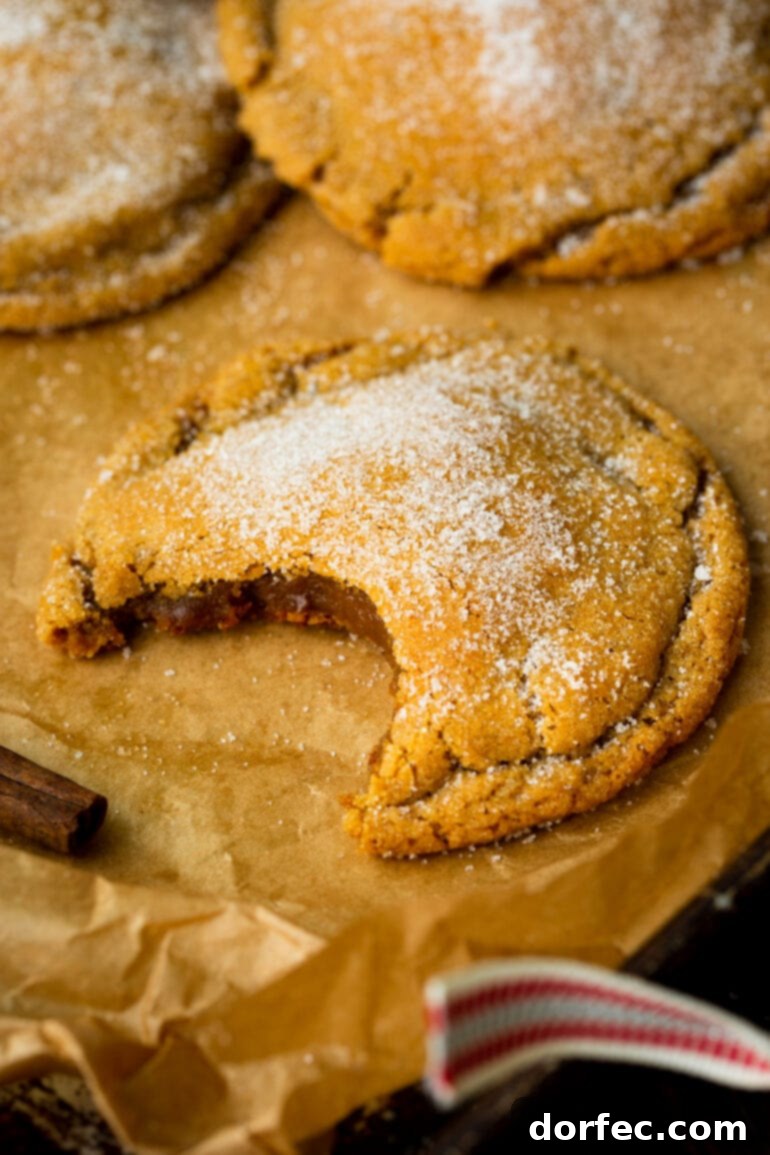
It’s important to distinguish these cookies from their crisper counterparts. Our classic molasses cookies are crafted for a soft, pliable, and wonderfully chewy interior, setting them apart from the snappier texture of traditional gingerbread cookies. It seems that the simple charm of molasses crinkles is sometimes overlooked, but we are committed to reviving and celebrating this timeless confection, ensuring it secures its rightful place in your essential holiday baking repertoire.
Why Old-Fashioned Molasses Cookies Remain a Beloved Holiday Tradition
There’s something undeniably magical about the aroma of freshly baked cookies filling your home during the holidays, and molasses cookies are truly at the heart of this festive tradition. Their rich, warm spices, including ginger, cinnamon, and cloves, create an inviting fragrance that instantly evokes cherished childhood memories and a sense of nostalgic comfort. Beyond the delightful scent, these cookies offer a unique depth of flavor that perfectly complements the season’s spirit. They are a testament to how simple, wholesome ingredients can come together to create something truly extraordinary. Whether you enjoy them with a hot cup of apple cider, a steaming mug of coffee, or share them at a holiday gathering, these classic molasses cookies symbolize comfort, warmth, and the joy of togetherness. They are an essential part of festive baking, deeply rooted in traditions that bring families closer.
The Essential Ingredients for Perfect Chewy Molasses Cookies
Having sampled countless molasses crinkle cookies over the years, a common complaint I’ve encountered is an overwhelming use of molasses or ginger. The goal isn’t to create a cookie that leaves a burning sensation, but rather one that offers a harmonious and balanced blend of warmth and sweetness. Achieving this delicate equilibrium relies heavily on precise ingredient ratios. For this particular recipe, just 1/2 cup of molasses is perfectly sufficient to infuse the cookies with their distinctive, rich flavor without overpowering the palate. This careful balance ensures every bite is a delightful experience, full of nuanced spice without being too intense.
Here’s a detailed breakdown of the essential ingredients that contribute to the incredible flavor, tender crumb, and perfect chewy texture of these exceptional soft molasses cookies:
- Unsalted Butter: Always opt for unsalted butter, softened to room temperature. This crucial step allows for proper creaming with the sugars, creating a light, airy, and foundational base for your cookie dough. Using unsalted butter also gives you precise control over the overall saltiness of your final cookie.
- Brown Sugar: This is a cornerstone ingredient for both sweetness and, more importantly, texture. Brown sugar contains molasses, which contributes significantly to the rich, caramelized flavor profile. Its moisture content ensures a wonderfully moist and ultimately chewy cookie that remains soft for days.
- Granulated Sugar: Standard granulated sugar serves a dual purpose in this recipe, acting as a crucial element for both taste and aesthetics. It not only sweetens the cookie dough internally but also provides that beautiful, sparkling outer coating when the dough balls are rolled before baking. This sugar coating is vital for contributing to the desired crinkled appearance as the cookies expand in the oven.
- Molasses: The star ingredient, molasses, imparts its characteristic deep, slightly smoky sweetness and rich, complex flavor. It’s also a key player in achieving the desirable soft and chewy texture that defines these cookies.
- PRO TIP: For the most authentic and robust flavor, we highly recommend using Grandma’s brand dark molasses. Its consistent quality and deep, rich taste make a noticeable difference in the final product, elevating your cookies from good to extraordinary.
- Vanilla Extract: A touch of pure vanilla extract works wonders by enhancing and unifying all the other flavors. It adds a subtle layer of aromatic depth that elevates the overall taste experience, making the cookies more complex and inviting.
- Eggs: Eggs are indispensable in this recipe, providing essential structure and binding the ingredients together. They also contribute significant moisture. The inclusion of both a whole large egg and an additional egg yolk, as specified in this recipe, further enhances the richness and ensures an incredibly chewy and tender crumb.
- All-Purpose Flour: Simple all-purpose flour provides the primary structure for these delectable cookies. Accurate measurement is absolutely crucial here; too much flour can result in a dense or overly dry cookie, while too little can make them spread excessively.
- Ground Cinnamon: This classic holiday spice adds a warm, sweet, and comforting woody note, creating that quintessential festive flavor profile that everyone loves. It’s a foundational spice in any good molasses cookie.
- Ground Cloves: Known for their strong, sweet, and intensely aromatic qualities, ground cloves contribute a distinct and robust festive kick that pairs exceptionally well with the other spices, adding complexity and depth.
- Baking Soda: As a powerful leavening agent, baking soda is responsible for the cookies’ characteristic rise. It contributes to their soft, fluffy interior and, crucially, helps create those beautiful, intricate cracks on the surface during the baking process.
- Ground Ginger: Essential for any outstanding molasses cookie, ground ginger provides a comforting warmth and a subtle, pleasant spicy kick. It balances the sweetness perfectly without being overwhelming, making it a cornerstone of the flavor profile.
- Salt: A modest pinch of salt is vital for balancing the inherent sweetness of the sugars and molasses. More importantly, it enhances all the individual flavors, making them more vibrant, pronounced, and complex, bringing out the best in every ingredient.
You will find the precise measurements for each of these carefully selected ingredients conveniently listed in the comprehensive recipe card located at the conclusion of this detailed article.
How to Bake the Best Old-Fashioned Molasses Crinkle Cookies: A Detailed Step-by-Step Guide
These old-fashioned soft molasses cookies are surprisingly simple to prepare, coming together with remarkable ease and delivering consistently incredible results. Follow these detailed steps meticulously to create a batch of perfect chewy molasses cookies that everyone will rave about. Each stage is designed to ensure maximum flavor and the most beautiful, pronounced crinkles.
- Prepare the Wet Ingredients Thoroughly: In the bowl of a stand mixer, fitted with the paddle attachment, combine the softened unsalted butter with both the brown sugar and granulated sugar. Cream these ingredients together on medium speed for at least 2 minutes, or until the mixture becomes visibly lighter in color, smooth, and wonderfully fluffy. This aeration is key to a tender cookie. Next, pour in the molasses and vanilla extract, beating until these rich liquids are fully incorporated and the mixture is uniformly smooth. Finally, add the large egg and the additional egg yolk, mixing just until they are fully combined. Be careful not to overmix once the eggs are added, as this can develop gluten and lead to a tougher cookie.
- Combine the Dry Ingredients Accurately: In a separate, medium-sized bowl, thoroughly whisk together all your dry ingredients: the all-purpose flour, ground cinnamon, ground cloves, baking soda, ground ginger, and salt. Whisking ensures that the leavening agent and all the fragrant spices are evenly distributed, preventing pockets of unmixed ingredients in your final dough.
- Integrate Wet and Dry Components: Gradually add the whisked flour mixture to the wet ingredients in the stand mixer. Mix on a low speed until everything is just combined and no streaks of dry flour are visible. Again, it’s crucial not to overmix at this stage. Overmixing can toughen the dough, resulting in a less tender cookie.
- Initial Chill for Flavor and Texture Development: After mixing, scrape down the sides of the mixing bowl with a rubber spatula, gathering all the dough into a cohesive mass. Wrap the bowl tightly with plastic wrap, ensuring it’s completely airtight to prevent the dough from drying out. Transfer the dough to the refrigerator and chill for a minimum of 2 hours. This crucial chilling period serves multiple purposes: it allows the distinct flavors to meld and deepen, the butter to firm up, and the flour to fully hydrate. This process is absolutely essential for achieving both the ideal chewy texture and the desired crinkle effect.
- Prepare for Baking: Once your dough has completed its initial chill, preheat your oven to 350°F (175°C). Line several baking sheets with either silicone baking mats (like Silpats) or parchment paper. This preparation prevents sticking and promotes even baking, ensuring your cookies slide off easily.
- Form Uniform Cookie Balls: Using a standard cookie scoop (approximately 1.5-2 tablespoons, or about 40-50g), scoop out uniform portions of the thoroughly chilled dough. Roll each portion gently between your palms to form smooth, round balls. Consistency in size ensures even baking.
- First Sugar Roll & Critical Second Chill: Place a generous amount of granulated sugar in a shallow bowl. Roll each dough ball thoroughly in the sugar, ensuring it’s completely coated. This initial sugar layer is important for the crinkles. Arrange the sugared dough balls on one of your prepared baking sheets, leaving ample space (about 2 inches) between them to allow for spreading. Once the sheet is full, wrap it tightly with plastic wrap and return it to the refrigerator. Continue this process with the remaining dough. This second chilling step is incredibly important for developing those deep, beautiful crinkles!
- PRO BAKER’S TIP: If your schedule allows, chilling the dough for this second stage overnight yields the absolute best results. The extended chilling time allows the dough to firm up completely, preventing excessive spreading and ensuring the sugar coating remains intact. This combination is key to achieving the most pronounced and beautiful crinkles on your baked cookies.
- Optional Second Sugar Roll (for Maximum Crinkles and Sparkle): After the second chilling period (or just before baking if you opted for a shorter chill), take the dough balls out of the refrigerator and let them sit at room temperature for about 10 minutes. This slight warming helps the cookies spread more evenly. Then, roll them in granulated sugar *again*. This optional but highly recommended step adds an extra layer of sweetness and texture, significantly amplifying those gorgeous, sparkling crinkles.
- Bake to Perfection: Place one baking sheet with the thoroughly chilled, double-sugared dough balls into the preheated oven. Bake for approximately 8-10 minutes, or until the edges are just set and beautiful cracks have visibly begun to appear across the top of the cookies. The centers should still look slightly soft and puffy; they will firm up as they cool. Overbaking will lead to a crisp, rather than chewy, cookie.
- IMPORTANT BAKING TIP: As you bake in batches, always remember to keep any unbaked dough balls in the refrigerator. It is absolutely crucial for the dough to remain thoroughly chilled right up until it enters the oven. This consistency in temperature ensures uniform results and the best possible crinkles across all your cookies.
- Cool and Enjoy: Once baked, remove the baking sheet from the oven and allow the cookies to rest on the hot sheet for a couple of minutes. This brief resting period helps them set properly without becoming overly crisp. After a few minutes, carefully transfer the warm cookies to a wire rack to cool completely. Enjoy the irresistible aroma and reward of your baking efforts!
These instructions provide a comprehensive guide to mastering this delicious recipe. For a convenient printable version or to save the recipe for future reference, please refer to the full recipe card provided below.
Unlocking the Secrets to the Best Molasses Cookies: Mastering the Crinkle and Chew
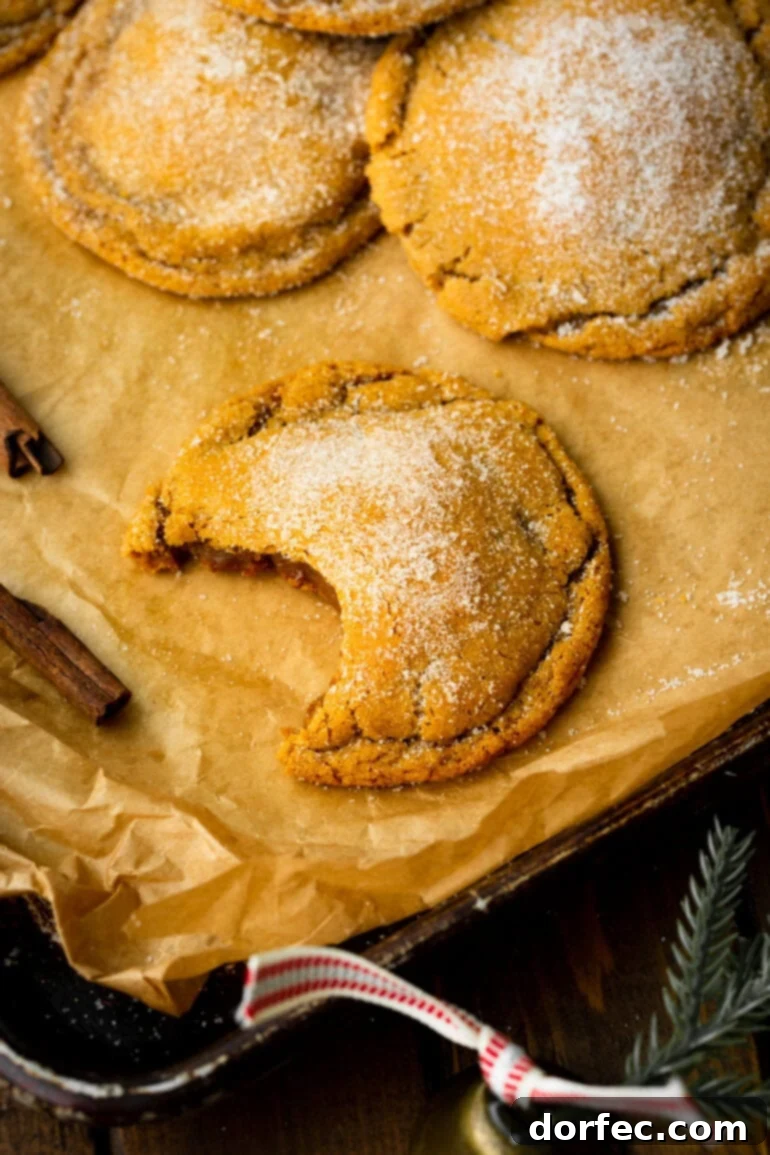
While the basic recipe steps are straightforward, there are a couple of crucial “secrets” that truly elevate these from simply good molasses crinkle cookies to genuinely extraordinary ones. The real key to their success lies in strategic chilling and a clever double sugar roll, both of which contribute significantly to their signature texture and appearance.
The Indispensable Power of Chilling: Why It’s Non-Negotiable
The most important secret is the relentless emphasis on chill, chill, chill! These cookies absolutely demand proper and extensive refrigeration. The dough should be chilled for a minimum of 2 hours after mixing, and it’s imperative that the dough remains thoroughly cold in the fridge between batches as you bake. This recipe yields a generous amount of dough, so ensure you have adequate refrigerator space available. But why is chilling so vitally important for achieving perfect chewy molasses cookies?
- Enhanced Flavor Development: Chilling allows ample time for all the aromatic spices and rich molasses to fully meld together. This process deepens and concentrates the flavor profile, resulting in a more complex, nuanced, and satisfying taste experience.
- Achieving Perfect Texture: Cold dough spreads much less rapidly when it hits a hot oven. This controlled spreading results in thicker, chewier cookies with a tender, soft crumb. When the butter in the dough is cold, it melts more slowly, which prevents the cookies from spreading too thinly and ensures a more desirable, tender interior.
- The Signature Crinkle Effect: This is perhaps the most significant benefit for molasses crinkles. When cold dough is placed into a hot oven, the exterior surface of the cookie dough sets and dries out quickly, while the interior continues to expand. This differential in expansion forces those beautiful, deep, and characteristic cracks to form on the surface. Without adequate chilling, your cookies might spread too much, too quickly, and sadly lack their iconic crinkled top.
The Magic of the Double Sugar Roll
Another secret weapon for achieving perfect crinkles and imparting an extra layer of delightful sweetness and texture is to double roll the dough in sugar! Here’s how to master this technique: First, after forming your dough into balls, roll them thoroughly in granulated sugar, ensuring each ball is completely coated. Place these initially sugared balls onto a baking sheet, wrap it tightly in plastic wrap, and return it to the fridge for a second chill. I personally prefer to chill them overnight for the absolute best results, but a minimum of two hours before baking will certainly suffice. Then, just before baking each batch, take the chilled dough balls out, allow them to sit at room temperature for about 10 minutes to take off the intense chill (which helps with even spreading), and then roll them in granulated sugar *again*. This second, generous coating of sugar ensures a thick, sparkling crust that significantly enhances the crinkling effect and provides a delightful textural contrast that elevates these cookies to another level.
The Unexpected Delight of Frozen Molasses Cookies
And if you’re seeking a truly unique and surprisingly delightful experience, here’s a personal secret that I urge you to try: I absolutely adore these cookies when they are baked and then intentionally frozen. They are, in fact, the *only* type of cookie in the world that I wholeheartedly recommend freezing for later enjoyment in this manner. There’s something undeniably awesome and utterly addictive about the compelling juxtaposition of the warm, festive spices against the icy coldness of the cookie. It creates a surprisingly refreshing, intensely flavorful, and wonderfully firm treat that offers a different, yet equally enjoyable, sensory experience you simply must discover!
A Brief History: Where Do Molasses Cookies Originate?
The precise origins of these delectable and aromatic treats are somewhat veiled in culinary history, but most food historians and sources generally agree that molasses cookies made their initial appearance on the American baking scene sometime in the mid-1800s. They gained particular popularity and prominence in the New England region, where molasses was not only a readily available but also a significantly more affordable sweetener compared to the often expensive granulated sugar. Molasses, being a rich byproduct of refining sugarcane into sugar, quickly became a staple in colonial kitchens. It remained a beloved and frequently used ingredient in American baking for centuries, lending its distinctive rich flavor and moistening properties to a wide variety of desserts and baked goods, with these old-fashioned cookies standing out as a prime and enduring example of its culinary versatility.
Molasses Cookies vs. Ginger Snaps: Understanding the Key Differences
It’s a very common question among bakers and cookie enthusiasts: Are ginger snaps and molasses cookies essentially the same thing? While they undoubtedly share many fundamental similarities, particularly their reliance on the warm, spicy notes of ginger and the rich, deep sweetness of molasses, there’s a crucial distinction that primarily sets them apart: their texture. Understanding this difference is key to appreciating each cookie’s unique charm.
- Molasses Cookies: Our recipe, much like most traditional molasses cookies, aims specifically for a soft, pliable, and wonderfully chewy texture. These cookies are designed to bend rather than break, offering a delightful and satisfying resistance when you bite into them. Their moist interior and tender crumb are hallmarks of a well-made molasses cookie, creating a comforting mouthfeel.
- Ginger Snaps: As their very name suggests, ginger snaps are characteristically “snappier” and notably crisper in texture. They are typically baked for a longer duration and often contain a more potent amount of ginger, which contributes to both their bolder flavor and drier, crunchy consistency. When broken, a true ginger snap will audibly “snap,” distinguishing it clearly from its chewier cousin.
Surprisingly, despite these distinct textural profiles, both cookie recipes often call for a remarkably similar amount of molasses—usually hovering around 1/4 cup. The primary variance in their texture often comes down to other key ingredient ratios (such as the specific amounts of flour, fat, and leavening agents used), as well as significant differences in baking time and oven temperature. These subtle adjustments make all the difference between a tender, chewy molasses cookie and a crisp, snappy ginger snap.
Troubleshooting: Why Aren’t My Molasses Cookies Cracking?
Achieving those beautiful, hallmark crinkles on your molasses crinkle cookies is often seen as a badge of honor for any baker, indicating a perfectly executed recipe. If your cookies aren’t cracking as expected, don’t worry—there are a couple of common culprits you can easily identify and address to ensure your next batch is picture-perfect.
- Dough Consistency (Too Wet): The characteristic cracks on molasses cookies form as the outer surface of the dough dries out and sets faster than the interior, which continues to expand during baking. If your dough is too wet, it may not dry out sufficiently on the surface to create these distinct fissures. To prevent this, ensure you measure all your ingredients, especially the flour, with utmost accuracy. Using a kitchen scale for flour is highly recommended for precision, as scooping flour can inadvertently add too much. Too much liquid or too little flour can lead to a dough that spreads excessively without the necessary surface tension to crack.
- Dough Temperature (Too Warm): This is perhaps the most frequent reason for a lack of crinkles. As we’ve emphasized throughout our baking tips, the cookie dough *must* be thoroughly chilled when it goes into the oven. Warm dough will spread rapidly and thinly before the surface has a chance to set and crack, resulting in flat, un-crinkled cookies. The sudden and dramatic temperature change from cold dough hitting a hot oven is absolutely crucial for creating that desirable crinkled effect. Always make sure to keep your unbaked dough in the refrigerator, especially between baking batches, to maintain its cold temperature.
Storing and Freezing Your Delicious Molasses Cookies for Later Enjoyment
These chewy molasses cookies are so incredibly delicious, you’ll undoubtedly want to ensure they stay fresh for as long as possible, or save some for future enjoyment! Luckily, they store and freeze beautifully, making them an ideal make-ahead treat.
Storing Baked Molasses Cookies
Once your cookies have completely cooled to room temperature, store them in an airtight container. They will remain wonderfully fresh and chewy at room temperature for up to 5-7 days. To help maintain their signature softness and chewiness, a time-honored trick is to place a slice of plain bread (like white bread) in the container along with the cookies. The cookies will absorb moisture from the bread, helping them stay soft and tender. Remember to replace the bread slice every couple of days to keep it fresh.
Freezing Molasses Cookies (Baked or Dough)
Yes, molasses cookies freeze exceptionally well, whether they are already baked or still in dough form. This makes them a fantastic and convenient make-ahead option for busy holiday seasons or whenever a craving strikes!
- Freezing Baked Cookies: After your cookies have cooled completely, arrange them in a single layer on a baking sheet and flash freeze them for about an hour, or until they are solid. This crucial step prevents them from sticking together when stored. Once frozen, transfer the cookies to an airtight, freezer-safe container or a heavy-duty freezer bag. For best results, separate layers of cookies with parchment paper or wax paper to prevent any potential sticking. Baked molasses cookies can be stored in the freezer for up to 3 months without compromising quality. To enjoy, simply thaw them at room temperature for an hour or two, or gently warm them in the microwave for a few seconds to restore that delicious, fresh-baked warmth and chewiness.
- Freezing Raw Cookie Dough: If you prefer the aroma and taste of freshly baked cookies on demand, you can easily freeze the raw dough balls. After forming the dough into balls and rolling them in sugar as per the recipe instructions, arrange the sugared dough balls on a baking sheet and flash freeze them until they are firm. Once solid, transfer the frozen dough balls to a freezer-safe bag or container. They can be stored in the freezer for up to 3 months. When you’re ready to bake, you can bake them directly from frozen; just add an extra minute or two to the baking time. Keep in mind that baking from frozen dough may sometimes result in slightly less pronounced crinkles, but the flavor will remain absolutely fantastic!
Exciting Variations and Customizations for Your Molasses Crinkles
While this classic molasses cookie recipe is truly perfect as is, you can always experiment with slight variations to personalize them, cater to different tastes, or simply add a new and exciting twist. Customizing your molasses crinkles can be a fun way to make them uniquely yours!
- For the Extra Spice Lover: If you adore a bolder, more intense spice profile, consider slightly increasing the amounts of ground ginger, cinnamon, or cloves mentioned in the recipe. For even greater complexity and aromatic depth, you could also add a pinch of nutmeg, allspice, or a touch of cardamom to the dry ingredients.
- Decadent Chocolate Chip Addition: For a delightful and unexpected flavor combination, try folding in about a cup of mini chocolate chips or white chocolate chips into the cookie dough just before the chilling process. The richness of the chocolate pairs wonderfully with the warm spices of the molasses cookie.
- Elegant Molasses Glaze: For an extra touch of sweetness, shine, and sophisticated presentation, whisk together powdered sugar with a little additional molasses and a small amount of milk or cream to create a simple, pourable glaze. Drizzle this glaze artfully over the cooled cookies for a beautiful finish.
- Bright Citrus Zest: A teaspoon of finely grated orange zest or lemon zest, added to the dough along with the wet ingredients, can dramatically brighten the overall flavors. The vibrant citrus notes offer a refreshing contrast to the deep, warm spices, creating a wonderfully balanced taste.
Irresistible Serving Suggestions for Your Festive Molasses Cookies
These old-fashioned molasses cookies are incredibly versatile and are perfect for enhancing any occasion, especially during the joyous festive season. Their comforting flavor and chewy texture make them a welcome treat anytime.
- The Classic Pairing: Enjoy these cookies the traditional way: with a tall, frosty glass of cold milk, a warm cup of freshly brewed coffee, or a soothing mug of spiced herbal tea. The simple combination is always a winner.
- Elevate Your Holiday Platters: Arrange them beautifully on a festive holiday cookie platter alongside other seasonal treats. Their distinct appearance, with those beautiful crinkles, and their unique warm flavor make them an absolute standout among any assortment.
- Thoughtful Edible Gifts: Package your homemade molasses crinkles in decorative bags, boxes, or elegant tins for a thoughtful, heartwarming, and truly homemade holiday gift. Friends, family, neighbors, and colleagues will surely appreciate such a personal and delicious present.
- As Part of a Dessert Spread: Serve them as a key component of a larger dessert spread. They pair wonderfully with a scoop of creamy vanilla bean ice cream, a dollop of freshly whipped cream, or alongside a spiced apple crumble.
In conclusion, old-fashioned molasses cookies are truly the quintessential holiday cookie recipe. They are warm, inviting, and festive, offering a wonderfully chewy texture and a deep, comforting flavor that effortlessly evokes the peace and joy of cherished childhood Christmases. We are utterly confident that you are going to fall completely in love with this classic cookie recipe and make it a cherished and eagerly anticipated tradition in your home for many years to come!
More Delicious Christmas Cookie Recipes to Explore for Your Holiday Baking:
- Soft and Chewy Gingerbread Men Cookies
- Decadent Chocolate Peppermint Cookies
- Festive Christmas M&M Chocolate Chip Cookies
- Classic Peanut Butter Blossoms
- Irresistible Peppermint Double Chocolate Cookies
- Elegant Sugar Cookies with Royal Icing
Old Fashioned Molasses Crinkles
Sweet Basil
2 hrs
8 mins
2 hrs 8 mins
36 – 48 cookies
Ingredients
- 3/4 Cup Unsalted Butter, softened
- 1/2 Cup Brown Sugar, plus 1 tablespoon
- 1/2 Cup Sugar
- 1/4 Cup Molasses
- 1/2 teaspoon Vanilla Extract
- 1 Large Egg
- 1 Egg Yolk
- 2 1/3 Cups All-Purpose Flour
- 1 teaspoon Ground Cinnamon
- 1/2 teaspoon Ground Cloves
- 1 1/2 teaspoons Ground Ginger
- 2 teaspoons Baking Soda
- 1/2 teaspoon Salt
- 1/2 Cup Sugar, for rolling dough in
Instructions
-
In a bowl of a standing mixer, mix the softened unsalted butter, brown sugar, and granulated sugar for 2 minutes or until the mixture is smooth, light in color, and fluffy.
-
Add the molasses and vanilla extract, then beat until the mixture is smooth and fully incorporated.
-
Incorporate the large egg and egg yolk, mixing just until the egg is combined into the dough. Avoid overmixing at this stage.
-
In a separate medium bowl, whisk together the all-purpose flour, ground cinnamon, ground cloves, baking soda, ground ginger, and salt until well combined.
-
Gradually add the whisked dry ingredients to the wet ingredients in the stand mixer. Beat on low speed until everything is just smooth and fully incorporated. Do not overmix.
-
Scrape down the sides of the bowl to ensure all ingredients are mixed. Wrap the bowl tightly with plastic wrap.
-
Refrigerate the cookie dough for at least two hours. This is crucial for flavor development and achieving the signature crinkles.
-
Preheat your oven to 350°F (175°C). Line several baking sheets with parchment paper or silicone baking mats.
-
Scoop rounded tablespoons of the chilled dough into your hands and roll them into smooth balls.
-
Place the remaining 1/2 cup of granulated sugar in a shallow bowl. Roll each dough ball generously in the sugar, ensuring a complete coating. Place the sugared dough balls on the prepared baking sheet, leaving ample space between each.
-
Cover the baking sheet with plastic wrap and chill the dough balls again while you prepare the next pan. For best results and the deepest crinkles, an overnight chill at this stage is highly recommended.
-
Keep the main bowl of dough in the refrigerator between rolling and baking batches to ensure the dough remains chilled.
-
If you chilled the dough a second time, remove the balls from the fridge about 10 minutes before baking and roll them in sugar *again* for enhanced crinkles and sweetness (optional but recommended!). Place the prepared baking sheet into the preheated oven and bake for 8-10 minutes, or until cracks just begin to appear on the top of the cookies and the edges are lightly set. The centers should still look soft.
-
Remove the baking sheet from the oven and let the cookies rest on the counter for two minutes to set. Then, gently transfer them to a wire rack to cool completely.
-
Repeat the baking process with any remaining dough, always keeping unbaked dough chilled until ready for the oven.
Recipe Notes
Nutrition
Serving:
1g
Calories:
107kcal
Carbohydrates:
17g
Protein:
1g
Fat:
4g
Saturated Fat:
3g
Polyunsaturated Fat:
0.2g
Monounsaturated Fat:
1g
Trans Fat:
0.2g
Cholesterol:
20mg
Sodium:
98mg
Potassium:
52mg
Fiber:
0.3g
Sugar:
10g
Vitamin A:
132IU
Vitamin C:
0.003mg
Calcium:
12mg
Iron:
1mg
Nutrition information is automatically calculated, so should only be used as an approximation.