
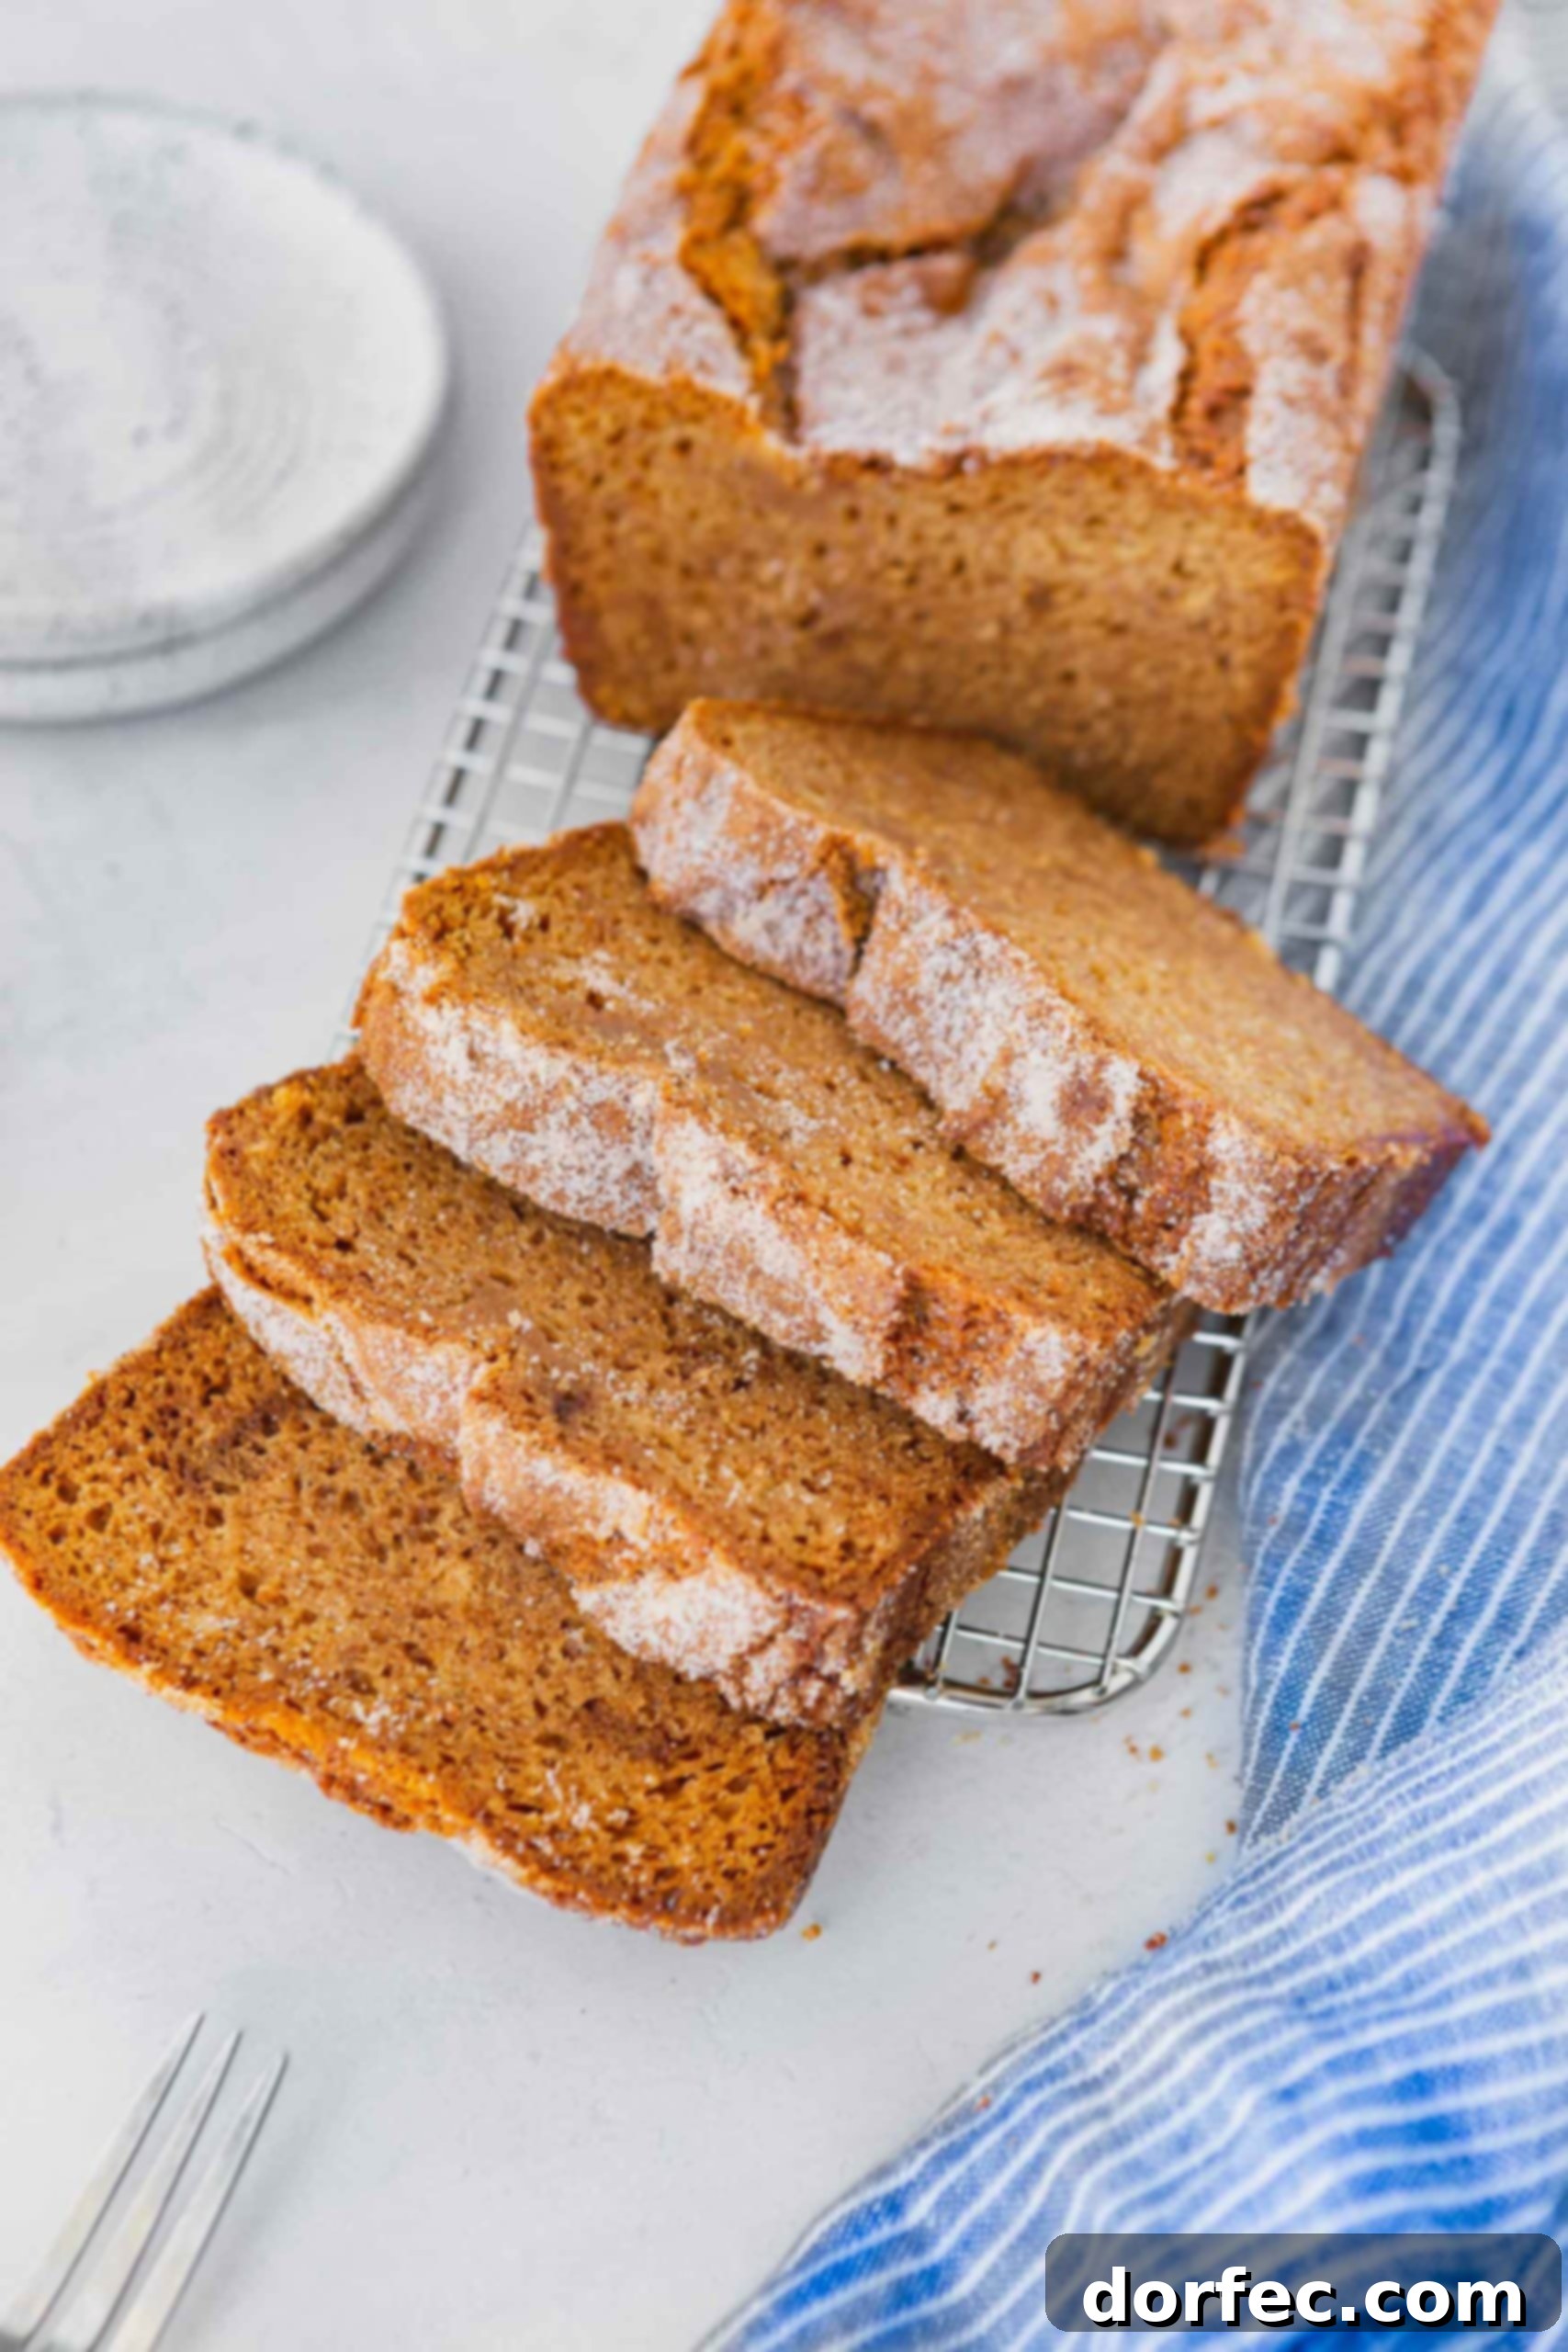
Amish Friendship Bread: A Timeless Tradition of Sweetness and Connection
There are recipes that simply taste good, and then there are those that weave themselves into the fabric of your memories, connecting you to loved ones and a sense of shared community. Amish Friendship Bread is unequivocally the latter. This delightful quick bread, with its irresistible cinnamon-sugar swirls, moist crumb, and fluffy texture, isn’t just a treat for your palate; it’s an invitation to partake in a beautiful, enduring tradition. It’s truly a labor of love that culminates in the most delicious loaves you’ll ever bake, destined to be savored and, even better, shared with friends.
For me, this bread embodies a cherished piece of my childhood. I vividly recall the excitement in elementary school when a gooey, mysterious Ziploc bag, accompanied by a handwritten slip of instructions, would arrive from my mom’s friend. My mom, ever the clever delegator, put me in charge of its daily care. Each morning, I’d eagerly squish the bag in my small hands, observing the starter’s subtle changes, occasionally adding the specified ingredients. Day by day, for an entire week, I nurtured that bag of magic, anticipating the moment it would transform into golden-brown loaves of cinnamon-scented perfection.
Sharing the Sweetness: The Heart of the Friendship Tradition
While indulging in the warm, fragrant bread was undoubtedly the best part, the true joy lay in the act of sharing. We would divide portions of the active starter, carefully packaging them with instructions, and distribute them to our friends and neighbors. It was a culinary chain letter, perhaps the only one I’ve ever willingly participated in (and unlike those frantic email chains of yore, there was no existential dread if you didn’t forward it within 20 minutes!). This tradition, steeped in generosity and connection, undoubtedly shaped my lifelong passion for sharing food.
Then, disaster struck. The recipe, a precious family heirloom, vanished. For years, I felt like a culinary Eeyore, lamenting its loss. I scoured the internet, pleaded with friends, and inquired with every acquaintance, but no one seemed to possess the coveted instructions for Amish Friendship Bread. The memory of its unique flavor lingered, a sweet ghost from the past, until one extraordinary day. I returned home from a meeting to find a familiar, comforting aroma wafting through the house. My dear friend, Brooklyn, had dropped off an infamous loaf – perfectly golden, glistening with cinnamon-sugar, and radiating warmth. I immediately, and perhaps a little too emphatically, requested the recipe. Brooklyn, with her perpetual sweetness and radiant positivity, graciously shared the secret, rekindling a beloved tradition in my home. And for that, I am eternally grateful.
What Exactly is Amish Friendship Bread?
At its core, Amish Friendship Bread is a type of **quick bread** made from a continuously fed **sourdough starter**. Unlike traditional sourdough that relies on natural fermentation from wild yeasts and bacteria, this starter is typically initiated with commercial yeast, then sustained through regular additions of flour, sugar, and milk. The “friendship” aspect comes from the cyclical nature of the process: you feed the starter for ten days, then use a portion of it to bake delicious loaves of cinnamon-sugar bread. The remaining starter is then divided and shared with friends, who, in turn, begin their own 10-day feeding cycle, bake bread, and continue the tradition by sharing with others. It’s a wonderful, edible network of kindness and community.
This bread offers a distinct flavor profile and texture that sets it apart. It’s incredibly moist, almost cake-like, with a tender crumb and a rich, sweet cinnamon flavor throughout. The 10-day process, while requiring patience, is surprisingly simple and becomes a comforting daily ritual. Whether your neighbors will greet you with open arms or playfully run in the opposite direction when they see you approaching with another bag of starter is part of the charm! We’ll guide you through every step, from creating and nurturing your starter to baking the perfect loaves and sharing the love with your community.
Essential Ingredients for Your Friendship Bread Journey
Embarking on the Amish Friendship Bread adventure requires two distinct sets of ingredients: those for building and maintaining your starter, and those you’ll need ten days later to transform a portion of that starter into heavenly bread. Gathering these essentials is the first step towards creating your own tradition.
For the Amish Friendship Bread Starter:
- Warm Water: Crucial for activating the yeast. Aim for a temperature between 110°-115°F (43°-46°C) – think warm bathwater, not scalding.
- Yeast: Instant yeast is generally preferred for its reliability and ease of use, but active dry yeast can also work, requiring a slightly longer proofing time.
- All-Purpose Flour: The foundational building block for your starter. Regular unbleached all-purpose flour works perfectly.
- Granulated Sugar: Feeds the yeast, encouraging fermentation and contributing to the starter’s activity and flavor.
- Milk: 2% milk is ideal for consistency and richness, but you can certainly use whatever milk you have on hand.
You will follow a precise 10-day schedule of feeding and gentle manipulation to cultivate this living starter before it’s ready to yield its first batch of delicious loaves.
For the Amish Friendship Bread Loaves:
- Amish Starter: The magical ingredient that gives the bread its unique texture and flavor.
- Vegetable Oil: Adds moisture and tenderness to the bread.
- Eggs: Provide structure and richness.
- Milk: Further contributes to the bread’s moistness and tender crumb.
- Vanilla Extract: Enhances the overall sweet flavor profile.
- Granulated Sugar: For sweetness and to feed the yeast in the starter during baking.
- Brown Sugar: Adds a deeper, caramelized note and extra moisture.
- All-Purpose Flour: The main dry ingredient for the bread structure.
- Salt: Balances the sweetness and enhances all the flavors.
- Baking Soda: A leavening agent that reacts with acidic components in the starter to create lift.
- Baking Powder: Another leavening agent for a light and airy texture.
- Ground Cinnamon: The signature spice, adding warmth and aroma.
- Instant Vanilla Pudding Mix: A secret ingredient that significantly boosts moisture and flavor, making the bread exceptionally tender.
- Cinnamon Sugar: For dusting the pans and topping the loaves, creating a beautiful, sweet crust.
Precise measurements for both the starter and the bread will be provided in the comprehensive recipe details at the end of this guide.
Mastering the 10-Day Starter Process
I know what you’re thinking: “Ten days to make bread? That’s a lifetime!” But trust me, the journey is just as rewarding as the destination. The beauty of Amish Friendship Bread lies in its simplicity and the daily connection you forge with your starter. It’s a wonderful project for teaching children patience and responsibility, as most days simply involve a quick “smoosh” of the bag. To help you stay on track, we’ve made a free printable guide for your convenience!
Creating and Nurturing Your Starter:
- Day 1: Activation. Begin by pouring warm water (110°-115°F) into a glass measuring cup. Sprinkle the yeast over the water along with a pinch of sugar. Stir gently and allow it to sit for 5-8 minutes. You’ll know it’s active when it becomes foamy and fragrant. In a larger glass or plastic bowl, combine the flour and the main portion of granulated sugar. Stir in the milk, then pour in your activated yeast mixture. Mix thoroughly until well combined. Once the mixture is bubbly, carefully transfer it into a gallon-sized Ziploc plastic bag and seal it. Place this bag on your kitchen counter at room temperature. Do NOT refrigerate. This day counts as Day 1 of your 10-day cycle. Many people find it helpful to write the daily schedule directly on the bag with a permanent marker.
- Day 2-5: The “Mash” Days. For these four days, your primary task is simple: “Mash the bag.” This means gently squishing and kneading the bag to mix the contents, ensuring the yeast remains active and evenly distributed. This step also releases gases produced during fermentation. Consistency is key here!
- Day 6: The First Feeding. On Day 6, your starter is hungry! Add 1 cup each of all-purpose flour, granulated sugar, and milk directly into the Ziploc bag. Seal the bag and mash it thoroughly until all the new ingredients are completely incorporated and the mixture is smooth. This feeding rejuvenates the yeast and allows your starter to grow.
- Day 7-9: More Mashing. Similar to Days 2-5, these days involve more gentle mashing of the bag. Continue to keep the starter at room temperature, allowing the fermentation process to continue.
- Day 10: Final Feeding and Division. On the final day, pour the entire starter mixture into a large glass or non-metal bowl. Add ½ cup each of all-purpose flour, granulated sugar, and 2% milk. Using a wooden spoon (avoid metal as it can sometimes react with the starter), mix everything together until well combined.
- Sharing the Starter. Now comes the exciting part: dividing the starter! Measure out 1-cup portions of the starter and place each into separate gallon-sized Ziploc plastic bags. You should have enough to make your own bread and create 2-3 bags to share. These new bags of starter are now considered “Day 1” for your friends. Provide each friend with a copy of the Amish Friendship Bread Printable instructions so they can begin their own journey. Keep one 1-cup portion for yourself to bake your bread!
Baking Your Perfect Loaves of Friendship Bread
After 10 days of nurturing your starter, the moment to bake arrives! If you’ve chosen to keep a cup of starter for yourself (which I highly recommend for instant gratification!), you’re just an hour of baking away from pure bliss. The recipe yields two wonderfully aromatic loaves.
Simple Steps to Delicious Bread:
- Preheat Your Oven. Set your oven to 325°F (160°C). This lower temperature helps ensure the bread bakes evenly without drying out.
- Combine Ingredients. In a large mixing bowl, add your 1 cup of Amish Starter along with all the remaining bread ingredients (flour, sugars, oil, eggs, milk, vanilla, salt, baking soda, baking powder, cinnamon, and instant vanilla pudding mix). Mix gently until just combined. Overmixing can develop the gluten too much, leading to a tough bread, so aim for a smooth batter without excessive stirring.
- Prepare Loaf Pans. Lightly spray two standard loaf pans with cooking spray. Then, dust the greased pans generously with half of your cinnamon-sugar mixture. This creates a delightful, slightly crispy, and sweet crust on the bottom and sides of your loaves.
- Fill and Top. Divide the batter evenly between the two prepared loaf pans. Sprinkle the remaining cinnamon-sugar mixture over the tops of both loaves. This not only adds flavor but also creates a beautiful, caramelized topping as it bakes.
- Bake to Perfection. Place the loaf pans in your preheated oven and bake for approximately 1 hour. The bread is done when a wooden toothpick inserted into the center of a loaf comes out clean. Baking times can vary slightly depending on your oven, so keep an eye on them towards the end.
- Cool and Serve. Once baked, remove the loaves from the oven and let them cool in their pans for about 10-15 minutes before carefully inverting them onto a wire rack to cool completely. Amish Friendship Bread is delicious warm, but also perfectly tender when fully cooled. Slice and enjoy!
All these instructions, for both the starter and the bread, are conveniently found in the recipe card below and in the Amish Friendship Bread Printable.
Freezing for Future Enjoyment
One of the many convenient aspects of Amish Friendship Bread is its freezer-friendliness. Both the active starter and the baked loaves can be frozen, allowing you to enjoy this delightful treat long after baking day.
Freezing the Starter: If you find yourself with more starter than you can immediately share or bake, you can easily freeze it. Simply place your 1-cup portion of starter in a freezer-safe Ziploc bag, squeeze out any excess air, and label it clearly with the date. The starter can remain viable in the freezer for years! When you’re ready to revive it, simply remove it from the freezer and let it come to room temperature on your counter. Once thawed, this counts as “Day 1” of the 10-day feeding cycle, and you can pick up the tradition right where you left off.
Freezing Baked Bread: To preserve the freshness of your baked Amish Friendship Bread, allow the loaves to cool completely before freezing. Once cooled, wrap each loaf tightly in plastic wrap, followed by a layer of aluminum foil. This double-wrapping method helps prevent freezer burn. Properly wrapped, the baked bread can be stored in the freezer for up to three months. To enjoy, simply thaw at room temperature or gently warm slices in the microwave or oven.
If you’re yearning for a deliciously moist, cinnamon-infused quick bread that embodies warmth, community, and connection, then Amish Friendship Bread is your answer. It’s more than just a recipe; it’s an opportunity to foster generosity and strengthen bonds, something we could all use a little more of these days. Imagine taking a bag of starter and a freshly baked loaf to a friend, along with the printable instructions. You’ll be initiating a wonderful wave of giving that can spread throughout your neighborhood!
More Delicious Quick Bread Recipes to Explore:
- Peanut Butter Banana Bread
- Glazed Poppy Seed Bread
- Classic Zucchini Bread
- Pumpkin Bread
- Snickerdoodle Bread
- Best Banana Bread Ever
Amish Friendship Bread
By Sweet Basil
Cook: 1 hr
Total: 10 days 1 hr 15 mins
Ingredients
Amish Friendship Bread Starter
- 1/4 Cup Warm Water
- 2 ¼ teaspoons Yeast
- 1 Cup All-Purpose Flour
- 1 Cup Sugar, + a pinch
- 1 Cup 2% Milk
Amish Friendship Bread
- 1 Cup Amish Starter
- 2 Cups Flour
- 3/4 Cup Sugar
- 1/2 Cup 2% Milk
- 3 Large Eggs
- 1 Cup Vegetable Oil
- 3/4 teaspoon Vanilla
- 1/4 Cup Brown Sugar
- 1/2 teaspoon Salt
- 1/2 teaspoon Baking Soda
- 1 1/2 teaspoon Baking Powder
- 2 teaspoons Cinnamon
- 2 Instant Vanilla Pudding, 3.4 ounce boxes
- 1/2 Cup Cinnamon Sugar
Instructions
For the Starter
- Pour the warm water into a small glass measuring cup. Sprinkle the yeast over the water along with a pinch of sugar. Let this stand for 5-8 minutes to allow it to dissolve and become foamy.
- In a larger glass or plastic bowl, mix together the flour and sugar. Stir in the milk and then the yeast mixture.
- Once the mixture is bubbly, pour it into a gallon-size Ziploc plastic bag and seal. Set aside on the counter. Do not refrigerate. Allow the sourdough mixture to sit out at room temperature.
- Write the 10-day schedule with a marker on the bag. This counts as Day 1.
- Day 2: Mash the bag.
- Day 3: Mash the bag.
- Day 4: Mash the bag.
- Day 5: Mash the bag.
- Day 6: Add 1 cup each of flour, sugar, and milk into the bag. Mash the bag until it is mixed well.
- Day 7: Mash the bag.
- Day 8: Mash the bag.
- Day 9: Mash the bag.
- Day 10: Pour the sourdough into a glass (or other nonmetal) bowl. Add 1/2 cup flour, 1/2 cup sugar, and 1/2 cup 2% milk. Mix well with a wooden spoon.
- Divide out 1-cup portions of the starter, placing each one-cup portion in separate Ziploc plastic bags.
- You’ll get about 3-4 bags. Seal the bags, and give the starter away to friends along with the instructions, keeping one for yourself if desired. The starter then goes back to Day 1 for your friends.
For the Bread
- Preheat the oven to 325°F (160°C).
- In a large bowl, combine all bread ingredients (1 cup Amish starter, flour, sugars, oil, eggs, milk, vanilla, salt, baking soda, baking powder, cinnamon, and instant vanilla pudding mix). Mix well, folding so as to not toughen the bread.
- Spray 2 loaf pans with cooking spray. Dust the greased pans with half of the cinnamon-sugar mixture.
- Pour the batter evenly into the pans and sprinkle the remaining cinnamon-sugar mixture over the batter.
- Bake for 1 hour or until a toothpick inserted into the center of the loaf comes out clean.
- Let the bread cool in the pans for 10-15 minutes, then invert onto a wire rack to cool completely before serving.
Recipe Notes
Nutrition
Calories: 2954kcal
Carbohydrates: 438g
Protein: 42g
Fat: 122g
Saturated Fat: 94g
Trans Fat: 1g
Cholesterol: 260mg
Sodium: 1065mg
Potassium: 1024mg
Fiber: 11g
Sugar: 262g
Vitamin A: 543IU
Vitamin C: 1mg
Calcium: 458mg
Iron: 11mg
Nutrition information is automatically calculated, so should only be used as an approximation.
If you loved this recipe, please consider leaving a comment below and sharing your experience!
For more easy and delicious recipes delivered to your inbox every day, remember to subscribe to our FREE Oh Sweet Basil NEWSLETTER.
When you try a recipe, please use the hashtag #ohsweetbasil on INSTAGRAM for a chance to be featured in our stories! FOLLOW OH, SWEET BASIL ON FACEBOOK | INSTAGRAM | PINTEREST | TWITTER FOR ALL OF OUR LATEST CONTENT, RECIPES AND STORIES.