
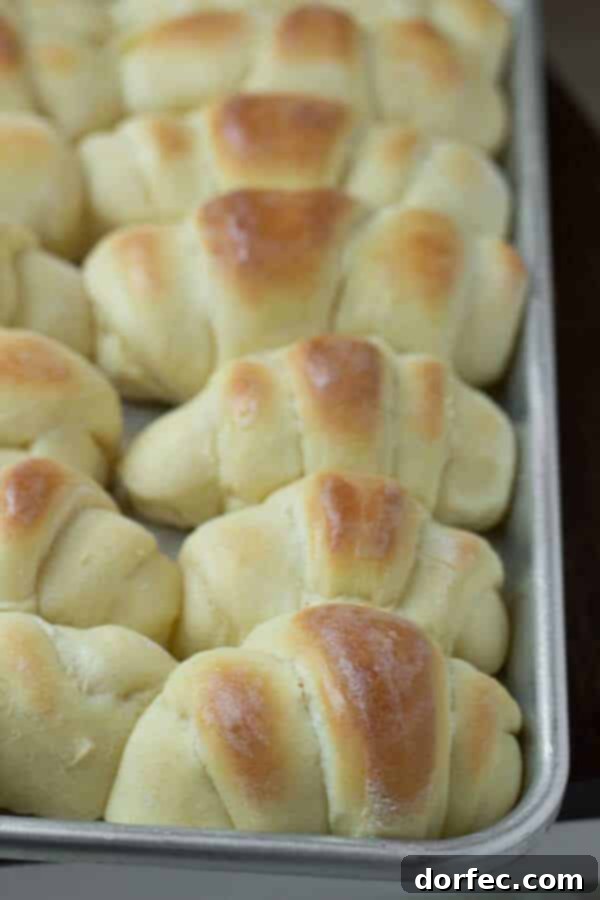
Discover the secret to the **world’s best homemade rolls recipe**, a culinary masterpiece that promises irresistible softness and a flavor that will captivate your taste buds. These aren’t just rolls; they’re an experience, often hailed as the most delightful homemade bread you’ll ever encounter. Prepare to transform your mealtimes with these incredibly fluffy, golden-brown wonders!
There’s a special kind of nostalgia associated with certain foods, isn’t there? For me, it harks back to childhood memories of seeing those captivating caramello bar commercials – the ones where the caramel stretched out in a mesmerizing, silky stream. Even as a little girl, I realized food wasn’t just about sustenance; it was about pure, unadulterated joy. That early realization helps explain my deep affection for rolls, especially those that boast an incredible, pillowy softness. I confess, I’m quite particular about my carbs, and only the most divine fluffy bread earns a permanent spot in my heart and on my plate.
While my potato rolls are undeniably heavenly, I’ve always yearned for a classic, foolproof homemade dinner roll recipe that delivers consistent perfection. After countless attempts and variations, I am thrilled to share what I truly believe is the ultimate recipe. These are not just soft homemade rolls; they are the epitome of what a perfect roll should be – tender, airy, and utterly delightful. This is truly the world’s best homemade rolls recipe, meticulously crafted to bring joy to your kitchen and your dinner table.
Why These Homemade Dinner Rolls Stand Out
What makes these dinner rolls truly special? It’s a combination of thoughtfully selected ingredients and a method that maximizes flavor and texture. Unlike many recipes that can yield dense or dry bread, this recipe consistently produces rolls that are incredibly soft and moist, with a delicate crust and a tender crumb. The inclusion of heavy cream, whole milk, and butter ensures a rich, indulgent flavor and an unparalleled fluffy texture that melts in your mouth. Whether served warm with a slather of butter or alongside a hearty meal, these homemade dinner rolls are guaranteed to impress.
Beyond their exceptional taste, these rolls are surprisingly easy to make, even for novice bakers. The steps are straightforward, guiding you through the process of creating beautiful, perfectly risen bread. The secret lies in giving the yeast ample time to activate and the dough sufficient time to rise, resulting in that coveted airy quality. Trust us, once you try this recipe, you’ll understand why it’s been crowned the world’s best homemade rolls recipe by everyone who tastes them.
Mastering Yeast: The Foundation of Fluffy Bread
Yeast is the living ingredient that brings bread to life, creating the light and airy texture we all love in fluffy dinner rolls. Understanding how to activate and work with yeast is crucial for successful homemade rolls. This recipe calls for instant dry yeast, which is convenient as it can often be mixed directly with dry ingredients. However, we take an extra step to ensure its vitality and kickstart the rising process by “proofing” it in warm water with a touch of sugar. This creates a foamy mixture, indicating that the yeast is active and ready to work its magic.
The temperature of the liquids is also key. Water that’s too hot will kill the yeast, while water that’s too cold won’t activate it effectively. Aim for water that feels like a warm bath (around 105-115°F or 40-46°C). The milk and butter mixture should also be cooled to lukewarm before combining with the yeast and egg mixture to prevent inhibiting yeast activity. These small details ensure your yeast performs optimally, leading to beautifully risen, soft homemade rolls every time.
Can Roll Dough Be Frozen for Later Use?
Absolutely! Freezing roll dough is a fantastic way to prepare ahead and enjoy fresh, homemade rolls whenever the craving strikes. This makes it incredibly convenient for holidays, potlucks, or busy weeknights. Here’s how to do it correctly:
- After the second rise (or even after the first, if you prefer smaller rolls), shape your kneaded yeast dough into individual rolls.
- Place the shaped rolls in a single layer on a baking sheet lined with parchment paper. Ensure they are not touching, as they will freeze individually.
- Freeze them uncovered for several hours until they are solid. This step prevents them from sticking together when stored.
- Once frozen solid, transfer the individual rolls to an airtight freezer bag or container. Label with the date.
- Frozen roll dough can be stored for up to 2-3 months without significant loss of quality.
When you’re ready to bake your frozen dough: Remove the desired number of rolls from the freezer and arrange them on a greased baking pan. Cover them loosely with a kitchen towel or plastic wrap (lightly greased on the underside to prevent sticking). Let them thaw and rise in a warm place for 3-5 hours, or until doubled in size, then bake as directed in the recipe. This method ensures you can enjoy delicious, soft dinner rolls with minimal effort on baking day.
How Long Do Freshly Baked Rolls Last?
Freshly baked dinner rolls are best enjoyed on the day they are made, still warm from the oven. However, if stored properly, these soft homemade rolls can maintain their deliciousness for several days. At room temperature, well-wrapped dinner rolls should stay fresh for 3-5 days. To maximize their freshness:
- Allow the rolls to cool completely after baking.
- Store them in an airtight container, a zippered storage bag, or wrapped tightly in aluminum foil or plastic wrap. This prevents them from drying out.
- Keep them away from direct sunlight or heat sources.
For longer storage, you can also freeze baked rolls. Once cooled, wrap individual rolls or small batches tightly in plastic wrap and then in aluminum foil, or place them in a freezer-safe bag. They can be frozen for up to 3 months. Thaw at room temperature and reheat as desired.
Reheating Your Delicious Dinner Rolls
There’s nothing quite like a warm roll, and reheating these homemade dinner rolls correctly will bring them back to their initial glory. Here are a couple of methods to achieve perfect warmth:
In the Oven (Recommended for Best Results):
- Preheat your oven to 350°F (175°C).
- If your rolls are large or slightly stale, you can lightly dampen them by sprinkling a few drops of water over them or wrapping them loosely in foil. This helps to re-moisturize the bread.
- Arrange the rolls in a baking dish or directly on a baking sheet.
- Bake for 7 to 10 minutes, or until they are thoroughly warm and soft to the touch. Keep an eye on them to prevent over-browning.
In the Microwave (Quick Option):
- This method is faster but can sometimes make rolls chewy if overdone.
- Place 1-2 rolls on a microwave-safe plate.
- Cover the rolls with a slightly damp paper towel. This helps to create steam and keep them moist.
- Microwave on high for 20-30 seconds. Check for warmth and microwave in 5-10 second intervals if needed.
Whether you choose the oven or microwave, a warm, buttery roll is just moments away!
The Ultimate Homemade Dinner Rolls Recipe
Ingredients
- 3/4 Cup Warm Water
- 2 teaspoons Sugar
- 4 1/2 teaspoons Instant Dry Yeast
- 1/4 Cup Heavy Cream
- 1/2 Cup Whole Milk, low fat is fine but not skim
- 1/2 Cup Unsalted butter, room temperature *see note*
*Remaining Ingredients*
- 1/2 Cup Sugar
- 3 Large Eggs
- 5 to 5 1/2 Cups Flour, all purpose
- 1 1/2 teaspoons Real Sea Salt, not kosher
- Canola Oil
- Extra Butter for after baking
Instructions
-
In a medium-sized bowl, combine the 3/4 cup warm water with 2 teaspoons of sugar and the instant dry yeast. Gently stir to dissolve the yeast.
-
Set this mixture aside in a warm spot for 5-10 minutes. You should see a foamy layer form on top, indicating that the yeast is active and ready to use. If it doesn’t foam, your yeast may be old or the water temperature was incorrect.
-
While the yeast is proofing, in a saucepan, combine the heavy cream, whole milk, 1/2 cup unsalted butter, and 1/2 cup sugar. Stir these ingredients together until well combined.
-
Heat the mixture over medium heat, stirring occasionally, just until foam begins to appear around the edges of the pan. It’s crucial not to let it boil, as boiling will scald the milk and change its properties.
-
Remove the saucepan from the burner and allow the mixture to cool to lukewarm. This is important to protect the yeast. You can speed up the cooling by placing the saucepan on a hot pad in the fridge, stirring frequently, and carefully monitoring the temperature until it reaches lukewarm.
-
Meanwhile, in a separate, large mixing bowl, lightly whisk the three large eggs until they are well blended.
-
Add one cup of all-purpose flour and the 1 1/2 teaspoons of real sea salt to the whisked eggs. Mix these ingredients thoroughly until a smooth batter forms.
-
Once both the scalded milk mixture and the yeast mixture have cooled to lukewarm and the yeast is foamy, carefully add them to the flour and egg mixture. Mix everything until just combined.
-
Continue adding an additional cup of flour, mixing until the dough starts to come together and pull away from the sides of the bowl. This indicates the gluten is developing.
-
Gradually add more flour, about 1/4 cup at a time, mixing well after each addition. Continue until the dough is no longer sticky to the touch but still yields slightly when lightly pressed with your finger. Avoid adding too much flour, as this can result in dry, dense rolls.
-
Lightly grease a small grocery or plastic bag with canola oil. Scrape the dough out of the bowl and into the greased bag. Twist the bag loosely at the top and tuck it underneath the dough. This creates a humid environment for rising.
-
Allow the dough to rise in a warm place for 45-60 minutes, or until it has doubled in size. This is the first rise.
-
Gently punch down the risen dough to release the air. Then, allow it to rise for an additional 45-60 minutes, or until doubled in size again. This second rise contributes to the light and airy texture of the soft dinner rolls.
-
Once the dough has completed its second rise, turn it out onto a lightly floured surface. Divide the dough in half. Roll one half into a large circle, approximately 1/4 to 1/2 inch thick.
-
Using a pizza cutter or sharp knife, cut the circle into 12 wedge-shaped pieces, like spokes on a wheel.
-
Starting from the wide end of each dough triangle, tightly roll it into a crescent shape.
-
Place the shaped rolls onto a greased cookie sheet, leaving some space between each roll for further rising.
-
Repeat the process with the remaining half of the dough. Once all rolls are shaped and on baking sheets, lightly cover them with a clean kitchen towel.
-
Allow the shaped rolls to undergo a final rise for 45 minutes to 1 hour, or until they appear noticeably puffy and almost doubled in size.
-
Preheat your oven to 375°F (190°C). Bake the rolls for 15-18 minutes, or until they are golden brown on top and cooked through.
-
Immediately after removing the hot rolls from the oven, brush them generously with a stick of melted butter. This adds flavor, shine, and extra softness. Serve warm and enjoy these truly amazing homemade rolls!
Recipe Notes
As mentioned earlier, these rolls are perfect for make-ahead baking. They can be shaped and then frozen after the first rise. To do this, freeze them on a cookie sheet until solid, then transfer them to ziploc bags for convenient storage in the freezer. When you’re ready to bake, simply remove them from the freezer, arrange them on a baking sheet, cover with a towel, and let them rise in a warm place until doubled in size before baking as directed. This flexibility makes them a staple for any home baker!
Nutrition
Nutrition information is automatically calculated, so should only be used as an approximation.
Serving Suggestions and Delicious Variations
These best homemade rolls are incredibly versatile and can be served in countless ways. Imagine them hot from the oven, split open and generously slathered with softened butter or homemade jam. They are the perfect accompaniment to any dinner, whether it’s a holiday feast, a comforting weeknight meal, or a backyard BBQ. Their rich flavor complements hearty stews, roasted meats, and fresh salads beautifully.
Feeling adventurous? Consider these delicious variations to customize your soft dinner rolls:
- Garlic Herb Rolls: Before baking, brush the tops of the rolls with melted butter mixed with minced garlic, fresh parsley, and a pinch of dried oregano.
- Cheese Rolls: Incorporate 1/2 to 1 cup of shredded cheddar or Parmesan cheese into the dough during the last stages of kneading.
- Sweet Rolls: For a touch of sweetness, add a teaspoon of cinnamon to the flour mixture, and after baking, drizzle with a simple glaze made from powdered sugar and milk.
- Savory Seed Rolls: Before the final rise, sprinkle the tops with sesame seeds, poppy seeds, or everything bagel seasoning.
No matter how you choose to enjoy them, these fluffy rolls are sure to become a beloved staple in your home.
Explore More Irresistible Roll Recipes
If you’ve fallen in love with making homemade rolls, there’s a whole world of delicious bread waiting for you to explore. Each recipe offers a unique flavor and texture profile, perfect for any occasion or craving. We encourage you to broaden your baking horizons and try these other fantastic roll recipes that have graced our kitchen:
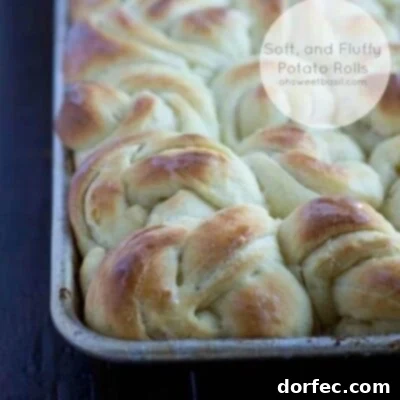
The Best Darn Potato Rolls
These potato rolls are incredibly moist and tender, thanks to the addition of mashed potatoes in the dough. They offer a unique depth of flavor and an unbelievably soft crumb that rivals any bakery roll. A must-try for those who appreciate extra tender bread.
 One Hour Rolls
Perfect for when you’re short on time but still crave the warmth and goodness of homemade bread. These one-hour rolls live up to their name, providing surprisingly soft and delicious results in a fraction of the time. Ideal for spontaneous meals or last-minute gatherings.
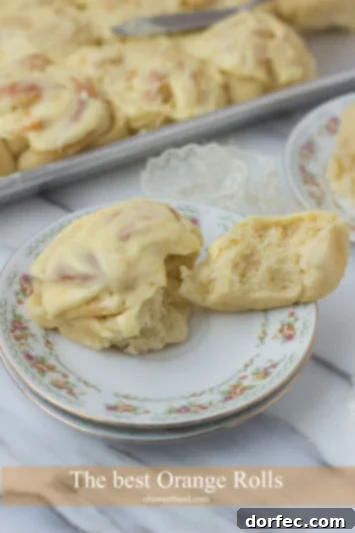
Orange Rolls
Infused with bright citrusy flavor and topped with a sweet, tangy glaze, these orange rolls are a delightful twist on classic dinner rolls. They make a fantastic brunch item or a special treat that’s bursting with sunshine. A true crowd-pleaser that adds a unique zest to any meal.