
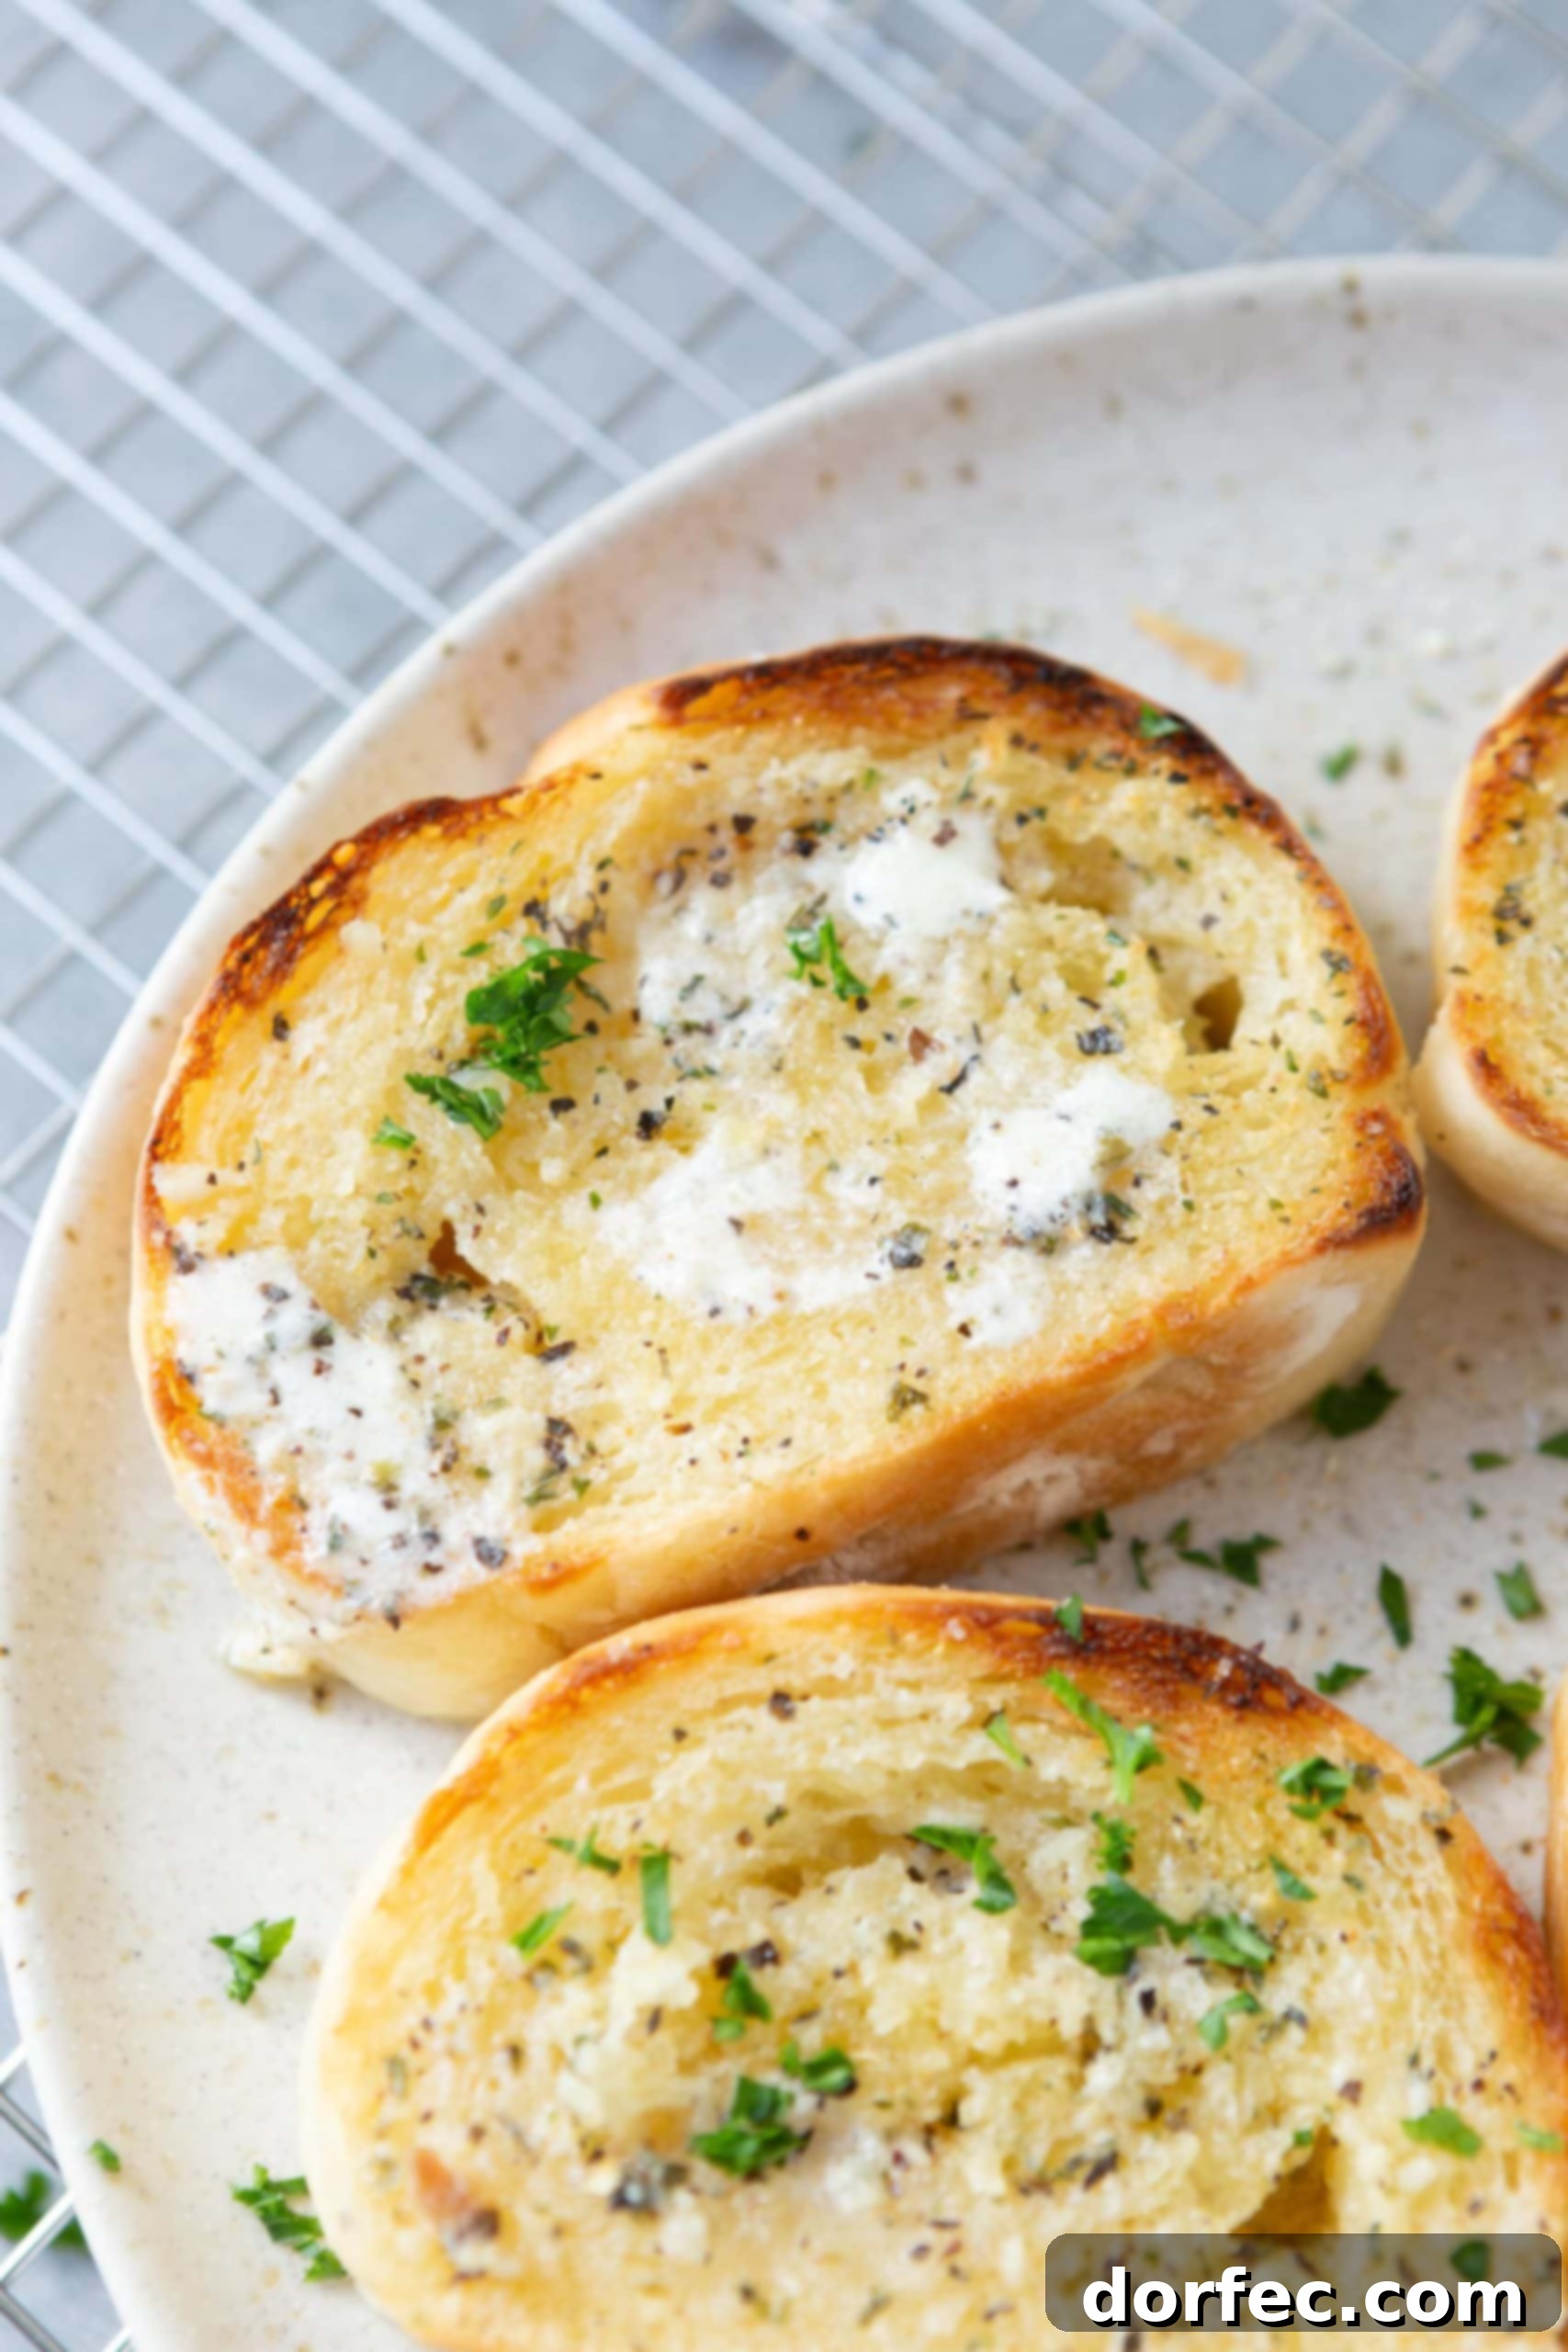
The Ultimate Homemade Garlic Bread Recipe You Can’t Resist
There are some culinary delights that simply transcend the ordinary, becoming an instant classic and a staple on any dinner table. Garlic bread is undoubtedly one of them. Imagine a slice of bread so perfectly golden, so rich with buttery, garlicky aroma, and so utterly delicious that it melts in your mouth with every bite. You know that kind of garlic bread – the one you can’t resist because it’s buttery, garlicky, and absolutely perfect? Well, this isn’t just a garlic bread recipe; this is the ultimate garlic bread recipe that will elevate your meals and leave everyone craving more. Forget mediocre, dry, or bland garlic bread; prepare to create a masterpiece that will become your signature side dish.
Why Homemade Garlic Bread Trumps All Others
While store-bought options offer convenience, nothing compares to the taste and aroma of freshly baked homemade garlic bread. When you make it yourself, you control the quality of ingredients, the intensity of the garlic, and the perfect texture. This recipe ensures a depth of flavor that pre-made versions simply cannot achieve. Plus, the process of baking garlic bread fills your kitchen with an inviting fragrance that signals comfort and deliciousness, making it an experience in itself.
Garlic bread is more than just a side; it’s a comforting companion to countless dishes, a crowd-pleaser at any gathering, and a simple pleasure that can transform an ordinary meal into something special. Whether you prefer it crispy with a satisfying crunch or soft and chewy with a tender interior, this recipe offers both options, ensuring everyone at your table finds their perfect slice.
Essential Ingredients for Unforgettable Garlic Bread
Crafting phenomenal garlic bread doesn’t require a complex list of ingredients or a trip to a specialty store. With just a few high-quality staples, you can achieve extraordinary results. The secret lies in the freshness and balance of these core components. If you have a fresh loaf of French bread ready, you only need three more simple yet powerful ingredients to unlock a world of flavor:
- French Bread: The foundation of our garlic bread. A good quality, fresh French baguette or loaf is crucial. Look for one with a slightly crusty exterior and a soft, airy interior. This provides the ideal canvas for absorbing all that rich garlic butter. You can even try making your own easy French bread for an extra touch of homemade goodness.
- Unsalted Butter: Butter is the heart of this recipe, providing richness, moisture, and that irresistible golden crisp. We recommend unsalted butter so you can control the overall sodium content and ensure the garlic and other flavors truly shine. Make sure it’s softened to room temperature for easy mixing.
- Fresh Garlic: The star of the show! Freshly minced garlic is non-negotiable for that pungent, aromatic kick. Avoid pre-minced jarred garlic if possible, as it often lacks the vibrant flavor of fresh cloves. Two cloves are a good starting point, but feel free to adjust to your personal garlic preference.
- Johnny’s Garlic Spread: This is our secret weapon, and trust us, it’s pure magic! Johnny’s Garlic Spread adds an incredible depth of flavor and a savory umami boost that takes this garlic bread from great to absolutely legendary. While we typically stock up on it at Costco, we’ve included an Amazon link for your convenience if you can’t find it locally. Its unique blend of herbs and spices complements the fresh garlic and butter beautifully.
- Fresh Parsley (Optional Garnish): A sprinkle of fresh chopped parsley not only adds a pop of vibrant color but also a fresh, herbaceous note that brightens the rich flavors. It’s the perfect finishing touch!
The exact measurements for each ingredient can be found in the comprehensive recipe card at the end of this post, designed to guide you through every step with precision.
How to Make Homemade Garlic Bread: Your Texture, Your Choice
When it comes to preparing your homemade garlic bread, you have a delightful decision to make: do you prefer a delightfully crispy, crunchy exterior, or a wonderfully soft and chewy texture? Both methods deliver incredible flavor, but cater to different preferences. My personal choice always leans towards the crispy and crunchy side, where each bite offers a satisfying crackle, but my girls absolutely adore the soft and chewy version. Let’s explore both fantastic techniques.
Method 1: Crispy and Crunchy Perfection
This method is ideal for those who love a golden, toasted crust that offers a delightful snap with every bite. The secret lies in a two-stage baking process that first warms the bread and melts the butter, then finishes with a quick broil for that coveted crispness.
- Prepare the Garlic Butter: In a small bowl, combine one stick of softened unsalted butter with two cloves of freshly minced garlic. Mix thoroughly until well combined. The softened butter ensures an even distribution of garlic flavor.
- Slice and Slather: Take your loaf of French bread and slice it into approximately 1-inch thick pieces. Generously slather each slice, butter side up, with the fragrant garlic butter mixture. Don’t be shy – the butter is what creates that incredible flavor and texture! After buttering, sprinkle a good amount of Johnny’s Garlic Spread over each slice.
- Initial Bake (Tent with Foil): Arrange the buttered and seasoned slices, butter-side up, on a baking sheet. Loosely tent the baking sheet with aluminum foil. This initial step allows the bread to warm through and the butter to melt and soak into the bread without browning too quickly, creating a tender base.
- Broil for Crispness: Once the bread is warmed and the butter has fully melted, carefully remove the foil. Change your oven setting to broil. Keep a very close eye on the bread during this stage, as broilers can vary greatly in intensity and garlic bread can go from perfectly golden to burnt in a matter of seconds. Broil for 1-3 minutes, or until the edges are beautifully browned and crispy.
- Finishing Touch: Immediately pull the baking sheet from the oven. For an extra layer of decadence (and because you can never have too much butter!), spread a tiny bit more butter over the warm slices, allowing it to melt into the hot bread. Finish with a sprinkle of fresh, chopped parsley for a burst of color and herbaceous freshness. Serve immediately and revel in the crispy, buttery, garlicky happiness!
Method 2: Soft and Chewy Indulgence
If you prefer a softer interior that’s still packed with garlicky flavor, this method is for you. By keeping the bread wrapped in foil for the entire baking process, you create a steaming effect that locks in moisture, resulting in a wonderfully tender and aromatic loaf.
- Prepare the Garlic Butter: Just as with the crispy method, combine one stick of softened unsalted butter with two cloves of freshly minced garlic in a small bowl. Mix well until everything is evenly incorporated.
- Halve and Slather: Instead of slicing the loaf, cut it in half lengthwise. This creates two large halves. Generously slather the cut sides of both halves with your prepared garlic butter mixture. Ensure every inch is covered to maximize flavor.
- Add the Secret Spread: Sprinkle both buttered halves with a liberal amount of Johnny’s Garlic Spread. This will infuse the bread with an unparalleled depth of savory goodness.
- Wrap and Bake: Carefully place the two buttered halves back together, with the seasoned sides facing each other. Wrap the entire loaf tightly in aluminum foil. This tight seal is crucial for creating that soft, steamy texture.
- Bake to Perfection: Place the wrapped loaf directly on the oven rack (or on a baking sheet if you prefer) and bake for 15-20 minutes at 350°F (175°C). The baking time allows the butter to melt completely and saturate the bread, while the foil keeps it moist and chewy.
- Serve Warm: Remove the loaf from the oven and carefully unwrap it (watch out for steam!). Let it cool for just a few minutes, then slice and serve. This soft and chewy garlic bread is particularly fantastic for dipping into sauces or soups!
Which delightful method will you try first? Both versions are absolutely delicious when dunked into a rich bowl of roasted tomato basil soup, or any of your favorite pasta sauces. The full detailed directions for both can be found in the recipe card below.
Make-Ahead and Freezing Tips for Ultimate Convenience
One of the many fantastic qualities of this garlic bread recipe is how well it lends itself to meal prep. You can easily prepare it in advance, saving you time and effort when you’re ready to bake. This makes it perfect for busy weeknights, holiday gatherings, or simply having a delicious side ready at a moment’s notice.
- Making Ahead (Refrigerated): To prepare garlic bread ahead of time, simply follow the steps for cutting and loading the bread with the garlic butter and Johnny’s Garlic Spread. Once assembled, wrap the prepared loaf tightly in plastic wrap. You can keep it at room temperature for up to 4-6 hours, or refrigerate it for up to 2-3 days. When you’re ready to bake, simply follow the instructions for your preferred method (crispy or soft) as stated in the recipe. If refrigerated, add a few extra minutes to the baking time to ensure it warms through completely.
- Freezing for Long-Term Storage: Garlic bread freezes exceptionally well, allowing you to have a delicious side ready for months! After preparing the bread with the garlic butter and spread, wrap it first in plastic wrap, then tightly in aluminum foil. This double layer protects against freezer burn. It will keep beautifully in the freezer for up to 3 months.
- Baking from Frozen: When you’re ready to enjoy your frozen garlic bread, there’s no need to fully thaw it. Simply pull the wrapped loaf (or slices) from the freezer and let it sit on the counter for about 30 minutes while your oven preheats. Then, bake as stated in the instructions for your chosen method. You might need to add an additional 5-10 minutes to the baking time, depending on how frozen it still is. The result will be just as fresh and flavorful as if you made it on the spot!
How to Reheat Garlic Bread Like a Pro
While garlic bread is always best enjoyed fresh out of the oven, sometimes you have leftovers (a rare but wonderful occurrence!). Reheating it properly is key to maintaining its texture and flavor. Avoid the microwave at all costs, as it tends to make garlic bread soggy and rubbery, stripping away its delicious qualities.
- Oven Method (Recommended): For best results, preheat your oven to 350°F (175°C). Wrap the leftover garlic bread slices or half-loaves tightly in aluminum foil. Place it directly on the oven rack and warm it for 10-15 minutes, or until heated through and the butter has re-melted. The foil helps to retain moisture, preventing it from drying out while keeping the crust somewhat crisp.
- Toaster Oven Method: For a few slices, a toaster oven works wonderfully. Preheat to 350°F (175°C) and place slices directly on the rack or on a small baking sheet. Bake for 5-8 minutes, keeping a close eye on it to prevent burning.
- Air Fryer Method: If you have an air fryer, it’s an excellent tool for reheating garlic bread quickly and efficiently. Place slices in a single layer in the air fryer basket (do not overcrowd). Air fry at 325°F (160°C) for 3-5 minutes, or until crispy and warm. Check frequently.
Storing Leftover Garlic Bread for Maximum Freshness
Proper storage ensures your garlic bread stays delicious for as long as possible. The goal is to keep it from drying out or becoming soggy.
Garlic bread is best stored at room temperature. Once completely cooled, place it in an airtight container or a plastic bag. This will keep it fresh and flavorful for 2-3 days. If you plan to keep it longer than a few days, your best bet is to place it in the freezer, as outlined in the make-ahead section above, and then reheat it following those instructions when you’re ready to enjoy it again. Avoid refrigerating garlic bread, as the cold temperature can dry it out and make it stale faster than at room temperature.
Elevate Your Garlic Bread: Delicious Variations
While our classic recipe is perfection, there’s always room to get creative and customize your garlic bread to suit your taste or complement a specific meal. Here are a few irresistible variations:
- Cheesy Garlic Bread Bliss: If you’re feeling extra wild and crazy (and undeniably smart!), adding cheese takes this garlic bread to a whole new level of indulgence. After slathering the bread with garlic butter and Johnny’s Garlic Spread, sprinkle generously with about 1 cup of shredded mozzarella and 1/4 cup of grated Parmesan cheese. The mozzarella adds gooey, stretchy goodness, while the Parmesan offers a salty, nutty bite. Bake as directed until the cheese is bubbly and golden brown. The result is pure garlic cheesy bliss!
- Herby Garlic Bread: Enhance the herbaceous notes by adding finely chopped fresh rosemary, thyme, or oregano to your garlic butter mixture. These herbs add a wonderful aroma and a deeper, more complex flavor profile.
- Spicy Garlic Bread: For those who love a bit of a kick, mix a pinch of red pepper flakes into your garlic butter. You can also sprinkle a little cayenne pepper or a dash of hot sauce before baking for an extra fiery twist.
- Lemon-Kissed Garlic Bread: A small amount of lemon zest mixed into the garlic butter can brighten the flavors beautifully, adding a subtle tangy freshness that cuts through the richness of the butter and garlic.
- Artisan Garlic Bread: Experiment with different types of bread! While French bread is classic, sourdough, ciabatta, or even a rustic Italian loaf can make excellent garlic bread, each offering a unique texture and flavor base.
What to Eat with Garlic Bread? The Perfect Pairings
The better question might be: what shouldn’t you eat with garlic bread? Because this versatile side dish truly goes with just about everything! Its rich, savory flavor and satisfying texture make it an ideal companion to a wide array of meals. Here are some of our absolute favorite pairings:
- Authentic Bolognese: The hearty, slow-cooked meat sauce finds its perfect match in warm, buttery garlic bread, ideal for soaking up every last drop.
- French Onion Soup: Elevate this classic comfort food by serving it with a side of crispy garlic bread instead of traditional croutons.
- Spaghetti Pie: A fun and flavorful twist on spaghetti, perfectly complemented by a savory slice of garlic bread.
- Pancetta Ravioli with Sun Dried Tomatoes and Spinach: The rich flavors of this pasta dish are beautifully balanced by the simplicity and robustness of garlic bread.
- Gnocchi Chicken Soup: A creamy, comforting soup that practically begs for a piece of garlic bread for dipping.
- Zuppa Toscana: The spicy, savory broth of this Tuscan soup is absolutely divine with a piece of chewy garlic bread.
- Any Pasta Dish: From simple marinara to creamy alfredo, garlic bread is the quintessential accompaniment to any pasta.
- Grilled Meats: Steak, chicken, or pork chops all benefit from the rich, savory addition of garlic bread.
- Salads: A crisp salad becomes a more substantial meal when served alongside warm garlic bread.
- Breakfast/Brunch: Yes, even breakfast! Garlic bread can be a surprisingly delicious accompaniment to eggs, especially if you enjoy savory breakfast options.
Truly, it goes exceptionally well with all soups, stews, and almost any Italian-inspired meal. Its versatility knows no bounds!
This, without a doubt, is the best garlic bread recipe you will ever make, and it truly couldn’t be any easier to prepare. As a self-proclaimed carb lover, I can attest that this bread is right at the top of my list of indulgences that are absolutely worth every single bite. The combination of rich butter, pungent garlic, and our secret ingredient creates an unparalleled flavor that will make this your go-to recipe for years to come. Prepare to impress your family and friends with this simple yet sensational side!
How to Make the Best Garlic Bread
5 mins
15 mins
20 mins
12 Slices
Ingredients
- 1 Stick Butter, unsalted, softened
- 2 Cloves Garlic, minced
- 1 Loaf French Bread
- Johnny’s Garlic Spread (to taste)
- Fresh Parsley, Chopped (for garnish)
Instructions
Crispy and Crunchy
- Preheat the oven to 350°F (175°C).
- Mix the softened butter and minced garlic together in a small bowl until well combined.
- Slice the French bread into approximately 1-inch thick slices. Generously slather each piece, butter side up, with the garlic butter. Then, sprinkle with Johnny’s Garlic Spread.
- Place each buttered slice, butter side up, on a baking sheet. Loosely tent the baking sheet with aluminum foil.
- Bake until the bread is warmed through and the butter has melted and started to soak into the bread.
- Remove the foil and turn the oven to broil. Broil for 1-3 minutes, keeping a very close eye on it, until the bread begins to brown and crisp up. Broiling happens quickly, so do not walk away!
- Remove from the oven, and for an extra touch of decadence, spread a little more butter on top and sprinkle with fresh chopped parsley. Serve immediately.
Soft and Chewy
- Preheat the oven to 350°F (175°C).
- Mix the softened butter and minced garlic together in a small bowl until well combined.
- Cut one loaf of French bread open lengthwise. Generously slather both halves with the garlic butter mixture. Then, sprinkle with Johnny’s Garlic Spread.
- Put the two halves back together with the buttered sides facing each other. Wrap the entire loaf tightly in aluminum foil.
- Place the wrapped loaf directly on the oven grate and bake for 15-20 minutes. (This is a favorite method for a tender, moist interior!)
- Remove from the oven and carefully open the foil (watch out for steam!). Let it cool for a few minutes, then slice for serving.
Nutrition
Serving: 1Slice
,
Calories: 165kcal
,
Carbohydrates: 19g
,
Protein: 4g
,
Fat: 8g
,
Saturated Fat: 5g
,
Trans Fat: 1g
,
Cholesterol: 20mg
,
Sodium: 238mg
,
Potassium: 47mg
,
Fiber: 1g
,
Sugar: 1g
,
Vitamin A: 235IU
,
Vitamin C: 1mg
,
Calcium: 18mg
,
Iron: 1mg
Nutrition information is automatically calculated, so should only be used as an approximation.
Enjoyed this recipe? Leave a comment below!
REMEMBER TO SUBSCRIBE TO our FREE Oh Sweet Basil NEWSLETTER AND RECEIVE EASY RECIPES DELIVERED INTO YOUR INBOX EVERY DAY!
When you try a recipe, please use the hashtag #ohsweetbasil on INSTAGRAM for a chance to be featured in our stories! FOLLOW OH, SWEET BASIL ON FACEBOOK | INSTAGRAM | PINTEREST | TWITTER FOR ALL OF OUR LATEST CONTENT, RECIPES AND STORIES.