
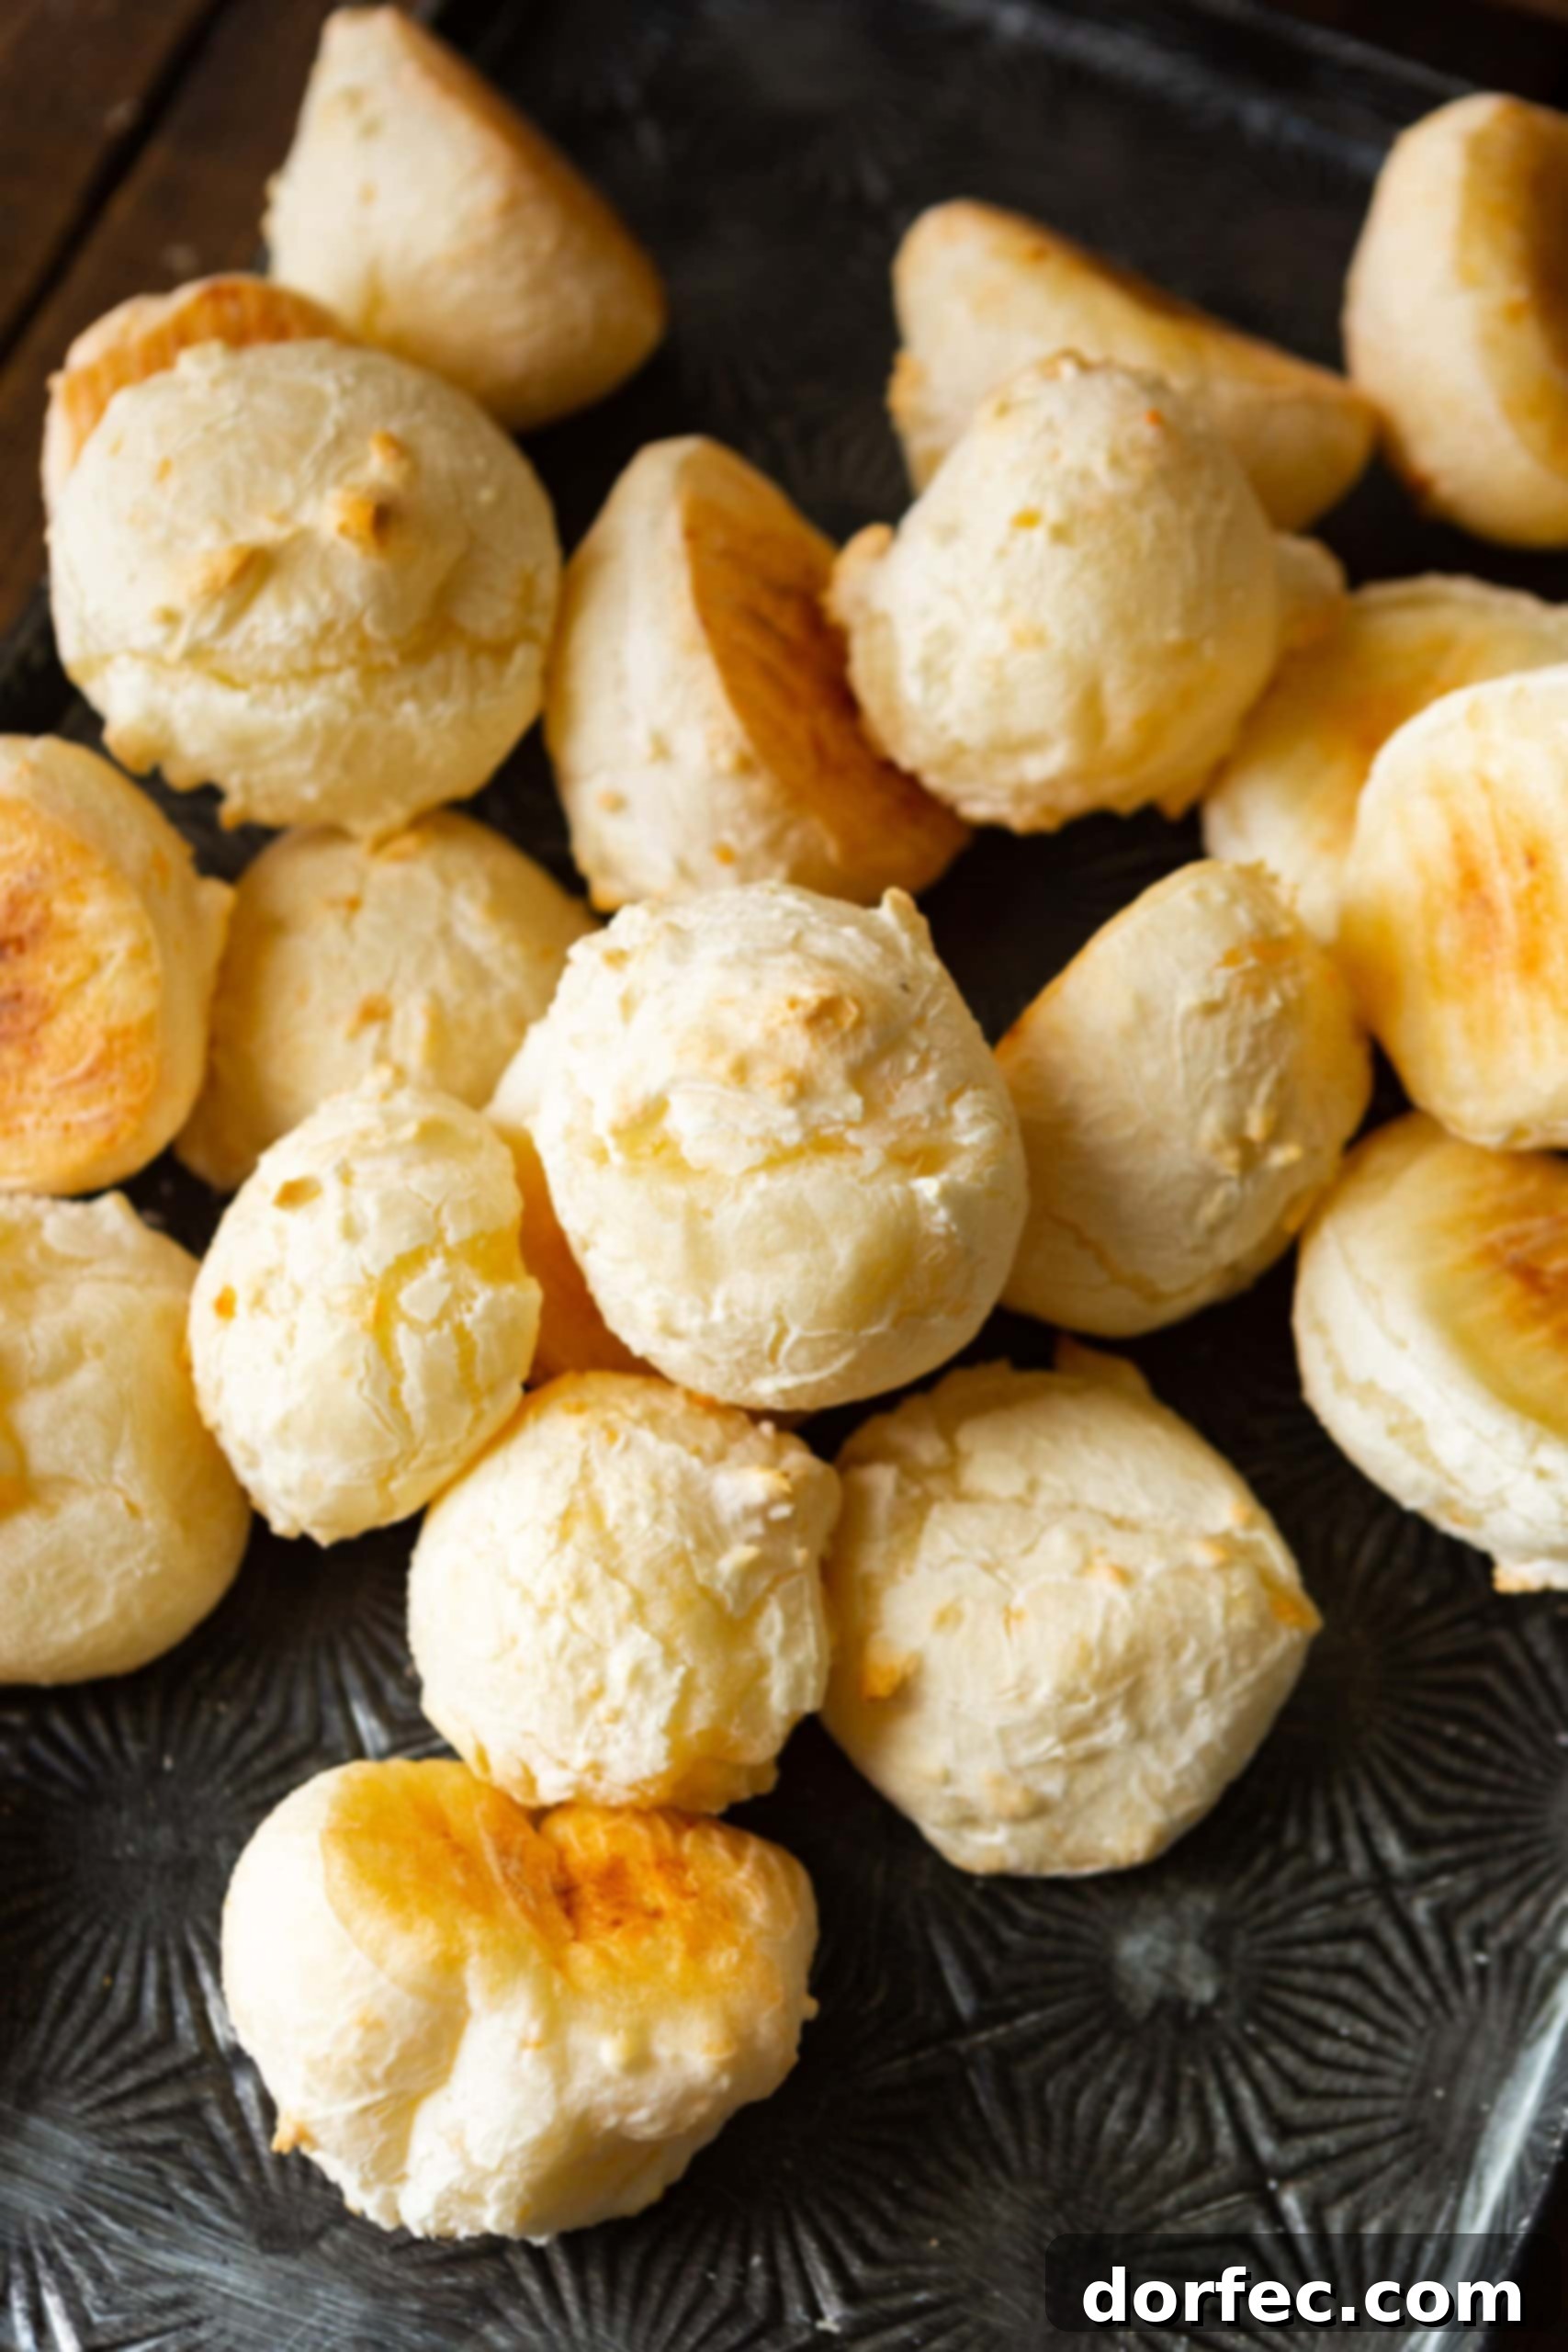
Craving a delightful, cheesy, and effortlessly gluten-free treat? Look no further than Pao de Queijo Brazilian Cheese Bread, a culinary gem from the heart of Brazil. This simple yet irresistible bread is a true masterpiece of texture and flavor, combining the unique qualities of tapioca flour with a sumptuous blend of Parmesan and Mozzarella cheeses. It’s a versatile snack that’s quickly gaining popularity worldwide, and for good reason!
One of the most appealing aspects of this incredible recipe is its straightforward process. Forget about lengthy preparation times, the fuss of yeast, or the patience required for dough to rise. Pao de Queijo goes from mixing bowl to oven, and then straight to your eager plate. This makes it an ideal choice for busy weekdays, spontaneous gatherings, or whenever a craving for warm, cheesy goodness strikes. Plus, these delectable bread rolls freeze exceptionally well, allowing you to prepare a batch in advance and enjoy freshly baked treats whenever you desire.
Imagine biting into a perfectly golden sphere: the exterior offers a delicate crispness, a satisfying whisper as you break through it, giving way to an interior that is astonishingly soft, delightfully chewy, and bursting with rich, melted cheese. It’s truly the epitome of cheesy bread perfection, promising a sensory experience that’s both comforting and exhilarating.
My family holds a cherished tradition every year: celebrating Cade’s birthday at Tucanos, a fantastic Brazilian restaurant renowned for its Churrasco-style dining experience. If you’ve never been, picture this: succulent meats carved directly from skewers at your table, a vibrant dance of flavors accompanied by the simple yet ingenious system of a wooden disc – green side up for “keep the food coming!” and red for “I need a moment to breathe!” It’s an absolutely amazing experience, full of lively atmosphere and unforgettable tastes.
Taking our kids to Tucanos is always a highlight. While it might not be quite the same as an authentic eatery found deep in Brazil, it’s the best we have around here, and it captures the spirit beautifully. The children especially adore when the drums come out, and everyone sings to Cade, making his birthday truly special. These traditions are more than just habits; they’re precious moments that weave the fabric of our family memories.
And, of course, no visit to a Brazilian restaurant would be complete without indulging in their Pao de Queijo. For years, I’ve been on a quest to replicate that irresistible taste and texture at home, meticulously tweaking and testing various recipes. Finally, after countless attempts, I’ve cracked the code! This recipe is the culmination of that journey, delivering the authentic flavor and satisfying chewiness I’ve been chasing. I simply can’t stop popping these little bundles of cheesy joy into my mouth!
What is Pao De Queijo? Unveiling Brazil’s Beloved Cheese Bread
Pronounced pow-du-KEH-zho, Pão de Queijo translates literally to “cheese bread.” This delightful delicacy is far more than just bread; it’s a staple in Brazilian culture, deeply embedded as a popular snack and breakfast item. It holds a place of honor at family tables, street vendors, and cafes across Brazil, cherished for its unique characteristics and versatile appeal.
While often compared to a French pâte à choux (like the dough used for éclairs or profiteroles) due to its airy, chewy interior, Pao de Queijo stands distinctly apart. The secret to its singular texture and naturally gluten-free nature lies in its primary ingredient: tapioca flour (also known as tapioca starch). Unlike traditional bread made with wheat flour, tapioca flour, derived from the cassava root, provides a wonderfully elastic, light, and chewy consistency that is completely unparalleled. This creates a small, spherical baked cheese roll that puffs up beautifully in the oven, achieving that perfect crispy crust and tender, cheesy heart. It’s truly a marvel of simplicity and deliciousness!
The Simple Ingredients for Authentic Pao de Queijo
One of the beauties of Pao de Queijo is that you don’t need an extensive list of exotic ingredients to create these irresistible cheese breads. The magic truly lies in a few key components that, when combined correctly, yield extraordinary results. Here’s a closer look at your essential shopping list and why each ingredient plays a crucial role:
- Tapioca Flour (or Tapioca Starch): This is the star of the show! Derived from the cassava root, tapioca flour is naturally gluten-free and is responsible for the signature chewy, elastic texture of Pao de Queijo. It’s not interchangeable with other flours if you want that authentic chew and gluten-free quality.
- 2% Milk: Provides moisture and helps create the rich, smooth dough base. Whole milk can also be used for an even richer flavor.
- Water: Balances the liquid content in the dough, contributing to the perfect consistency.
- Salt: Essential for enhancing the overall flavor of the cheese and the bread itself. Don’t skip it!
- Vegetable Oil: Adds richness and helps to create the characteristic crispy crust. A neutral oil like canola or sunflower oil works best.
- Parmesan Cheese (shredded): Brings a sharp, savory depth of flavor that is quintessential to Pao de Queijo. Freshly shredded Parmesan will always yield the best taste.
- Mozzarella Cheese (shredded): Contributes to the incredible meltiness and gooey, stretchy interior that makes these cheese breads so addictive. A good quality, low-moisture mozzarella is ideal.
- Eggs: Act as a binder, helping to emulsify the dough and providing structure as the bread bakes, contributing to its airy texture.
The complete recipe with precise measurements for each of these ingredients can be found in the detailed recipe card at the end of this post, ensuring you have everything you need for success.
Where Can I Find Tapioca Flour?
Thankfully, tapioca flour has become much more widely available due to the increasing popularity of gluten-free baking. You should be able to locate it easily at most major grocery stores. Typically, it’s stocked alongside other specialty flours, such as almond flour, coconut flour, and gluten-free blends. Brands like Bob’s Red Mill offer excellent quality tapioca flour that works wonderfully for this recipe. If you’re having trouble finding it in the flour aisle, sometimes it can also be found in the international foods section, particularly near Asian or Latin American ingredients, as it’s used in many cuisines.
Is There Something You Can Use Instead of Tapioca Starch?
While tapioca flour (or tapioca starch, which are essentially the same for this purpose) is truly key to achieving the authentic Pao de Queijo texture, there are some alternatives you can consider if you’re in a pinch. For every 1 1/2 teaspoons of tapioca starch, you can substitute with one tablespoon of arrowroot powder, cornstarch, or even regular all-purpose flour. However, it’s important to note that these substitutions will alter the final product. Arrowroot powder will give a slightly chewier result than cornstarch, but neither will fully replicate the unique elasticity and lightness that tapioca flour provides. Using all-purpose flour will make the bread no longer gluten-free and will result in a more traditional, bready texture rather than the distinctive chewy Pao de Queijo experience. For the most authentic taste and texture, sticking to tapioca flour is highly recommended.
Storing, Freezing, and Reheating Pao de Queijo: Your Guide to Enjoying Them Longer
One of the fantastic qualities of Pao de Queijo is how well it adapts to various storage methods, making it an excellent candidate for meal prep or enjoying fresh batches over time. Here’s a comprehensive guide to keeping your Brazilian cheese bread delicious:
Storing Baked Pao de Queijo:
To store your freshly baked Pao de Queijo, allow them to cool completely to room temperature. This is crucial to prevent condensation, which can make them soggy. Once cooled, transfer them to an airtight container or a resealable plastic bag (like a Ziploc). Store them in the refrigerator, where they will maintain their freshness and delightful texture for 4-5 days. For best results, consider a quick re-heat before serving.
Freezing for Future Enjoyment:
The ability to freeze Pao de Queijo is a game-changer! You can freeze either the unbaked dough balls or the baked rolls. Freezing the unbaked dough is particularly convenient: simply scoop the dough into small balls (using a cookie scoop for uniformity) and place them on a baking sheet lined with parchment paper. Ensure they are not touching each other to prevent them from sticking. Stick the entire baking sheet into the freezer for at least an hour, or until the dough balls are solid. Once frozen solid, transfer them to a freezer-safe resealable bag or container. They will keep beautifully for up to 2 months. When you’re ready to bake, preheat your oven to 400°F (200°C) and bake the frozen dough balls directly for 20-25 minutes, or until golden brown and puffed. There’s no need to thaw them first!
Alternatively, you can freeze fully baked and cooled Pao de Queijo. Place them in a single layer on a baking sheet and freeze until solid, then transfer to a freezer-safe bag. Reheat as per the instructions below.
Reheating for Freshness:
To reheat either refrigerated or frozen (and previously baked) Pao de Queijo, arrange them on a baking sheet. Place them in a preheated oven at 350°F (175°C) for approximately 8 minutes, or until they are warmed through and have regained their soft, chewy interior. This method will bring them back to their optimal texture and cheesy deliciousness, making them taste as good as freshly baked.
If you’re often swept away by cravings for those incredibly addicting little cheese breads, there’s absolutely no need to make a special trip to your nearest Brazilian restaurant. The truly wonderful news is that you can effortlessly make Pao de Queijo from scratch right in your own kitchen, and the process is surprisingly simple and incredibly rewarding! Imagine the aroma of freshly baked cheese bread filling your home, ready to be enjoyed any time you wish. Give this recipe a try and bring a taste of Brazil into your culinary repertoire!
More Delicious Brazilian Recipes to Try:
- Brazilian Smoked Tri Tip
- Brazilian Coconut Rice
- Torta de Limão (Brazilian Lemon Tart)
- Brazilian Burger (X-Tudo)
Pao De Queijo: Authentic Brazilian Cheese Bread
By Carrian Cheney
Prep Time: 20 mins
Cook Time: 30 mins
Total Time: 50 mins
Servings: 24 rolls
Pao De Queijo Brazilian Cheese Bread is a simple and cheesy gluten-free bread from Brazil. It’s made with tapioca flour and a mix of Parmesan and Mozzarella cheeses, offering a delightful crispy outside and a soft, chewy, cheesy inside.
Ingredients
- 4 Cups Tapioca Flour
- 1 ¼ Cups 2% Milk
- ½ Cup Water
- 2 teaspoons Salt
- 6 Tablespoons Vegetable Oil
- 2 Large Eggs
- 1 ¼ Cups Parmesan Cheese, shredded
- 1 ¼ Cups Mozzarella Cheese, shredded
Instructions
- Preheat your oven to 400°F (200°C). Prepare a baking sheet by lining it with parchment paper or lightly greasing it.
- In a large stand mixer fitted with a paddle attachment, add the tapioca flour.
- In a medium saucepan, combine the milk, water, salt, and vegetable oil. Bring this mixture to a rolling boil over medium-high heat.
- Once boiling, immediately remove the pot from the heat. With the mixer on low speed, slowly and carefully pour the hot liquid mixture into the tapioca flour. Continue mixing until the flour and liquid are thoroughly combined and resemble a thick paste.
- Add one large egg to the mixer and beat until fully incorporated and the dough is smoother. Then, add the second egg and mix again until the dough is uniformly smooth and elastic.
- Reduce the mixer speed to low and gradually add both the shredded Parmesan and Mozzarella cheeses. Mix until the cheeses are completely blended into the dough, forming a cohesive, sticky batter.
- Using a small cookie scoop (about 1-inch in diameter) that has been dipped in water to prevent sticking, scoop uniform balls of dough onto your prepared baking sheet. Leave some space between each ball as they will expand.
- Bake for 20 minutes, or until the Pao de Queijo are puffed up and golden brown on the outside. For an even chewier texture, you can choose to freeze the dough balls for a few hours before baking directly from frozen for 20-25 minutes.
- Serve your delicious Pao de Queijo warm, right out of the oven, for the best experience!
Recipe Notes
- Freezing Unbaked Dough: To freeze, scoop dough balls onto a baking sheet and freeze until solid. Transfer to a resealable bag and store in the freezer for up to 2 months. Bake directly from frozen at 400°F (200°C) for 20-25 minutes.
- Storing Baked Pao de Queijo: Store cooled, baked Pao de Queijo in an airtight bag or container in the refrigerator for up to 4-5 days.
- Reheating Baked Pao de Queijo: To reheat, place refrigerated or frozen (and previously baked) Pao de Queijo in a 350°F (175°C) oven for about 8 minutes, or until warmed through.
Nutrition
Serving: 1g, Calories: 117kcal, Carbohydrates: 18g, Protein: 4g, Fat: 3g, Saturated Fat: 2g, Polyunsaturated Fat: 1g, Monounsaturated Fat: 1g, Trans Fat: 1g, Cholesterol: 23mg, Sodium: 324mg, Potassium: 37mg, Sugar: 1g, Vitamin A: 120IU, Calcium: 109mg, Iron: 1mg
Nutrition information is automatically calculated, so should only be used as an approximation.
If you enjoyed this recipe, please consider leaving a comment below and sharing your thoughts! We love hearing from you and seeing your creations.