
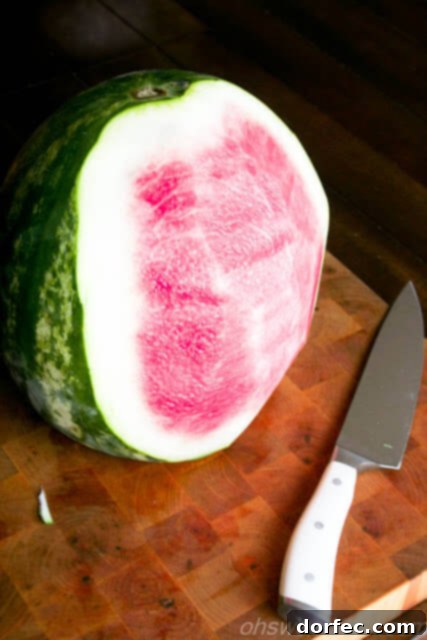
The Ultimate Guide to Perfectly Slicing a Watermelon: No More Mess, All the Sweetness
Ah, watermelon! The quintessential fruit of summer, synonymous with picnics, beach days, and refreshing treats. However, the joy of a juicy watermelon often comes with the dread of slicing it. For years, many of us have endured the awkward, messy, and often wasteful traditional method: hacking off large circles, attempting to painstakingly carve out the rind, and then clumsily chopping the remaining flesh. This archaic approach frequently results in uneven chunks, a significant loss of precious fruit clinging to the rind, and a sticky countertop that requires an immediate cleanup crew.
But what if there was a better way? A method so intuitive, so efficient, and so clean that it would revolutionize your fruit preparation forever? Prepare to have your watermelon-slicing world turned upside down! This guide will introduce you to a game-changing technique that not only minimizes waste and maximizes delicious, edible fruit but also simplifies the entire process, leaving you with perfectly cubed watermelon every single time. Get ready to impress your family and friends with uniform, bite-sized pieces that are ready for snacking, salads, or any culinary creation your heart desires.
The Game-Changing Method: Step-by-Step Watermelon Slicing Excellence
Forget everything you thought you knew about tackling this magnificent melon. This technique focuses on stability, precision, and efficiency, ensuring you get the most out of every watermelon you bring home. Let’s dive into the steps that will transform your fruit prep experience.
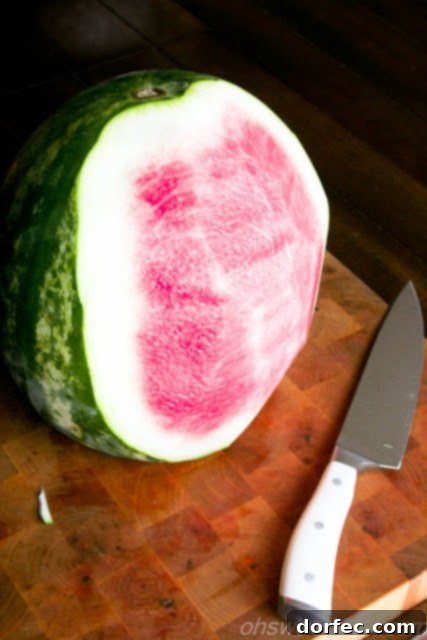
Step 1: Preparing Your Melon for Stability
The first and arguably most crucial step in achieving flawless watermelon cubes is ensuring a stable foundation. A wobbly melon on a cutting board is an accident waiting to happen, not to mention incredibly difficult to work with. To begin, place your watermelon on a large, sturdy cutting board. Using a sharp chef’s knife, carefully slice off about a half-inch to an inch from one of the watermelon’s ends. This creates a flat, stable base for the melon to rest on.
This simple act of creating a flat bottom vastly improves safety and control during the subsequent rind removal process. You’ll immediately notice how much easier it is to manage the watermelon once it’s no longer rolling or rocking on the board. Always ensure your cutting board is securely placed on a non-slip surface to prevent any mishaps.
Step 2: The Art of Rind Removal
With your watermelon now standing upright on its newly flattened base, it’s time to tackle the rind. This method approaches rind removal with precision, minimizing waste and leaving you with pure, unadulterated red flesh. Starting from the top of the melon, carefully slice downwards, following the natural curve of the fruit, peeling off strips of rind. Aim to remove just the green and white parts, leaving as much of the vibrant pink or red flesh intact as possible.
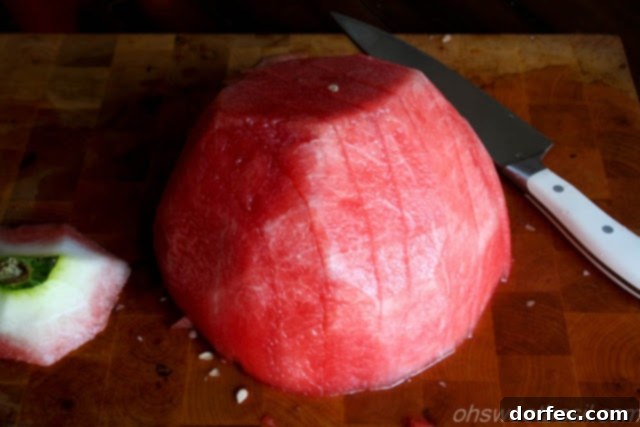
This step requires a steady hand and a keen eye. Think of it like peeling an apple, but on a much larger scale. As you slice, guide your knife along the contour where the green rind meets the pink flesh. Don’t be afraid to take slightly thicker slices if you’re new to this; practice makes perfect, and you’ll quickly develop a feel for the optimal depth. Continue this process all the way around the melon, rotating it as you go, until it is completely “bald” – meaning all the green and white rind has been removed, revealing only the glorious, edible flesh.
The beauty of this technique is that it virtually eliminates those annoying white bits that often cling to conventionally sliced watermelon. You’ll find yourself with a beautifully rounded, pure watermelon core, ready for the next phase. Take your time, focus on smooth, continuous strokes, and let the knife do the work.
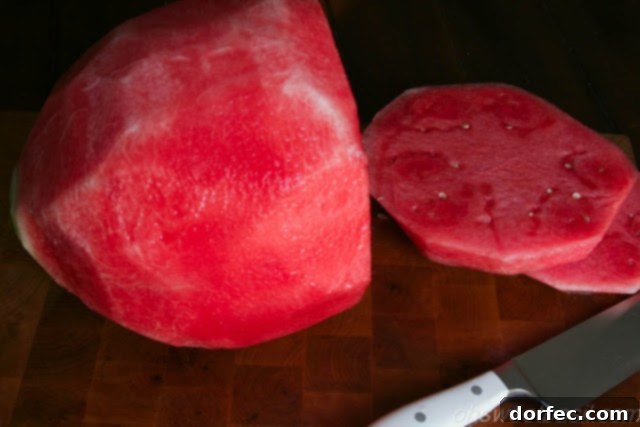
Step 3: Transforming into Manageable Discs
Once your watermelon is completely rind-free, gently lay it on its side on the cutting board. Now, using your sharp chef’s knife, begin slicing the melon into evenly thick discs or rings. The thickness of these rings will ultimately determine the size of your watermelon cubes, so aim for consistency – usually around 1 to 1.5 inches thick is ideal for standard bite-sized pieces.
Stack these circular slices neatly as you cut them. This makes the subsequent cubing step much more efficient and straightforward. Cutting the melon into rings creates flat surfaces that are much easier to work with than a whole, slippery sphere. This stage truly sets the foundation for perfectly uniform cubes, ensuring every piece is a consistent delight.
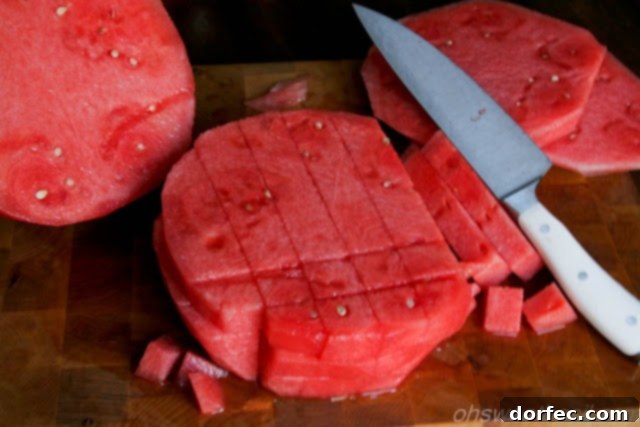
Step 4: Effortless Cubing
With your stack of watermelon rings, the cubing process becomes incredibly simple. Take a few rings at a time, or even the entire stack if it’s stable enough, and lay them flat on your cutting board. First, make vertical slices across the stacked rings. The spacing of these slices will determine one dimension of your cubes. For instance, if you want 1-inch cubes, make slices 1 inch apart.
Once you’ve made your vertical cuts, rotate the stacked slices 90 degrees. Now, make horizontal slices across the previous cuts, again maintaining consistent spacing. As your knife passes through, you’ll see perfectly formed watermelon cubes emerging! This method allows you to cube large quantities of watermelon in a fraction of the time it would take with traditional approaches, all while maintaining perfect uniformity.
Step 5: Perfecting the End Pieces
As you work through your watermelon, you’ll eventually reach the end pieces – the top and bottom sections that were initially flattened. These might be a bit more irregular than the central rings, but they can still be easily cubed. Take these thicker, often half-moon-shaped pieces and lay them flat on the cutting board. If they are too thick, you can carefully slice them in half horizontally to create thinner, more manageable layers.
From these flattened sections, proceed to slice vertically and horizontally, just as you did with the main rings. The goal is to maximize the edible fruit and minimize waste. By breaking down these end pieces into smaller, flatter sections, you can achieve uniform cubes even from the trickiest parts of the melon. Once all your delicious watermelon has been cubed, transfer it to a large bowl or airtight container, ready for enjoyment.
Why This Watermelon Slicing Technique Reigns Supreme
This innovative method offers a multitude of benefits over older, less efficient approaches. Firstly, it significantly reduces waste. By precisely removing the rind, you leave very little flesh attached, ensuring you get the most out of every melon. Secondly, it provides unparalleled uniformity. Every cube is roughly the same size, making it not only aesthetically pleasing for presentation but also perfect for eating, whether by fork, toothpick, or simply by hand.
Beyond aesthetics, this method is remarkably cleaner and safer. By creating a stable base and removing the rind before cubing, you minimize the mess and the risk of the knife slipping. The entire process becomes more controlled and less frustrating, transforming a once daunting task into a simple, enjoyable part of meal prep. Say goodbye to sticky countertops and hello to perfectly prepared watermelon!
Pro Tips for Watermelon Enthusiasts
Choosing the Perfect Watermelon
The best slicing technique starts with the best watermelon. Here’s how to pick a winner:
- Look for a Yellow Spot: This indicates where the watermelon rested on the ground and ripened in the sun. A creamy yellow spot means it’s ripe and sweet.
- Heavy for its Size: A good watermelon should feel heavier than it looks, indicating a high water content and juiciness.
- Dull Appearance: A shiny watermelon usually means it’s underripe. Look for a dull, matte finish.
- Tap Test: Give it a good thump! A ripe watermelon should produce a deep, hollow sound. If it sounds dull, it might be overripe or mushy.
Essential Tools for the Job
Having the right equipment makes all the difference:
- Sharp Chef’s Knife: A large, sharp knife is crucial for safety and efficiency. A dull knife is more likely to slip.
- Large, Sturdy Cutting Board: Ensure it’s big enough to accommodate the entire watermelon and won’t slip on your counter.
- Large Bowl or Container: For collecting your perfectly cubed watermelon.
Storage and Longevity
Once sliced, watermelon needs proper storage to maintain its freshness. Store cubed watermelon in an airtight container in the refrigerator. It typically stays fresh for 3-5 days. If you’ve only cut a portion of the melon, cover the cut surface tightly with plastic wrap before refrigerating the remainder.
Beyond Cubes: Creative Ways to Enjoy Your Watermelon
While perfectly cubed watermelon is fantastic on its own, its versatility extends far beyond a simple snack. Here are a few ideas to get you started:
- Watermelon Feta Salad: Combine cubes with feta cheese, fresh mint, and a drizzle of balsamic glaze for a refreshing sweet and savory dish.
- Refreshing Smoothies: Blend watermelon with other fruits, a splash of coconut water, and a squeeze of lime for a hydrating drink.
- Grilled Watermelon: A surprisingly delicious treat! Grill thick slices for a few minutes per side to caramelize the sugars, then serve with a sprinkle of salt.
- Watermelon Salsa: Dice finely with red onion, jalapeño, cilantro, and lime juice for a vibrant accompaniment to grilled fish or chicken.
- Frozen Watermelon Pops: Blend and pour into popsicle molds for a healthy, cooling summer treat.
- Watermelon Juice or Agua Fresca: Simply blend and strain for a pure, refreshing juice, or add a touch of sugar and lime for a Mexican-inspired beverage.
Safety First: A Gentle Reminder
Always prioritize safety when working with knives, especially with large, round fruits. Ensure your knife is sharp, your cutting surface is stable, and you maintain focus on the task at hand. If you’re new to knife skills, take it slow and always cut away from your body. The goal is delicious watermelon, not emergency room visits!
Gone are the days of wrestling with a giant, slippery watermelon. This revolutionary slicing technique promises not just perfectly cut fruit, but also a more enjoyable, less wasteful, and safer kitchen experience. Embrace this method, and you’ll find yourself reaching for watermelons more often, confident in your ability to transform them into delightful, ready-to-eat cubes. So grab your sharpest knife, pick a beautiful melon, and get ready to enjoy the sweet taste of success!