
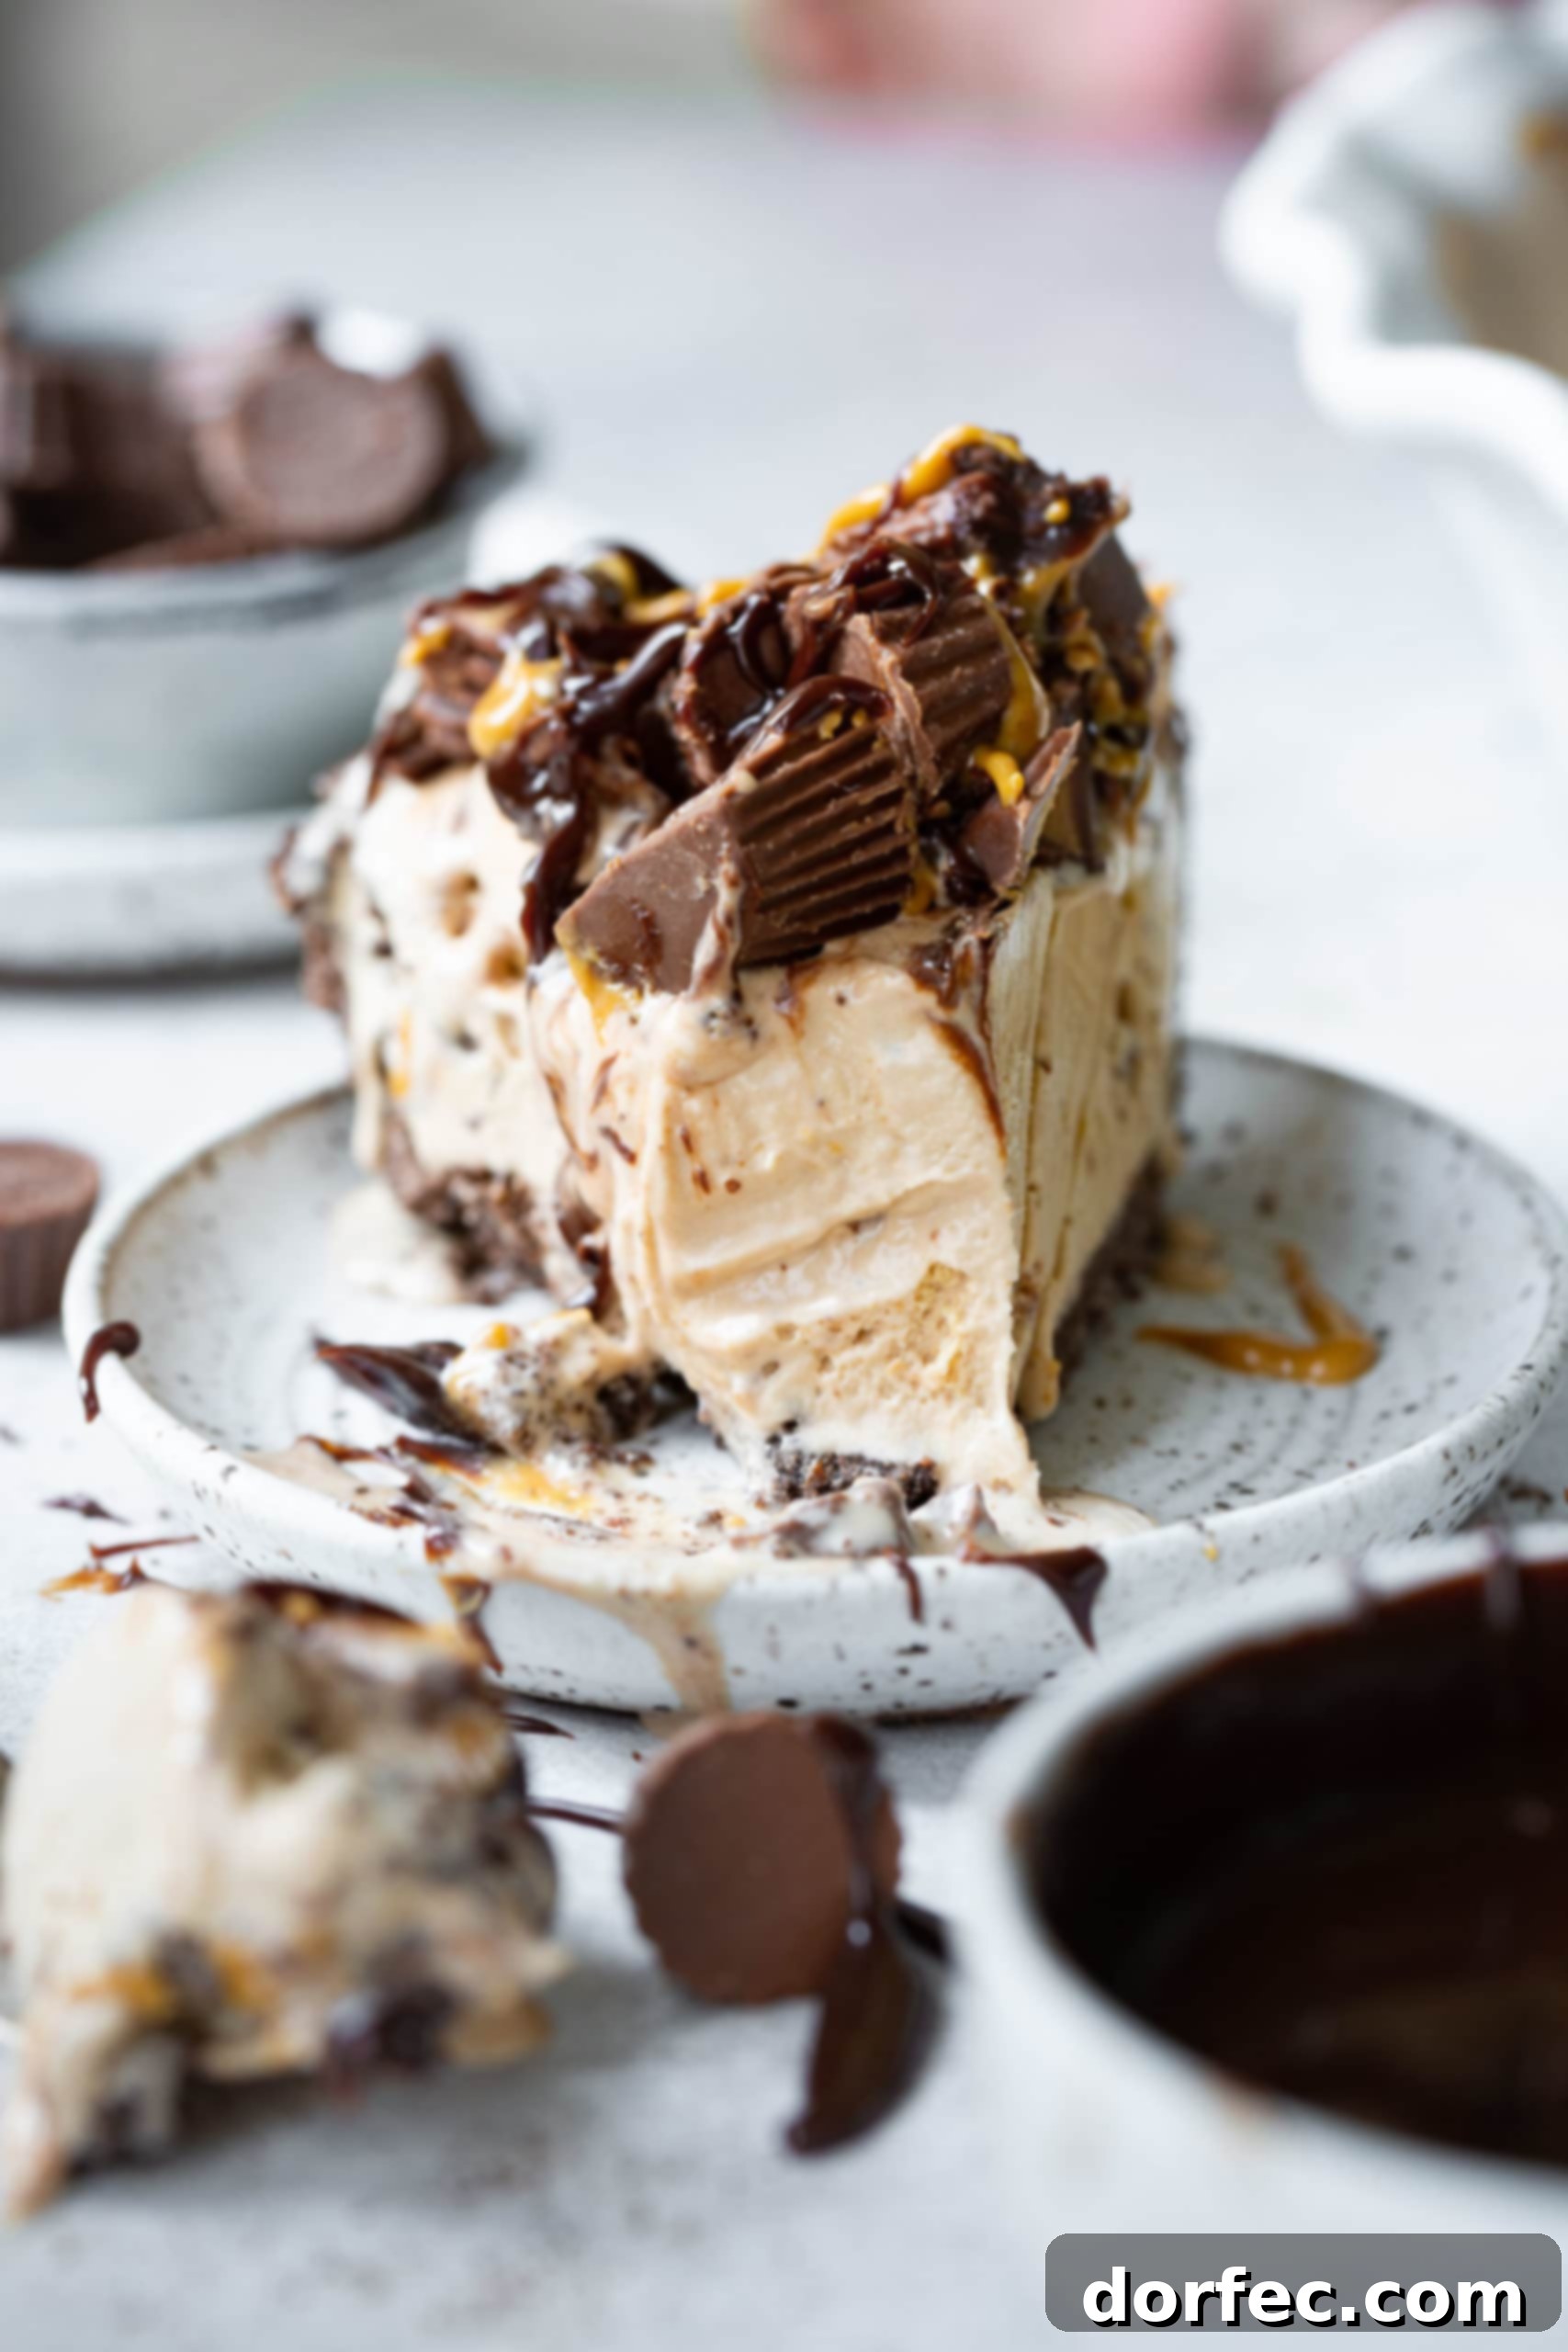
For those sweltering summer days or cozy winter evenings, this incredible Reese’s Ice Cream Pie with its rich chocolate crust is an absolute dream to prepare – incredibly easy and entirely stress-free! It’s the ultimate dessert for any occasion, combining two universally loved flavors: creamy peanut butter and decadent chocolate.
I must confess, I’m not the biggest ice cream enthusiast myself – perhaps a little un-American, I know! However, I’m married to one, and our children fall somewhere in between. After the overwhelming success of our beloved peanut butter pie recipe, my kids naturally requested an ice cream variation. Given that it closely resembled the ice cream cakes we used to make (minus the brownie base), I decided to embrace the challenge. The result was nothing short of spectacular, proving that even a non-ice-cream-lover can be completely won over by this delightful creation.
To my surprise, it was our youngest, Grayson, who couldn’t get enough, devouring slice after slice! I fully expected him to feel a little unwell, but alas, this child is utterly unfazed by ice cream! It just goes to show how universally appealing this dessert truly is. It’s a testament to the irresistible combination of flavors and textures that make this pie an instant family favorite.
This magnificent pie features luscious peanut butter chocolate ice cream, generously studded with an abundance of Reese’s candies, all piled high within a crunchy chocolate graham cracker pie crust. But here’s the best part: this recipe is incredibly flexible, allowing you to customize it to your heart’s content! Feel free to experiment with different toppings, ice cream flavors, or even crust variations to make it uniquely your own. It’s designed for maximum enjoyment with minimal effort.
Why This Reese’s Ice Cream Pie Is Your Next Must-Make Dessert
Beyond its undeniable deliciousness, this Reese’s Ice Cream Pie offers several compelling reasons to add it to your dessert repertoire. First and foremost, its simplicity is unmatched. You won’t find yourself wrestling with complicated techniques or a lengthy list of obscure ingredients. This recipe is designed for ease, making it perfect for novice bakers and seasoned dessert makers alike. It requires no baking expertise beyond preparing a simple crust, and even that can be expedited with a store-bought option if time is truly of the essence.
Secondly, it’s a guaranteed crowd-pleaser. The combination of chocolate and peanut butter is a classic for a reason, appealing to almost every palate. Whether you’re hosting a summer barbecue, a holiday gathering, or simply want to treat your family to something special, this pie will undoubtedly be a hit. Its vibrant flavors and delightful textures create a memorable dessert experience that guests will rave about long after the last slice is gone.
Finally, the versatility of this pie allows for endless customization. While we adore the classic Reese’s combination, the base recipe is robust enough to handle various modifications. You can swap out ice cream flavors, experiment with different types of chocolate or candy for toppings, or even explore alternative crust options. This adaptability ensures that the Reese’s Ice Cream Pie can be tailored to suit specific dietary preferences or simply satisfy a craving for something a little different, making it a truly dynamic and indispensable dessert recipe.
Essential Ingredients for Your Dreamy Reese’s Ice Cream Pie
The beauty of this peanut butter ice cream pie lies in its simple yet impactful ingredients, all harmoniously blending around the divine pairing of chocolate and peanut butter. This flavor combination is, quite frankly, what dreams are made of! We’ll guide you through each component, from the foundational crust to the glorious, candy-laden topping. Rest assured, all these ingredients are readily available at most local grocery stores, making your dessert-making journey even smoother.
For the Irresistible Chocolate Crust
- Chocolate Graham Cracker Crumbs: These form the backbone of our pie. You can easily create them by crushing chocolate graham crackers in a food processor for a fine, uniform crumb, or for a more hands-on approach, place them in a ziploc bag and use a rolling pin to achieve your desired texture. This ensures a fresh, flavorful base.
- Melted Butter: The melted butter acts as the binding agent, holding the graham cracker crumbs together to form a firm, delicious crust. It also adds a rich, buttery depth that complements the chocolate perfectly.
- Sugar: A touch of granulated sugar enhances the sweetness of the chocolate graham cracker crumbs, creating a balanced flavor profile for the crust that isn’t overly sweet but perfectly satisfying.
- Hot Fudge Sauce: This is a secret weapon! A layer of warm hot fudge spread over the baked crust before freezing adds an extra dimension of chocolate flavor and creates a delicious barrier, preventing the crust from becoming soggy once the ice cream filling is added.
For the Decadent Ice Cream Filling and Toppings
- Reese’s Ice Cream: This is the star of our filling. Breyer’s brand is our go-to for its rich, creamy texture and authentic peanut butter chocolate flavor, but feel free to use your favorite brand of Reese’s-flavored ice cream.
- Cool Whip: Adding Cool Whip to the ice cream contributes to a lighter, airier texture, making the pie easier to slice and more delightfully fluffy. It also helps stabilize the ice cream, preventing it from melting too quickly.
- Peanut Butter: Creamy peanut butter is swirled into the ice cream mixture, creating beautiful ribbons of pure peanut butter bliss. This amplifies the classic Reese’s flavor and adds another layer of creaminess.
- Mini Reese’s Peanut Butter Cups: These are perfect for scattering throughout the pie and on top, offering delightful bursts of chocolate and peanut butter in every bite. Halving them ensures they distribute evenly.
- Reese’s Peanut Butter Cups: Larger, chopped Reese’s Peanut Butter Cups provide a more substantial bite of candy goodness, adding varied texture and intense flavor.
- Mini Unwrapped Reese’s Peanut Butter Cups: The convenience of unwrapped minis means less prep time and more deliciousness, perfect for last-minute additions or simply enhancing the visual appeal of your pie.
You’ll find the precise measurements for each of these ingredients in the detailed recipe instructions provided below. These carefully selected components work together to create an unforgettable dessert experience that celebrates the beloved combination of chocolate and peanut butter.
Step-by-Step Guide to Making Reese’s Ice Cream Pie with a Chocolate Crust
Creating this peanut butter ice cream pie with Reese’s is surprisingly straightforward, proving that some of the most indulgent desserts can also be the easiest to make. The process is divided into two main stages: crafting the perfect chocolate crust and then assembling the rich, creamy ice cream filling. Let’s break down each step to ensure your pie turns out absolutely perfect.
For the Perfectly Baked Chocolate Crust
- Preheat the Oven: Begin by preheating your oven to 350°F (175°C). This ensures that the oven is at the optimal temperature for baking the crust evenly and quickly, giving it a slightly toasted flavor and firm texture.
- Combine and Press: In a medium-sized bowl, thoroughly combine your chocolate graham cracker crumbs, melted butter, and sugar. Mix until the crumbs are uniformly moistened. Then, press this mixture firmly and evenly into the bottom and up the sides of a 9-10 inch pie dish. Use the back of a spoon or the bottom of a glass to compact the crust, ensuring it holds its shape during baking.
- Bake and Cool: Bake the crust in the preheated oven for approximately 8 minutes. This brief bake time helps to set the crust, making it sturdy enough to hold the ice cream filling without crumbling. Once baked, remove the pie dish from the oven and allow it to cool completely on a wire rack. It’s crucial that the crust is entirely cool before proceeding to prevent the hot fudge from melting unevenly.
- Fudge Layer and Freeze: Once the crust has cooled, warm your hot fudge sauce until it’s pourable. Generously pour the warm fudge over the bottom of the cooled crust, spreading it evenly. This layer adds an extra dimension of chocolate flavor and also acts as a barrier to prevent the crust from becoming soggy. Place the crust in the freezer for at least 30 minutes, or until the fudge layer is firm. This step is essential for a clean, non-soggy pie.
Assembling the Dreamy Peanut Butter Ice Cream Filling
- Whip the Ice Cream and Cool Whip: In the bowl of a stand mixer fitted with the paddle attachment (or using a hand mixer), add your softened Reese’s ice cream. Beat on medium speed until it’s smooth and slightly pliable, but not fully melted. Then, add the Cool Whip and continue to beat until both are thoroughly combined and the mixture is light and fluffy.
- Create Peanut Butter Swirls: Reduce the electric mixer to low speed. Add dollops of creamy peanut butter directly into the ice cream mixture. Mix just until the peanut butter begins to swirl through the ice cream, creating beautiful ribbons of flavor. Be careful not to overmix, as we want distinct swirls, not a fully incorporated peanut butter flavor throughout.
- Fill and Freeze: Carefully pour the peanut butter ice cream mixture into your prepared, frozen chocolate pie crust. Use a spatula to spread it evenly across the crust. Cover the pie tightly with plastic wrap to prevent freezer burn and freeze for a minimum of 4 hours, or ideally, overnight (up to 24 hours). This extended freezing time ensures the pie is completely firm and easy to slice.
- Top and Serve: Approximately 5-10 minutes before you plan to serve, remove the pie from the freezer. This allows it to soften slightly, making it easier to cut. Now for the fun part: generously top your pie with an assortment of Reese’s candies, hot fudge drizzle, and a final drizzle of warmed peanut butter. Slice and serve immediately to enjoy this decadent, homemade Reese’s Ice Cream Pie!
For your convenience, all these instructions, along with precise measurements and nutritional information, are available in the comprehensive recipe section at the end of this post. You can also print and save the recipe from there for future culinary adventures.
Creative Topping Ideas to Personalize Your Pie
While the classic Reese’s toppings are undeniably delicious, one of the joys of making this ice cream pie is the freedom to customize it. Don’t be afraid to let your culinary imagination run wild! Here are some additional ideas to elevate your Reese’s Ice Cream Pie, offering various textures and complementary flavors:
- Reese’s Pieces: For an extra crunch and a burst of colorful candy-coated peanut butter flavor.
- M&M’s: Classic chocolate candies add a familiar sweetness and a satisfying textural contrast.
- Take 5 Bars: Chop these up for a complex topping featuring pretzels, caramel, peanut butter, and chocolate – a truly indulgent addition.
- Snickers: Cubed Snickers bars bring nougat, caramel, peanuts, and chocolate into the mix, creating a chewy and nutty experience.
- Twix: Crushed Twix bars offer a delightful combination of crunchy cookie, soft caramel, and smooth chocolate.
- Chocolate Chips: A simple yet effective way to add more chocolatey goodness. Use mini chips for a subtle touch or regular-sized for a more pronounced chocolate flavor.
- Peanut Butter Chips: To double down on the peanut butter flavor and add a different texture.
- Nutter Butters: Crushed Nutter Butter cookies provide an extra layer of peanut butter cookie flavor and a pleasant crunch.
- Oreo Cookies: Crumbled Oreos are always a fantastic choice, adding a distinct chocolate cookie crunch that pairs wonderfully with peanut butter.
- Hot Fudge: An essential drizzle for extra chocolate decadence.
- Warmed Peanut Butter: A swirl of warmed peanut butter not only enhances the flavor but also creates beautiful visual appeal.
Beyond toppings, consider switching up the ice cream flavors entirely! Imagine a mint chocolate chip ice cream pie with chocolate cookie crumbles, or a coffee ice cream pie with a caramel drizzle. The possibilities are truly endless. Let your heart and your belly guide you to your perfect ice cream pie creation!
Exciting Crust and Ice Cream Variations
In addition to altering the toppings and ice cream flavors, as suggested above, you can also completely transform this dessert by changing the pie crust. The base recipe is incredibly adaptable, allowing for creative experimentation with different crust types to suit your preferences or what you have on hand.
If you’re an ardent Oreo lover, one of my absolute favorite variations for this ice cream pie is to use an Oreo cookie crust. This provides a rich, dark chocolate flavor and a slightly different texture that complements the creamy filling beautifully. For a reliable and delicious Oreo crust recipe, I recommend following the instructions found in our dulce de leche chocolate cheesecake bars post. That recipe yields a perfect, sturdy, and flavorful Oreo base that works wonders with this ice cream pie.
Beyond Oreos, consider a classic vanilla wafer crust for a lighter, sweeter base, or even a pretzel crust for a delightful sweet and salty contrast. The key is to ensure your chosen crust is well-compacted and properly chilled or baked to provide a stable foundation for the ice cream filling. Each crust variation offers a unique dimension to the overall flavor and texture profile, making this Reese’s Ice Cream Pie a versatile canvas for your dessert artistry.
Whipped Cream vs. Cool Whip: What’s Your Preference?
I understand that there’s a strong “anti-Cool Whip” contingent out there, and I respect your preferences! So, to answer your question directly: yes, you can absolutely use homemade whipped cream in this recipe as a substitute for Cool Whip. The goal here is to make the recipe as accessible and enjoyable as possible, whether you prioritize convenience or a from-scratch touch. In fact, for ultimate ease, you could even opt for a store-bought pie crust!
If you choose to use homemade whipped cream, here’s how to prepare it for this recipe: whip 1 cup of heavy cream until soft peaks form. You can sweeten it to your liking with powdered sugar and a touch of vanilla extract for added flavor. This amount of heavy cream will yield approximately 2 cups of whipped cream, which is the perfect quantity to combine with the ice cream, mirroring the volume provided by Cool Whip. Homemade whipped cream will offer a slightly richer, dairy-forward flavor and a less processed texture, which many appreciate. Whichever you choose, both options will result in a delicious ice cream pie!
How Long Does Reese’s Ice Cream Pie Last in the Freezer?
Proper storage is key to maintaining the optimal texture and flavor of your Reese’s Ice Cream Pie. To ensure it stays fresh and delicious for as long as possible, first, place a lid on your pie plate if it comes with one. If not, cover the pie dish tightly with at least two layers of plastic wrap, pressing it down directly onto the surface of the pie to minimize air exposure. For an extra layer of protection against freezer burn, wrap the entire pie (with the plastic wrap) in aluminum foil. This triple-layer method is highly effective in sealing out moisture and odors from the freezer.
For the best eating experience, this pie is ideal when consumed within 2-3 days of preparation. During this timeframe, the ice cream remains perfectly creamy, and the crust retains its delightful crunch. While it can technically last up to 5 days in the freezer, you might notice a slight degradation in texture and flavor beyond the third day. The crust may begin to soften, and the ice cream could develop tiny ice crystals, affecting its creamy consistency. So, for peak enjoyment, aim to finish it within a few days!
When is the Perfect Time to Indulge in Reese’s Ice Cream Pie?
The answer, quite simply, is always!
This delightful dessert transcends seasonal boundaries. It’s an absolute lifesaver on those scorching hot summer days when you need a refreshing treat to cool down, and when the thought of turning on the oven is unbearable. Its no-bake filling means less time in a hot kitchen and more time enjoying the sunshine (or air conditioning!).
But don’t relegate it solely to the warmer months! The Reese’s Ice Cream Pie is equally wonderful on a cozy winter night. When you’re craving a comforting dessert that feels a little more special and intriguing than a plain bowl of ice cream, this pie steps up to the plate. Its rich, satisfying flavors of chocolate and peanut butter provide that comforting indulgence perfect for a chilly evening. It truly is a versatile dessert that fits any mood, any season, and any reason. So, whenever a craving strikes, or an occasion calls for something sweet, the answer is always Reese’s Ice Cream Pie.
You all know my profound love for pie – perhaps even more than the next person! I will choose pie over almost any other dessert, every single time. Whether it’s served warm or cold, I’ll gladly take all the pie! When you combine the magical trio of chocolate, peanut butter, and ice cream, it simply becomes an irresistible force. This Reese’s ice cream pie is not just easy to make; it’s a dessert that consistently delights everyone who tries it. It’s a testament to simple ingredients coming together to create something truly extraordinary and universally adored.
More Delightful Ice Cream Desserts to Explore:
- Biscoff Cookie Butter Ice Cream
- Dulce De Leche Ice Cream
- Berries and Cream Ice Cream
- Lemon Curd Frozen Custard
- Key Lime Pie Milkshake
- Cookies and Cream Frozen Custard
- Copycat Pinkberry Chocolate Crunch Sauce
- Chocolate Chip Cookie Ice Cream Sandwiches dipped in Milk Chocolate
- Apple Pie Fried Ice Cream Cake
- Loaded Salted Pretzel Ice Cream Sundae
- Mint Chocolate Stracciatella Ice Cream
- Nutella Chocolate Chip Ice Cream
- Explore All Our ICE CREAM RECIPES Here!
Reese’s Ice Cream Pie
Sweet Basil
10 mins
8 mins
4 hrs 18 mins
10

Ingredients
For the Crust
- 2 Cups Chocolate Graham Cracker Crumbs
- 7 Tablespoons Butter, melted
- 1/3 Cup Sugar
- 1 Cup Hot Fudge, warmed
For the Pie
- 1 Tub Reese’s Ice Cream
- 2 Cups Cool Whip
- 1/2 Cup Peanut Butter
- 3 Cups Mini Reese’s Peanut Butter Cups, halved
- 1 1/2 Cups Reese’s Peanut Butter Cups, chopped
- 2 Cups Mini Unwrapped Reese’s Peanut Butter Cups
- Hot Fudge
- Peanut Butter, warmed up
Instructions
For the Crust
-
Preheat the oven to 350 degrees F.
-
In a bowl, combine the graham cracker crumbs, butter, and sugar. Press into a 9-10″ pie dish.2 Cups Chocolate Graham Cracker Crumbs, 7 Tablespoons Butter, 1/3 Cup Sugar
-
Bake for 8 minutes and remove to cool completely.
-
Once cool, warm the hot fudge and pour all over in the crust. Place in the freezer.1 Cup Hot Fudge
For the Pie
-
In a standing mixer, add the ice cream and beat until smooth. Add in the cool whip and beat again.1 Tub Reese’s Ice Cream, 2 Cups Cool Whip
-
With the mixer running on low speed, drop in dollops of peanut butter and mix until just until the peanut butter swirls.1/2 Cup Peanut Butter
-
Pour into the prepared pie dish and spread evenly. Cover with plastic wrap and place in the freezer for 4 hours or up to 24 hours.
-
Remove the pie from the freezer 5-10 minutes before serving and top with the different sized reeses, some hot fudge and warmed up peanut butter. Serve immediately.3 Cups Mini Reese’s Peanut Butter Cups, 1 1/2 Cups Reese’s Peanut Butter Cups, 2 Cups Mini Unwrapped Reese’s Peanut Butter Cups, Hot Fudge, Peanut Butter
Nutrition
Nutrition information is automatically calculated, so should only be used as an approximation.
REMEMBER TO SUBSCRIBE TO our FREE Oh Sweet Basil NEWSLETTER AND RECEIVE EASY RECIPES DELIVERED INTO YOUR INBOX EVERY DAY!
When you try a recipe, please use the hashtag #ohsweetbasil on INSTAGRAM for a chance to be featured in our stories! FOLLOW OH, SWEET BASIL ON FACEBOOK | INSTAGRAM | PINTEREST | TWITTER FOR ALL OF OUR LATEST CONTENT, RECIPES AND STORIES.