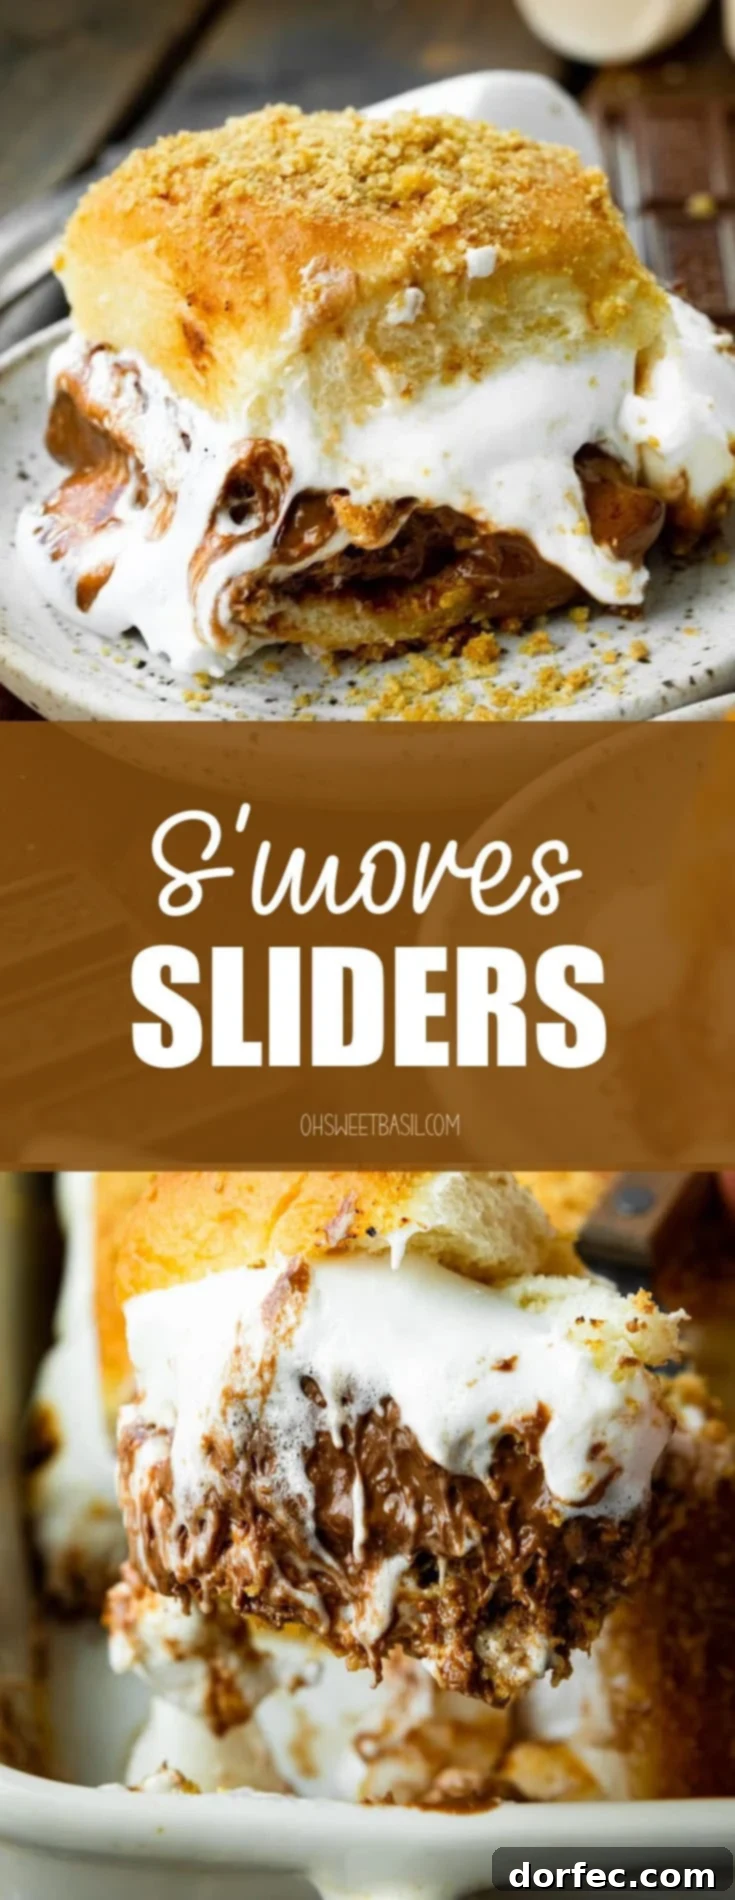
Craving the nostalgic taste of s’mores but without the hassle of a campfire? Look no further! These delightful S’mores Sliders offer an irresistible, bite-sized twist on the beloved classic, bringing all the gooey, chocolatey goodness right into your kitchen. Perfect for any occasion, from casual family gatherings to festive parties, these easy-to-make dessert sliders promise a memorable treat that will have everyone reaching for more.
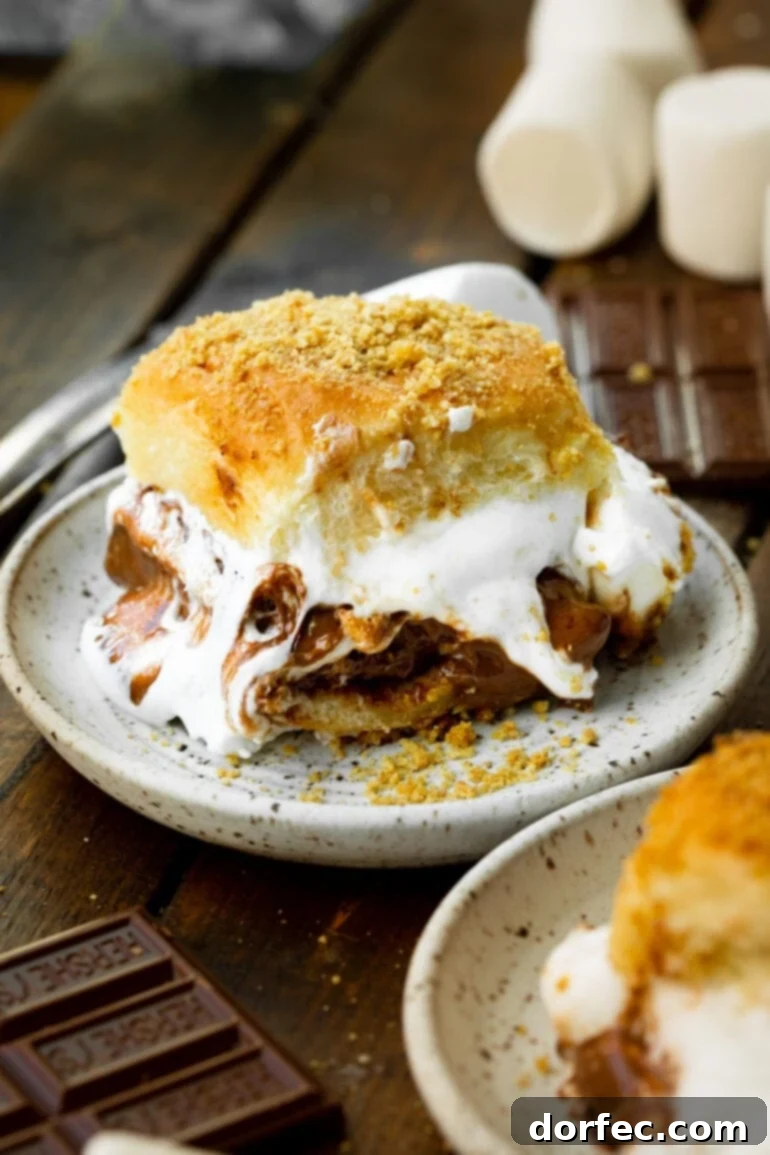
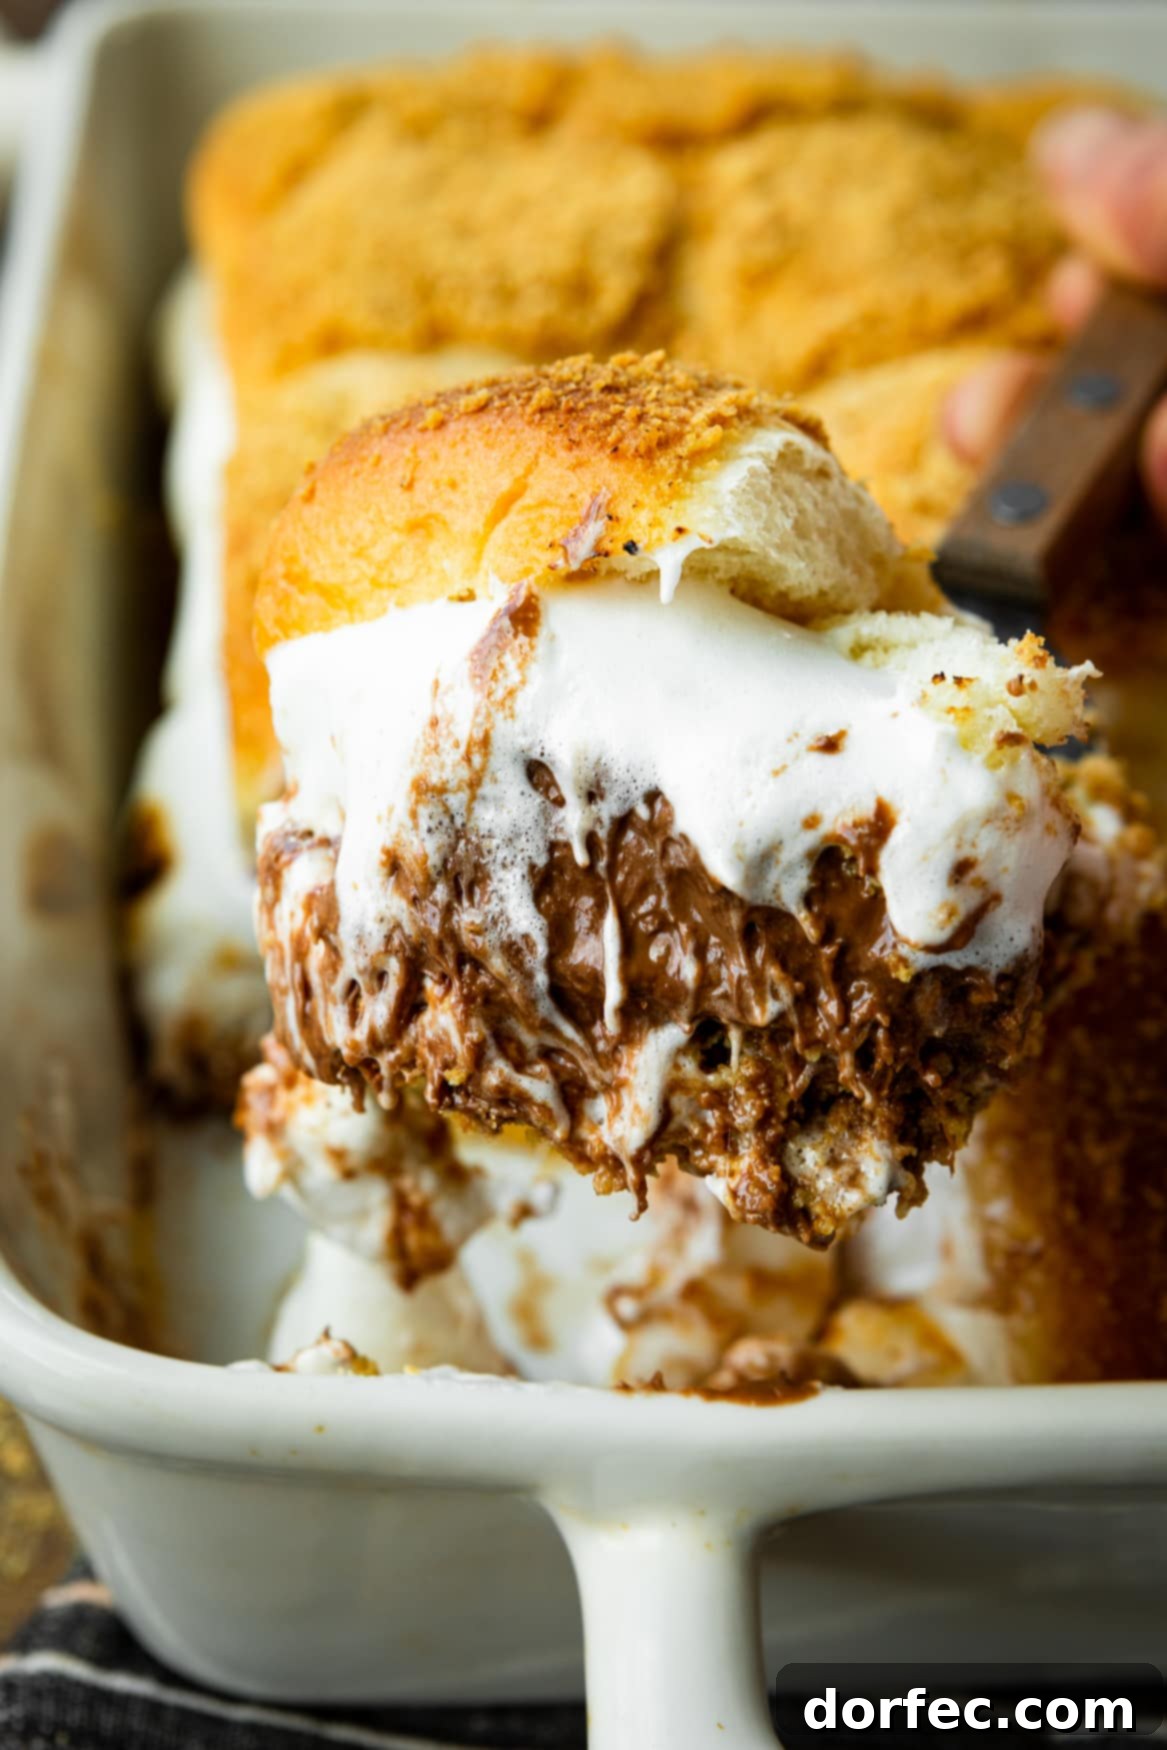
Imagine sinking your teeth into a warm, soft Hawaiian roll, perfectly encasing a molten core of rich chocolate and perfectly toasted marshmallow, all complemented by the satisfying crunch of graham cracker. This isn’t just a dessert; it’s an experience! The best part? You can whip up these incredible baked s’mores sliders any time of year, completely eliminating the need for a flickering flame or chilly outdoor evenings. Simply pop them in the oven, and in minutes, you’ll be enjoying a tray of pure comfort and joy.
The Ultimate S’mores Slider Experience: Why You’ll Love Them
What makes s’mores sliders an absolute game-changer in the world of easy desserts? It’s the harmonious blend of convenience, familiar flavors, and an unexpected yet brilliant presentation. Instead of individual assembly by a smoky fire, these sliders bake as a single unit, making them ideal for feeding a crowd with minimal effort. The sweet, slightly savory notes of Hawaiian rolls provide the perfect foundation, elevating the classic s’mores combination to new heights. You get that signature gooey marshmallow, the decadent melted chocolate, and the essential graham cracker crunch, all in a convenient, shareable format. This truly is the best easy s’mores dessert for anyone looking for a delightful treat without the fuss.
My journey to creating these incredible dessert sliders began quite serendipitously. With a bag of Hawaiian rolls tucked away in the freezer, I was determined to craft something more exciting than traditional savory sliders. The idea of a s’mores version sparked in my mind, and the results were nothing short of spectacular! My family devoured them, unanimously declaring them superior to traditional s’mores. From that moment, s’mores sliders became a cherished, go-to recipe in our home, proving that a little creativity can transform a simple ingredient into an extraordinary dessert sensation.
Gather Your Ingredients: Simple Staples for Sweet Success
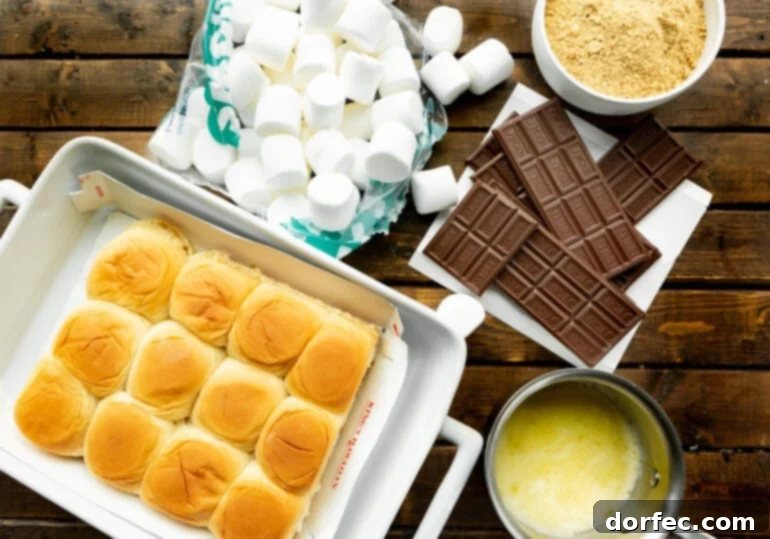
One of the many reasons these baked s’mores sliders are so popular is their incredibly simple ingredient list. You only need five basic items, most of which are likely already in your pantry or easily found at any grocery store. Forget complex preparations or exotic components; this recipe is all about leveraging classic flavors for maximum impact. Here’s a closer look at what you’ll need to create this irresistible easy s’mores dessert:
- Hawaiian Sweet Rolls: These soft, slightly sweet, and buttery rolls are the secret star of our s’mores sliders. Their inherent sweetness perfectly complements the chocolate and marshmallow, while their pull-apart nature makes them ideal for slicing and layering. You can often find them in the bakery or bread aisle.
- Hershey Bars: The classic choice for s’mores, Hershey’s milk chocolate bars melt beautifully, providing that familiar, creamy chocolate flavor everyone loves. Feel free to use other chocolate varieties if you prefer, but for that authentic s’mores taste, Hershey’s is key.
- Large Marshmallows: The bigger, the better for that ultimate gooey texture! Large marshmallows toast perfectly in the oven, creating a wonderfully soft and stretchy center that defines a s’more. You’ll use almost an entire 10oz bag to ensure every slider is generously filled.
- Butter (Melted): A touch of melted butter is brushed over the rolls, contributing to their golden-brown finish and adding a rich, savory note that balances the sweetness. It also helps the graham cracker crumbs adhere beautifully.
- Graham Cracker Crumbs: What’s a s’more without graham cracker? Crushed graham crackers provide that essential texture and flavor. We’ll use them both as a base and sprinkled on top for an extra layer of crunch and classic s’mores aroma.
Detailed measurements for each ingredient can be found in the comprehensive recipe section at the end of this article, ensuring you have everything you need for perfect s’mores sliders every time.
Effortless Preparation: How to Make S’mores Sliders in Minutes
Preparing these easy s’mores sliders is remarkably straightforward, requiring minimal fuss and delivering maximum deliciousness. In just a few simple steps, you can transform ordinary ingredients into an extraordinary dessert that’s ready to impress. This recipe is designed for efficiency, allowing you to create a crowd-pleasing treat in under half an hour from start to finish. Get ready to enjoy the ultimate quick s’mores dessert with these easy instructions:
- Step 1: Preheat and Prepare Your Baking Dish. Begin by preheating your oven to 350°F (175°C). Take a 9×13 inch baking dish and brush the bottom generously with a portion of your melted butter. This helps prevent sticking and adds flavor. Next, sprinkle about a third of the graham cracker crumbs evenly across the buttered base. This creates a delightful, crunchy foundation for your sliders.
- Step 2: Slice and Place the Rolls. Using a sharp bread knife, carefully slice the entire sheet of Hawaiian sweet rolls horizontally, separating the top half from the bottom half, while keeping the rolls connected. Gently place the bottom half of the rolls into the prepared baking dish, ensuring they form a single, unbroken layer.
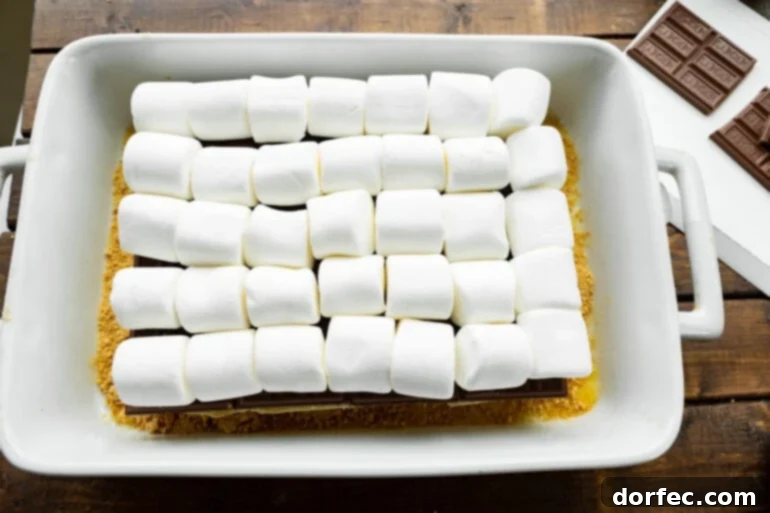
- Step 3: Layer the Indulgence. Now comes the fun part – building your s’mores! Arrange the Hershey’s chocolate bars evenly over the bottom layer of rolls, ensuring good coverage. Break them as needed to fit. Follow this with a generous, even layer of large marshmallows. Overlapping them slightly is fine; they will melt down beautifully.
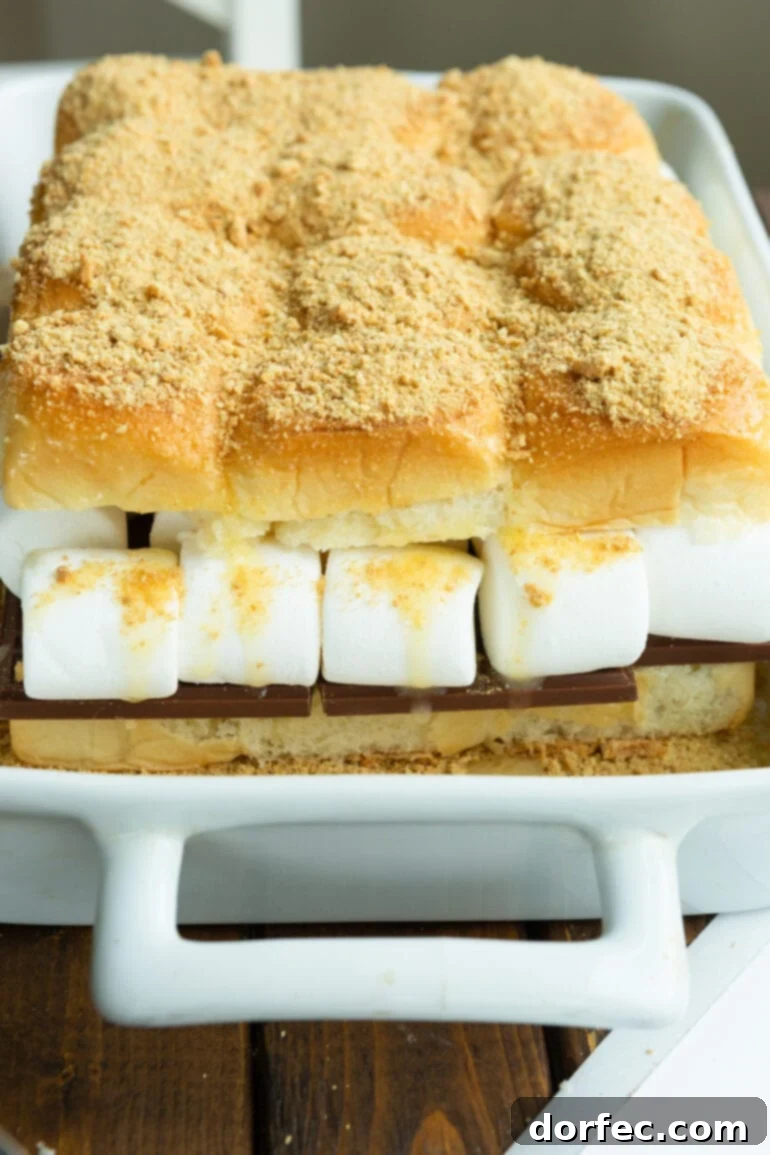
- Step 4: Top and Butter. Carefully place the top half of the Hawaiian rolls back over the marshmallow and chocolate layers, creating a sandwich. Pour the remaining melted butter evenly over the entire top surface of the rolls. Use a pastry brush to gently spread the butter, ensuring every roll is coated for that perfect golden-brown crust.
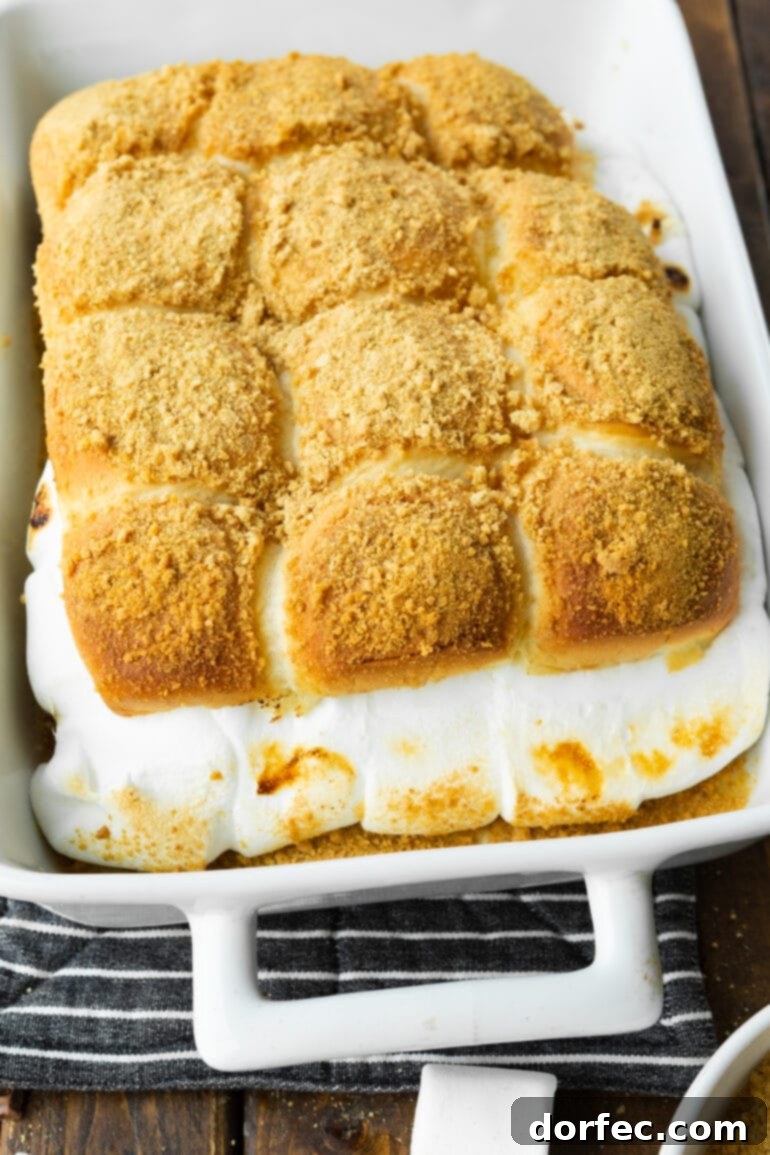
- Step 5: Sprinkle with Graham Cracker Crumbs. Generously sprinkle the remaining graham cracker crumbs all over the buttery tops of the rolls. This adds another layer of classic s’mores flavor and a delightful crunch.
- Step 6: Bake to Perfection. Cover the baking dish loosely with aluminum foil. Bake in the preheated oven for 10 minutes. This initial covered bake allows the chocolate and marshmallows to melt without the rolls browning too quickly. After 10 minutes, remove the foil and continue baking for another 10 minutes, or until the marshmallows are golden and bubbly, and the rolls are lightly toasted.
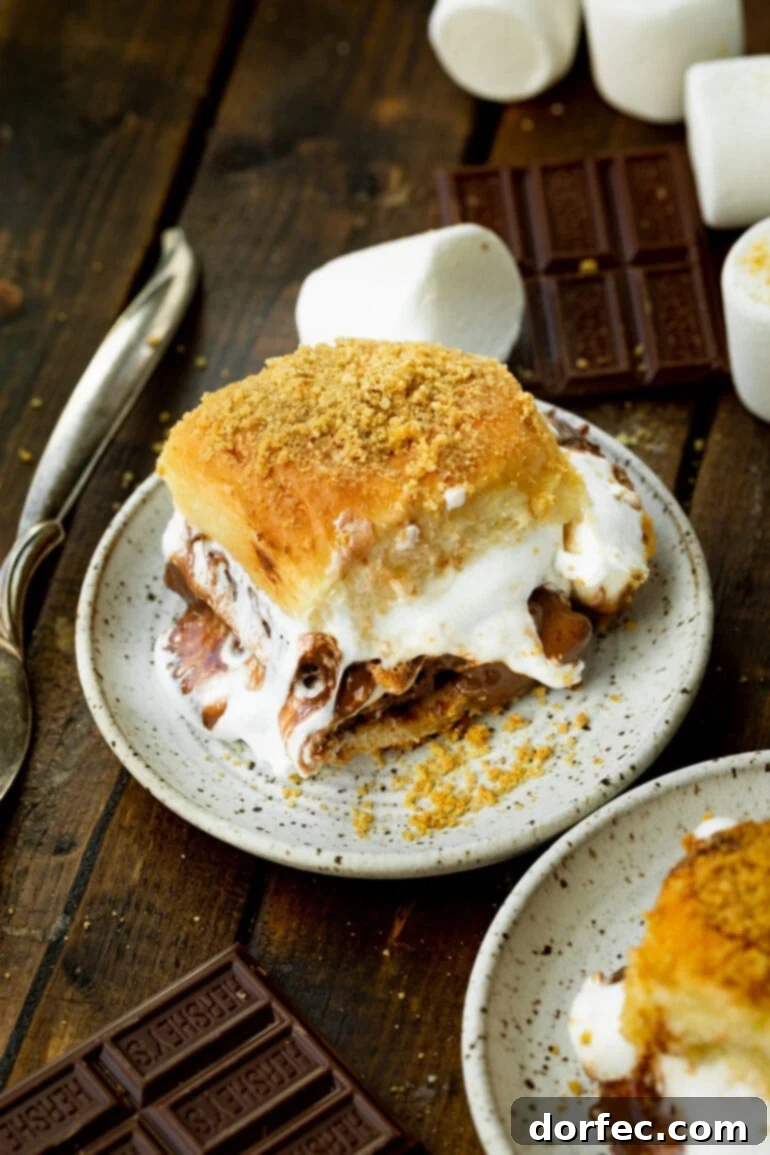
Once baked, remove from the oven and serve immediately while warm and gooey. These oven-baked s’mores are best enjoyed fresh!
Creative Variations: Customizing Your S’mores Sliders
While the classic combination of chocolate, marshmallow, and graham cracker is always a winner, these s’mores sliders are incredibly versatile! Just like traditional campfire s’mores, you can easily customize them with different chocolates, added fruits, or creamy spreads to create unique flavor profiles. Don’t hesitate to get creative and experiment with your favorite sweet treats. Here are some fantastic ideas to personalize your s’mores sandwich experience and make it truly your own:
- Reese’s Peanut Butter Cups: Swap out the Hershey bars for miniature Reese’s Peanut Butter Cups for a delightful chocolate and peanut butter fusion that’s always a crowd-pleaser.
- Nutella: For a rich, hazelnut-chocolate twist, spread a generous layer of Nutella over the bottom rolls before adding marshmallows. This adds an extra layer of decadence.
- Dark Chocolate: If you prefer a less sweet and more intense chocolate flavor, use dark chocolate bars instead of milk chocolate. It beautifully balances the sweetness of the marshmallows and rolls.
- Bananas: Add thin slices of fresh banana over the chocolate layer for a fruity, creamy element. The warmth of the oven will soften them beautifully.
- Strawberries: Fresh, thinly sliced strawberries provide a burst of juicy sweetness and a lovely contrast to the rich chocolate and marshmallow.
- Coconut Flakes: Sprinkle toasted coconut flakes over the marshmallows or on top of the rolls with the graham cracker crumbs for a tropical s’mores experience.
- Caramel Drizzle: After baking, a drizzle of warm caramel sauce over the gooey sliders adds an extra layer of sweet indulgence.
- Peanut Butter Spread: Spread a thin layer of creamy peanut butter on the bottom rolls before adding the chocolate and marshmallows for a classic peanut butter s’mores flavor.
The possibilities are endless, allowing you to tailor these dessert sliders to suit any taste preference or dietary consideration (within reason!).
Make Ahead & Storage Tips: Enjoy S’mores Anytime
These s’mores sliders are not only quick to bake but also incredibly convenient for make-ahead preparation, making them a fantastic option for entertaining or busy weeknights. Preparing them in advance allows you to minimize stress and maximize enjoyment when it’s time to serve. Here’s how to get ahead and ensure your baked s’mores dessert is ready when you are:
Make Ahead Instructions:
You can assemble the sliders up to the point of brushing the melted butter and sprinkling the graham cracker crumbs on top. Follow all the layering steps, then cover the baking dish tightly with plastic wrap to prevent the rolls from drying out. Store the unbaked sliders at room temperature for a few hours, or in the refrigerator for up to one day. When you’re ready to bake, simply remove the plastic wrap, brush with the melted butter, sprinkle with graham cracker crumbs, and bake as instructed. This makes hosting a breeze, as you can have a fresh, warm dessert ready with minimal last-minute effort.
Storing Leftovers:
While these sliders are undeniably best enjoyed fresh and warm, any leftovers can be stored for later enjoyment. Allow the baked s’mores sliders to cool completely to room temperature. Then, transfer them to an airtight container. They will keep well in the refrigerator for 3 to 4 days.
Reheating Leftovers:
To bring your leftover s’mores sliders back to their gooey glory, reheat them in the oven. Preheat your oven to 350°F (175°C). Place the sliders on a baking sheet and cover loosely with aluminum foil to prevent them from drying out or over-browning. Bake for 5 to 7 minutes, or until the chocolate and marshmallows are softened. Remove the foil and bake for an additional 2 to 3 minutes to lightly re-toast the tops. Serve warm and enjoy the renewed indulgence!
Tips for the Best S’mores Sliders
Achieving perfectly gooey, deeply satisfying s’mores sliders is easy, but a few small tips can elevate your dessert to extraordinary levels:
- Don’t Skimp on the Butter: The melted butter brushed over the rolls isn’t just for flavor; it helps create that beautiful golden crust and keeps the rolls from drying out in the oven. Ensure even coverage!
- Layer Generously: Be liberal with your chocolate and marshmallow layers. These are s’mores, after all! A thick layer ensures maximum gooeyness and flavor in every bite.
- Watch for Browning: The foil step is crucial. It allows the fillings to melt thoroughly before the rolls and marshmallows on top get too dark. Once the foil is removed, keep an eye on them; marshmallows can go from golden to burnt quickly.
- Serve Warm: These sliders are truly at their best when served warm, straight from the oven. The melted chocolate and gooey marshmallows are key to the s’mores experience.
- Embrace the Mess: S’mores are inherently messy, and these sliders are no exception! Have plenty of napkins on hand. The gooey, chocolatey fingers are part of the fun and a sure sign of a successful dessert.
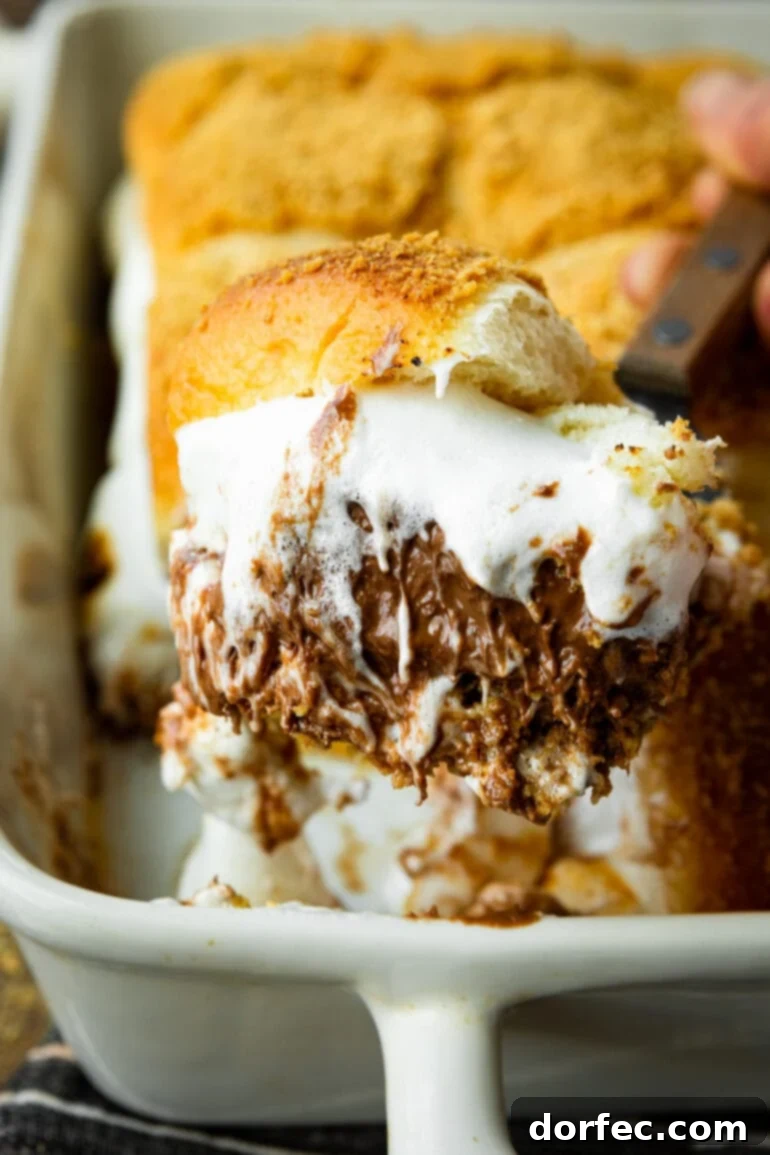
Prepare for sticky fingers and happy smiles! These easy s’mores sliders are more than just a dessert; they’re a fun, interactive treat that brings people together. Enjoy this fantastic, oven-baked twist on a timeless classic.
Explore More S’mores Dessert Recipes
If you’ve fallen in love with the convenience and deliciousness of these S’mores Sliders, you’re in for a treat! The world of s’mores-inspired desserts is vast and wonderful. Here are some other creative and indulgent recipes that capture the essence of this beloved campfire favorite, perfect for any occasion:
- S’mores Stuffed Chocolate Chip Cookies
- Grilled S’mores Quesadilla
- S’mores Brownies
- S’mores Banana Bread
- No Bake S’mores Bars
- S’mores Chocolate Chip Cookies
- S’mores Granola Bars
S’mores Sliders Recipe
Prep: 5 mins |
Cook: 20 mins |
Total: 25 mins |
Servings: 12 sliders
Looking for a fun twist on the classic s’mores? Try making s’mores sliders! These bite-sized treats offer a unique and delicious way to enjoy the classic campfire dessert.
Ingredients
- 1 Package Hawaiian Sweet Rolls (12-count)
- 5 Hershey Bars (standard size)
- 1 Bag Large Marshmallows (10oz, you’ll use almost the whole bag)
- 6 Tablespoons Butter, melted and divided
- 8 Graham Crackers, crushed (approximately 1 cup crumbs), divided
Instructions
- Preheat Oven & Prepare Pan: Preheat your oven to 350°F (175°C). Brush the bottom of a 9×13 inch baking pan with 2 tablespoons of the melted butter. Sprinkle about one-third of the crushed graham crackers evenly over the buttered bottom of the pan.
- Slice Rolls: Using a sharp bread knife, carefully cut the entire sheet of Hawaiian sweet rolls horizontally in half, separating the top from the bottom while keeping the rolls intact. Place the bottom half of the rolls in the prepared baking pan.
- Layer Fillings: Evenly arrange the Hershey Bars over the bottom layer of rolls, breaking them into smaller pieces if necessary to fit. Next, place a single layer of large marshmallows over the chocolate bars, ensuring good coverage across all the rolls.
- Top & Butter: Place the top half of the rolls back onto the marshmallow layer. Pour the remaining 4 tablespoons of melted butter over the top of the rolls, using a pastry brush to spread it evenly over all the buns.
- Sprinkle Crumbs: Sprinkle the remaining crushed graham crackers over the buttery tops of the rolls.
- Bake: Cover the baking dish lightly with aluminum foil. Bake for 10 minutes. Then, remove the foil and bake for an additional 10 minutes, or until the marshmallows are golden and bubbly, and the rolls are lightly toasted.
- Serve Immediately: Remove from the oven and serve these delicious S’mores Sliders warm. Be ready for some gooey, chocolatey goodness!
Nutrition (Approximate per slider)
Serving: 1 slider
Calories: 224kcal
Carbohydrates: 33g
Protein: 2g
Fat: 11g
Saturated Fat: 6g
Polyunsaturated Fat: 0.4g
Monounsaturated Fat: 3g
Trans Fat: 0.2g
Cholesterol: 15mg
Sodium: 128mg
Potassium: 53mg
Fiber: 1g
Sugar: 22g
Vitamin A: 175IU
Calcium: 13mg
Iron: 1mg
Nutrition information is automatically calculated, so should only be used as an approximation.