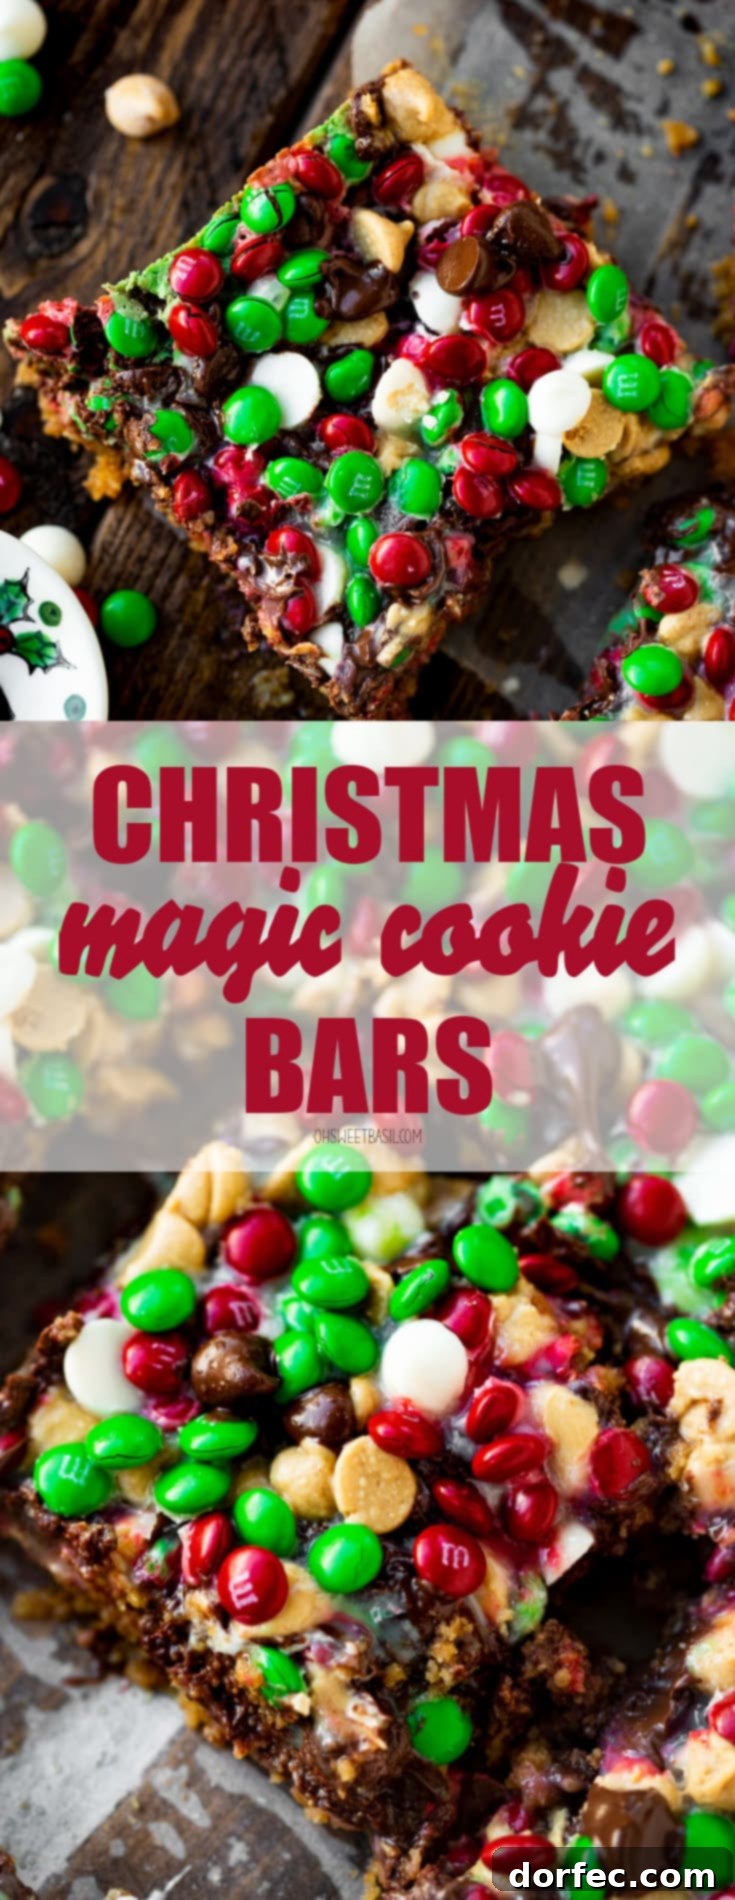
Irresistible Christmas Magic Cookie Bars: Your Ultimate Holiday Treat
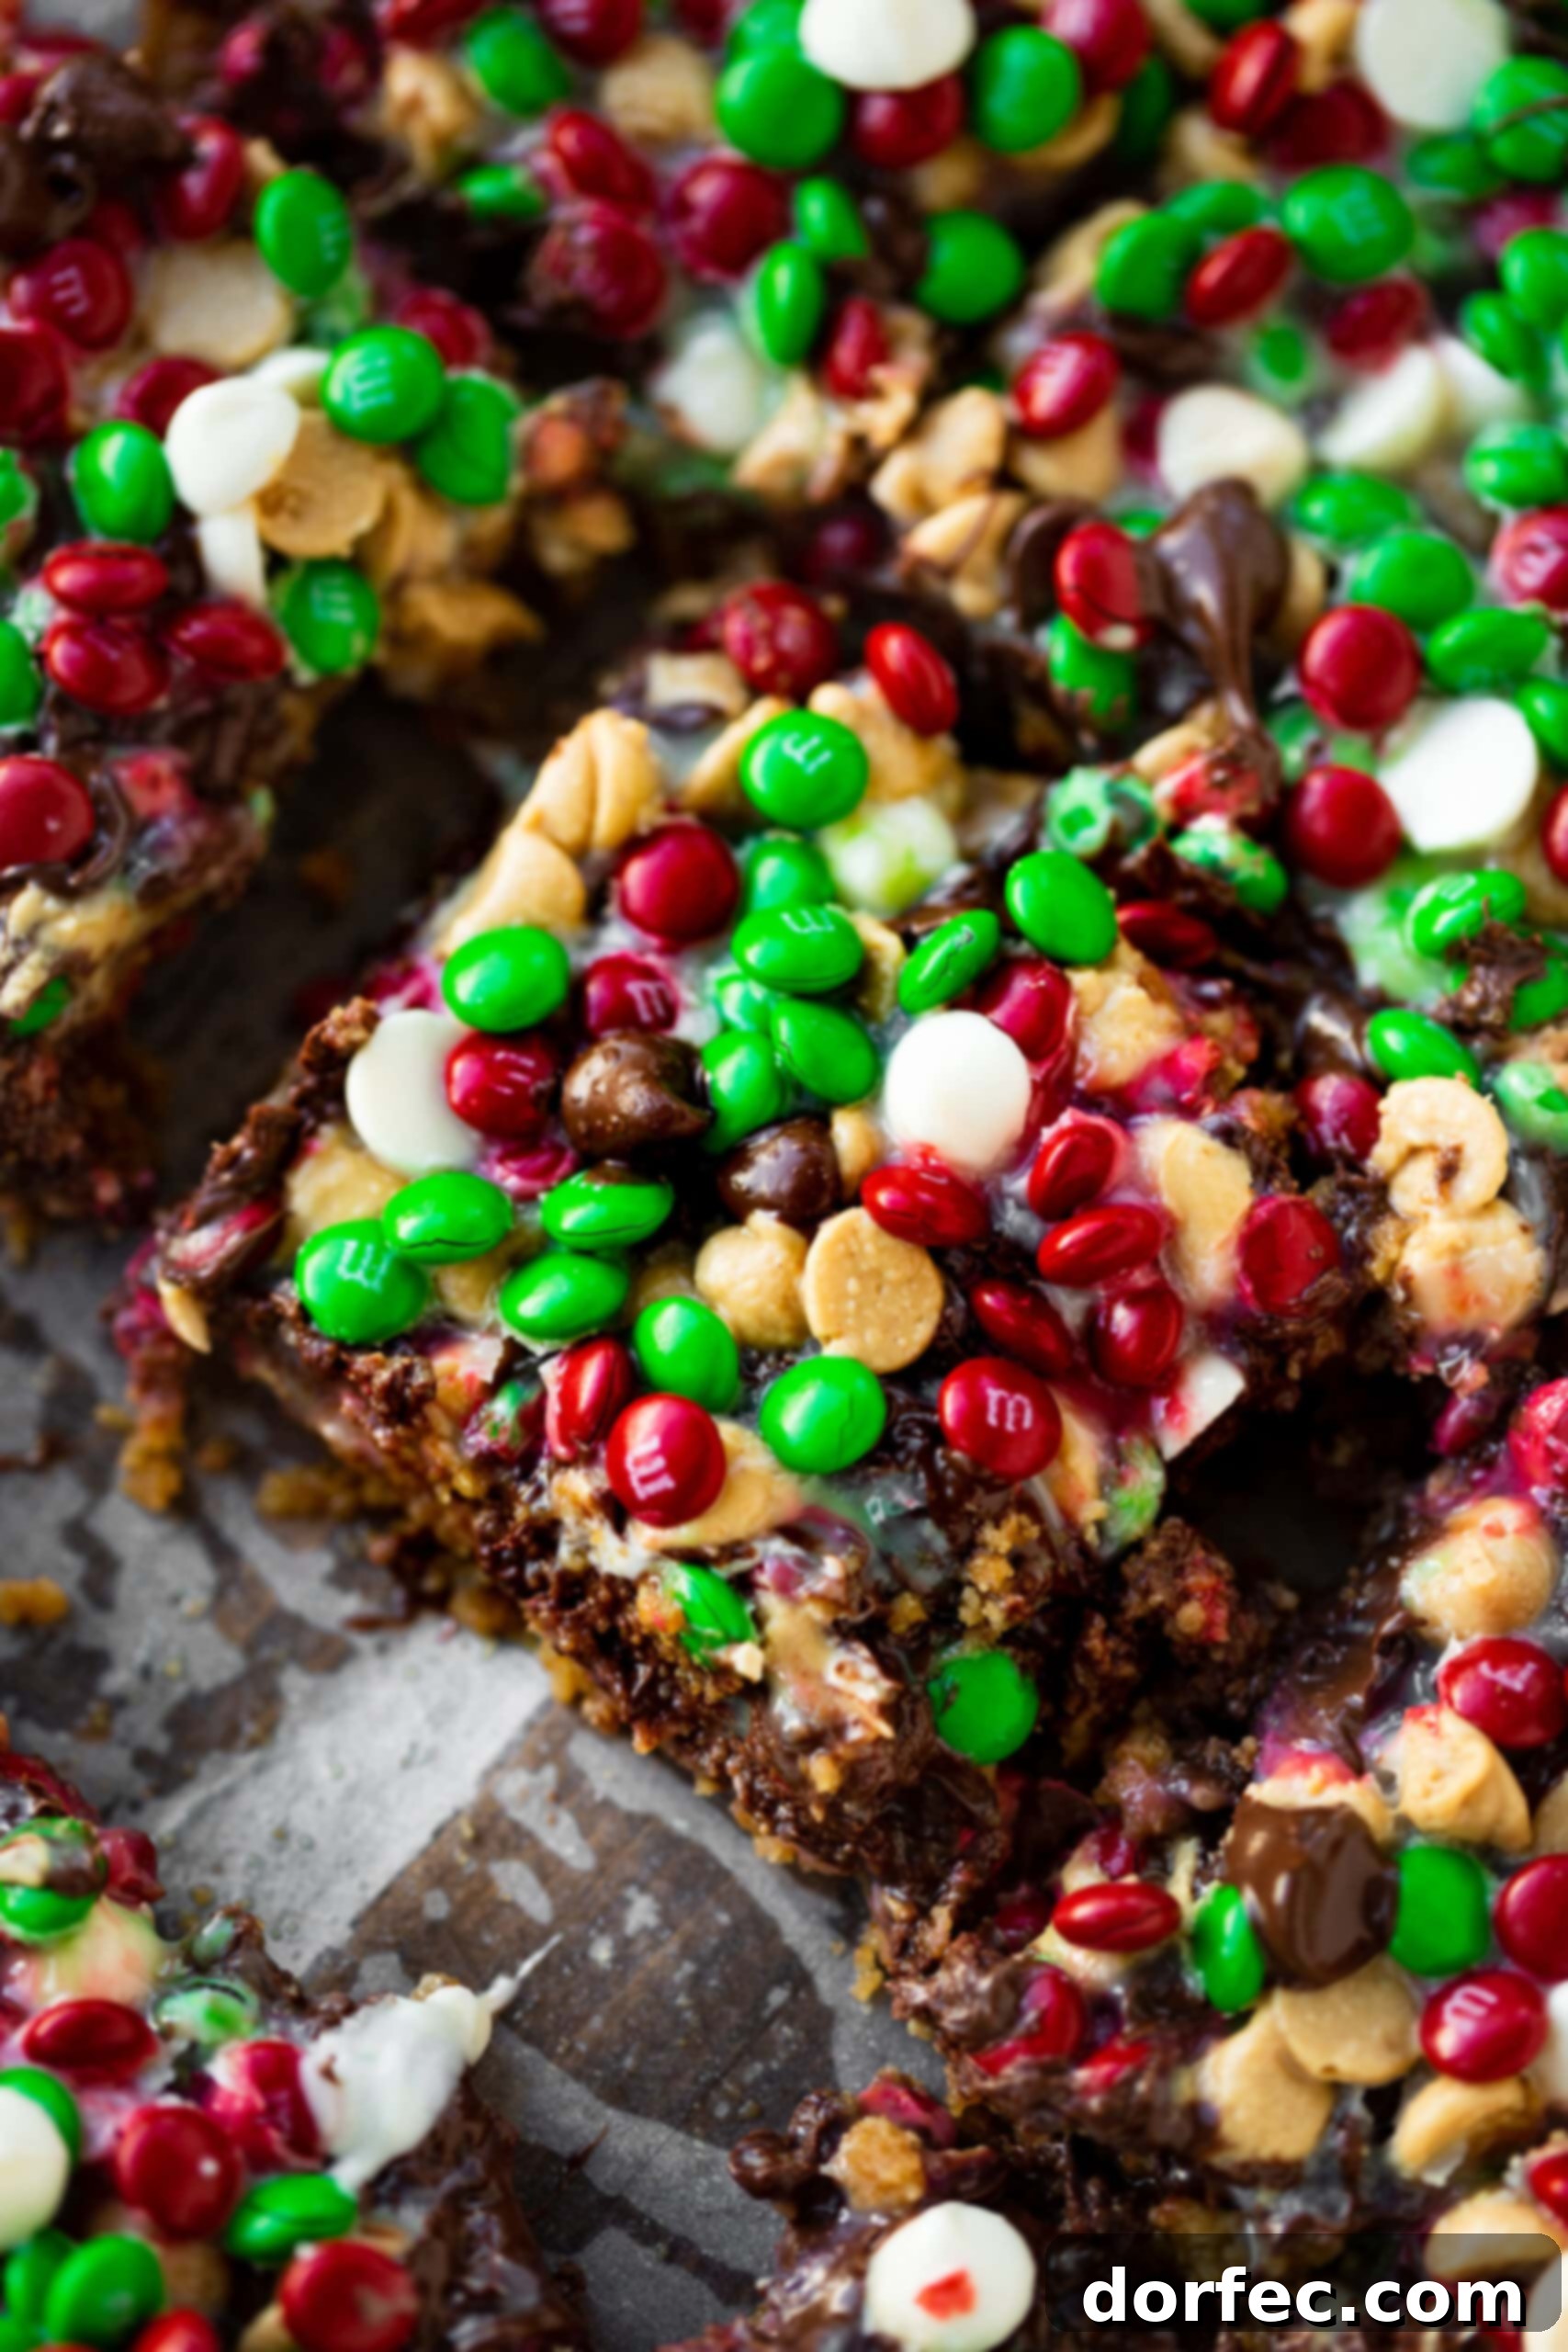
There’s a certain kind of enchantment that only Christmas Magic Cookie Bars can bring to the holiday season. Imagine a buttery, crunchy graham cracker crust, blanketed by a rich, gooey layer of sweetened condensed milk. On top, a festive medley of quick oats, assorted baking chips, and colorful holiday M&M’s create a visual and textural masterpiece. These easy-to-make bars are more than just a dessert; they’re a celebration in every bite, promising to be a beloved addition to your holiday baking traditions. Get ready to fall in love with these delightful and incredibly simple treats!
For years, the quest for the quintessential magic bars recipe felt like an unending journey. Friends would often inquire why a staple like magic bars was missing from our repertoire. My answer was always the same: I wouldn’t share a recipe unless our family genuinely adored it, finding it utterly delicious and truly exceptional. Many attempts came and went, each falling short of that magical standard. But now, after countless trials and adjustments, we’ve finally perfected a recipe that stands head and shoulders above the rest. This isn’t just *a* magic bars recipe; it’s *the only* magic bars recipe you’ll ever need, especially for Christmas.
The Enchanting Appeal of Classic Magic Bars
What exactly makes a dessert “magic”? For these bars, it’s the seamless blend of textures and flavors that come together almost effortlessly. The process is so straightforward, yet the result is nothing short of miraculous. From the satisfying crunch of the crust to the rich, chewy filling and the burst of chocolate and candy in every bite, Christmas Magic Cookie Bars live up to their name. They require minimal effort but deliver maximum festive impact, making them an ideal choice for busy holiday bakers and seasoned confectioners alike. Their inherent charm lies in their ability to transform simple pantry staples into a truly extraordinary sweet treat.
Many traditional recipes for magic bars are famously known as “7-layer bars.” This typically refers to the distinct layers of graham cracker crust, sweetened condensed milk, coconut, nuts, and various chocolate chips. While our recipe certainly boasts multiple layers of delightful goodness, we prefer not to strictly label it as a “7-layer magic bar.” This intentional choice empowers you to customize your creation, adding or omitting “layers” to craft your own unique version of holiday magic. Whether you stick to the classic combination or venture into new flavor profiles, the essence of an easy-to-make, incredibly delicious bar remains. Our family’s ultimate Christmas magic bars recipe emphasizes flexibility, allowing your culinary creativity to shine.
Why This Christmas Magic Cookie Bar Recipe Shines
Simplicity at Its Best for Holiday Baking
In the whirlwind of holiday preparations, an easy dessert recipe is a true gift. This Christmas Magic Cookie Bar recipe is incredibly simple, requiring just a few basic steps. There’s no fancy equipment needed beyond a baking dish and some measuring tools. You’ll spend more time sprinkling ingredients than actively mixing or shaping, making it a perfect project for bakers of all skill levels. From preparing the crust to layering the toppings and a quick bake in the oven, this recipe ensures a delicious outcome without any culinary stress. It’s the ideal solution for anyone seeking a quick, satisfying, and impressive holiday treat.
Unmatched Customization for Every Palate
The beauty of these magic bars lies in their adaptability. While our family loves the classic combination of chocolates and graham crackers, the possibilities for customization are truly endless! Feel free to experiment with different nuts like salted peanuts, pecans, or almonds. Swap out chocolate chips for butterscotch, dark chocolate, or even cinnamon chips. You can even include other festive candies or sprinkle a pinch of flaky sea salt for a delightful sweet-and-salty contrast. This versatility means you can tailor your holiday magic cookie bars to suit any preference or occasion, making each batch uniquely yours.
Perfect for Any Festive Occasion
While we specifically highlight these as Christmas Magic Cookie Bars with their vibrant red and green M&M’s, their appeal extends far beyond a single holiday. The beauty of this recipe is its seamless adaptability. Simply swap out the holiday-themed M&M’s for ones that match any celebration – pastel colors for Easter, red, white, and blue for patriotic holidays, or even school colors for a graduation party. For everyday enjoyment, use classic plain M&M’s. This makes them a fantastic, versatile dessert that can be enjoyed throughout the year, always bringing a touch of “magic” to the table.
A Crowd-Pleasing Delight for Sharing
These bars are designed to be shared. Their convenient bar form makes them exceptionally easy to cut, package, and distribute. Whether you’re assembling neighbor gifts, contributing to a potluck, or simply treating your family and friends, these easy Christmas cookie bars are always a hit. Their rich flavors and appealing layers ensure they disappear quickly from any treat plate, leaving everyone asking for the recipe. It’s a dessert that not only tastes good but also fosters connection and warmth during the festive season.
Essential Ingredients for Magical Bites
Believe it or not, you’re only a handful of ingredients away from creating these enchanting Christmas Magic Cookie Bars! The beauty of this recipe lies in its simplicity, relying on readily available pantry staples to achieve its extraordinary flavor and texture. Here’s a detailed look at what you’ll need to embark on your magical baking journey:
- Graham Crackers: These form the foundation of our delicious, buttery crust. You can save time by purchasing pre-crushed graham cracker crumbs, or effortlessly make your own by pulsing whole graham crackers in a food processor until finely ground. The finer the crumbs, the more compact and stable your crust will be.
- Sugar: Just regular white granulated sugar is all that’s required. It works in harmony with the graham cracker crumbs and butter to create a perfectly balanced, slightly sweet, and crunchy crust.
- Butter: Unsalted butter is preferred, as it allows you to control the overall saltiness of your bars. Melt it gently in the microwave for about 60 seconds until completely liquid. This melted butter is crucial for binding the graham cracker crumbs and sugar together, forming a sturdy and flavorful base.
- Sweetened Condensed Milk: This is truly the “magic” ingredient that ties all the layers together, creating that irresistible gooey, chewy center. We highly recommend using a trusted brand like Eagle Brand for consistent results. Do NOT confuse this with evaporated milk – they are entirely different products and using evaporated milk will lead to a soggy, unbound mess. More on this critical distinction below!
- Quick Oats: We love the delicate texture and subtle chewiness that quick oats bring to these bars. They add a comforting heartiness without being too heavy. If you only have old-fashioned oats on hand, you can certainly use them, but be aware they will result in a slightly chewier texture.
- Semi-Sweet Chocolate Chips: A classic choice that provides a balanced chocolate flavor. Feel free to customize this layer! You can easily swap them for milk chocolate chips for a sweeter profile, or dark chocolate chips for a richer, more intense cocoa experience, depending on your personal preference.
- Peanut Butter Chocolate Chips: These chips introduce a wonderful nutty and savory sweetness that perfectly complements the other flavors. If peanut butter isn’t your favorite, or if you have allergy concerns, butterscotch chips make a fantastic alternative, adding a distinct caramel-like note.
- White Chocolate Chips: Adding white chocolate chips contributes an extra layer of sweetness and a lovely creamy texture. They melt beautifully, creating pockets of smooth, vanilla-infused delight throughout the bars.
- Holiday M&M’s: These are the ultimate festive touch! Use the classic red and green Christmas M&M’s to instantly evoke holiday cheer. As mentioned before, you can easily swap these out for any color or themed M&M’s to match a different holiday or occasion, making this recipe incredibly versatile.
The precise measurements for all these ingredients can be found in the recipe section at the end of this article. Gather your components, and get ready to conjure some holiday magic!
Unleash Your Creativity: Topping Variations & Beyond
One of the most exciting aspects of making Christmas Magic Cookie Bars is the freedom to personalize them to your heart’s content. The “magic” truly comes alive when you layer up your favorite flavors and textures. While our go-to combination is undeniably delicious, don’t hesitate to explore new horizons with these additional topping ideas. Mix and match to create your signature holiday treat!
- Shredded Coconut: A timeless addition to magic bars, coconut adds a delightful chewiness and tropical sweetness. Use either sweetened or unsweetened, depending on your preference.
- Nuts: Elevate the crunch factor and add rich, earthy flavors with a variety of nuts. Chopped pecans, walnuts, almonds, or even salted peanuts can provide a wonderful contrast to the sweetness. Toasting them lightly beforehand can enhance their flavor.
- Butterscotch Chips: For a warm, caramel-like essence, butterscotch chips are an excellent substitute for peanut butter chips or a delicious addition alongside them.
- Dark Chocolate Chips: If you prefer a less sweet, more intense chocolate flavor, swap some of the semi-sweet chips for dark chocolate.
- Milk Chocolate Chips: For those who love a classic, creamy chocolate taste, milk chocolate chips can replace semi-sweet entirely or be used in combination.
- Cinnamon Chips: Introduce a cozy, spicy warmth with cinnamon chips, especially fitting for a holiday-themed bar.
- Reese’s Pieces: Add a burst of vibrant color and a delightful peanut butter crunch with these popular candies.
- Peanut Butter M&M’s: For a double dose of peanut butter goodness, consider adding peanut butter M&M’s instead of or in addition to the classic holiday M&M’s.
- Flaky Sea Salt: A sprinkle of flaky sea salt over the top before baking can magically enhance all the sweet flavors, creating an irresistible sweet-and-salty balance.
Don’t be afraid to experiment! The “magic” of these bars is their ability to adapt to whatever delicious combination you dream up. Just ensure your chosen toppings are evenly distributed for consistent flavor in every square.
Step-by-Step Guide to Perfect Christmas Magic Cookie Bars
Crafting these irresistible Christmas Magic Cookie Bars is a breeze! Follow these simple steps to ensure a flawless and delicious outcome every time:
- Prepare Your Baking Dish: Begin by preheating your oven to 350°F (175°C). This ensures the oven is at the correct temperature for even baking. Next, take a 9×13 inch baking dish and lightly grease it with nonstick cooking spray. This initial step helps prevent sticking. For an even easier removal of the bars, line the greased dish with a sheet of parchment paper, leaving an overhang on the sides. This “sling” will allow you to lift the entire batch out of the pan once cooled, making cutting a dream.
- Create the Buttery Graham Cracker Crust: In a medium bowl, combine your crushed graham cracker crumbs, granulated sugar, and melted butter. Stir these ingredients together until they are thoroughly mixed. The mixture should resemble wet sand – crumbly yet able to hold its shape when pressed. Press this mixture firmly and evenly into the bottom of your prepared 9×13 inch baking dish. For a super-compact and uniform crust, use the bottom of a flat measuring cup or a clean, flat glass to press the crumbs down firmly. An even crust is key for a stable base for your layers.
- Layer the Magic and Bake: Evenly pour the sweetened condensed milk over the pressed graham cracker crust. Gently spread it to cover the entire surface, ensuring it reaches the edges. This sweet, gooey layer is what binds all the toppings together. Next, generously sprinkle your quick oats evenly over the condensed milk. Follow with an even layer of semi-sweet chocolate chips, then peanut butter chips, white chocolate chips, and finally, your festive holiday M&M’s. Distributing these toppings evenly ensures every bite of your Christmas Magic Cookie Bars is packed with flavor.
- Bake to Golden Perfection: Place the baking dish into your preheated oven and bake for approximately 25 minutes. You’ll know they’re ready when the edges are lightly golden brown and the topping layers are bubbly and set. The M&M’s should look slightly melted but still retain their shape and color.
- Cool and Serve: Once baked, carefully remove the bars from the oven. This next step is crucial for clean, well-formed bars: allow them to cool completely in the pan on a wire rack before attempting to cut them. The sweetened condensed milk needs time to set. Once fully cooled (this can take a couple of hours), use the parchment paper overhang to lift the entire block of bars out of the dish. Place them on a cutting board and slice into squares. These easy magic cookie bars are delicious served warm, with their gooey center, or at room temperature, where they firm up beautifully.
Enjoy the enchanting flavors of your homemade Christmas Magic Cookie Bars!
Expert Tips for Flawless Magic Cookie Bars
Achieving bakery-quality Christmas Magic Cookie Bars is easy when you keep a few key tips in mind. These small details can make a big difference in the final taste and texture of your holiday dessert.
- Pan Preparation is Key: Always use parchment paper in your baking dish, extending it up the sides to create a “sling.” This isn’t just for easy removal; it also prevents the sticky, gooey bars from adhering stubbornly to the pan, ensuring perfectly formed squares. Don’t forget to spray with nonstick cooking spray even with parchment, for extra insurance.
- Perfect Crust Texture: When combining graham cracker crumbs, sugar, and melted butter, the mixture should feel like wet sand. This texture indicates the right balance of ingredients, allowing it to pack down firmly without being too dry or overly saturated.
- Evenly Distributed Layers: For consistent flavor and texture in every bite, it’s vital to sprinkle all your toppings – oats, chips, and M&M’s – evenly over the sweetened condensed milk layer. This prevents some bars from being overloaded while others are sparse.
- The Patience of Cooling: It’s tempting to dive into these delicious bars right out of the oven, but resist! Allowing them to cool completely (preferably for several hours or even chilling in the refrigerator) is crucial. This gives the sweetened condensed milk and melted chips time to set, resulting in clean, firm, and easy-to-cut squares. Cutting them warm will often lead to a messy, crumbly outcome.
- Don’t Substitute Sweetened Condensed Milk: This is perhaps the most critical tip. Evaporated milk and sweetened condensed milk are NOT interchangeable. Sweetened condensed milk is thick, sugary, and serves as the primary binder for these bars, creating that characteristic gooey texture. Evaporated milk, on the other hand, is unsweetened and much thinner. Using it will prevent the layers from setting and will simply make your graham cracker crust soggy, ruining the entire recipe. Always double-check your labels at the grocery store!
Storing Your Delicious Magic Cookie Bars
Proper storage ensures your delightful Christmas Magic Cookie Bars remain fresh and delicious for as long as possible. Here’s how to keep them at their best:
- At Room Temperature: Once your magic bars have cooled completely and been cut into squares, store them in an airtight container at room temperature. They will maintain their freshness and wonderful texture for 3-4 days. This is perfect for quick holiday treats or everyday snacking.
- In the Refrigerator: If you wish to extend their shelf life a little longer, transfer the airtight container to the refrigerator. Chilling them can keep them fresh for up to a week. Just be aware that the crust might become a bit firmer when cold, but they will still be incredibly delicious. Allow them to come to room temperature for a few minutes before serving for optimal texture.
- Freezing for Future Enjoyment: Magic cookie bars freeze exceptionally well, making them an excellent make-ahead option for holiday baking or unexpected guests. Once the bars are completely cool, cut them into individual squares. Place them in a single layer on a baking sheet and freeze until solid (about 1-2 hours). Once frozen, transfer the solid bars to a freezer-safe container or a heavy-duty ziploc bag, separating layers with parchment paper to prevent sticking. They will last for up to 3 months in the freezer. To enjoy, simply thaw them at room temperature for a few hours or overnight in the refrigerator.
A Legacy of Sweetness: Our Magic Bar Journey
After more than 15 years of dedicated baking and sharing recipes on this blog, we are absolutely thrilled to finally present our very own, tried-and-true magic cookie bars recipe! It’s been a long journey of taste tests, ingredient adjustments, and countless iterations, all in pursuit of that perfect, unforgettable bar. We’ve poured our hearts into finding the ideal combination of textures and flavors that our entire family adores, and now it’s time for the world to know!
This isn’t just any recipe; it’s the culmination of years of passion for baking and a commitment to deliciousness. We are so confident in the irresistible charm of these bars that we guarantee there won’t be a single one left on your treat plate. Whether you’re making them for Christmas, another holiday, or just because, prepare for them to disappear in a flash. Embrace the magic, share the sweetness, and make these extraordinary bars a cherished part of your culinary traditions.
More Festive Baked Goods You’ll Adore:
- Best Gingerbread Man Cookie Recipe
- Christmas Sugar Cookies
- Peppermint Bark Cookies
- Gingerbread Bars
- Dulce de Leche Christmas Tree
- Peppermint Chocolate Snack Cake
- Chocolate Andes Mint Cookies
- Orange Cranberry Poppy Seed Bread
- White Chocolate Molasses Cookies
- All our Christmas recipes!
Christmas Magic Cookie Bars Recipe
Prep Time: 10 mins
Cook Time: 25 mins
Total Time: 35 mins
Yields: 15 bars
Ingredients
- 12 Graham Crackers, crushed
- 2 Tablespoons Sugar
- 9 Tablespoons Butter, melted
- 1 1/2 Cups Sweetened Condensed Milk
- 3/4 Cup Quick Oats
- 1 1/3 Cups Semi Sweet Chocolate Chips
- 3/4 Cup Peanut Butter Chips
- 1/4-1/3 Cup White Chocolate Chips
- 1 Cup Holiday M&Ms
Instructions
- Preheat the oven to 350°F (175°C) and line a 9×13 inch baking dish with nonstick spray and a piece of parchment paper, leaving an overhang on the sides.
- Combine the graham cracker crumbs, sugar, and melted butter. Press this mixture firmly and evenly into the bottom of the prepared 9×13 inch dish.
- Pour sweetened condensed milk evenly over the crust. Sprinkle the quick oats, semi-sweet chocolate chips, peanut butter chips, white chocolate chips, and holiday M&M’s evenly over the top.
- Bake for 25 minutes, or until the edges are golden and the topping is bubbly and set.
- Allow the bars to cool completely in the pan on a wire rack before cutting and serving. Serve warm or at room temperature.
Nutrition
Nutrition information is automatically calculated, so should only be used as an approximation. Per 1 bar serving: Calories: 405kcal, Carbohydrates: 49g, Protein: 6g, Fat: 21g, Saturated Fat: 12g, Polyunsaturated Fat: 1g, Monounsaturated Fat: 5g, Trans Fat: 1g, Cholesterol: 32mg, Sodium: 181mg, Potassium: 249mg, Fiber: 2g, Sugar: 37g, Vitamin A: 332IU, Vitamin C: 1mg, Calcium: 132mg, Iron: 2mg.
REMEMBER TO SUBSCRIBE TO our FREE Oh Sweet Basil NEWSLETTER AND RECEIVE EASY RECIPES DELIVERED INTO YOUR INBOX EVERY DAY!
When you try a recipe, please use the hashtag #ohsweetbasil on INSTAGRAM for a chance to be featured in our stories! FOLLOW OH, SWEET BASIL ON FACEBOOK | INSTAGRAM | PINTEREST | TWITTER FOR ALL OF OUR LATEST CONTENT, RECIPES AND STORIES.