
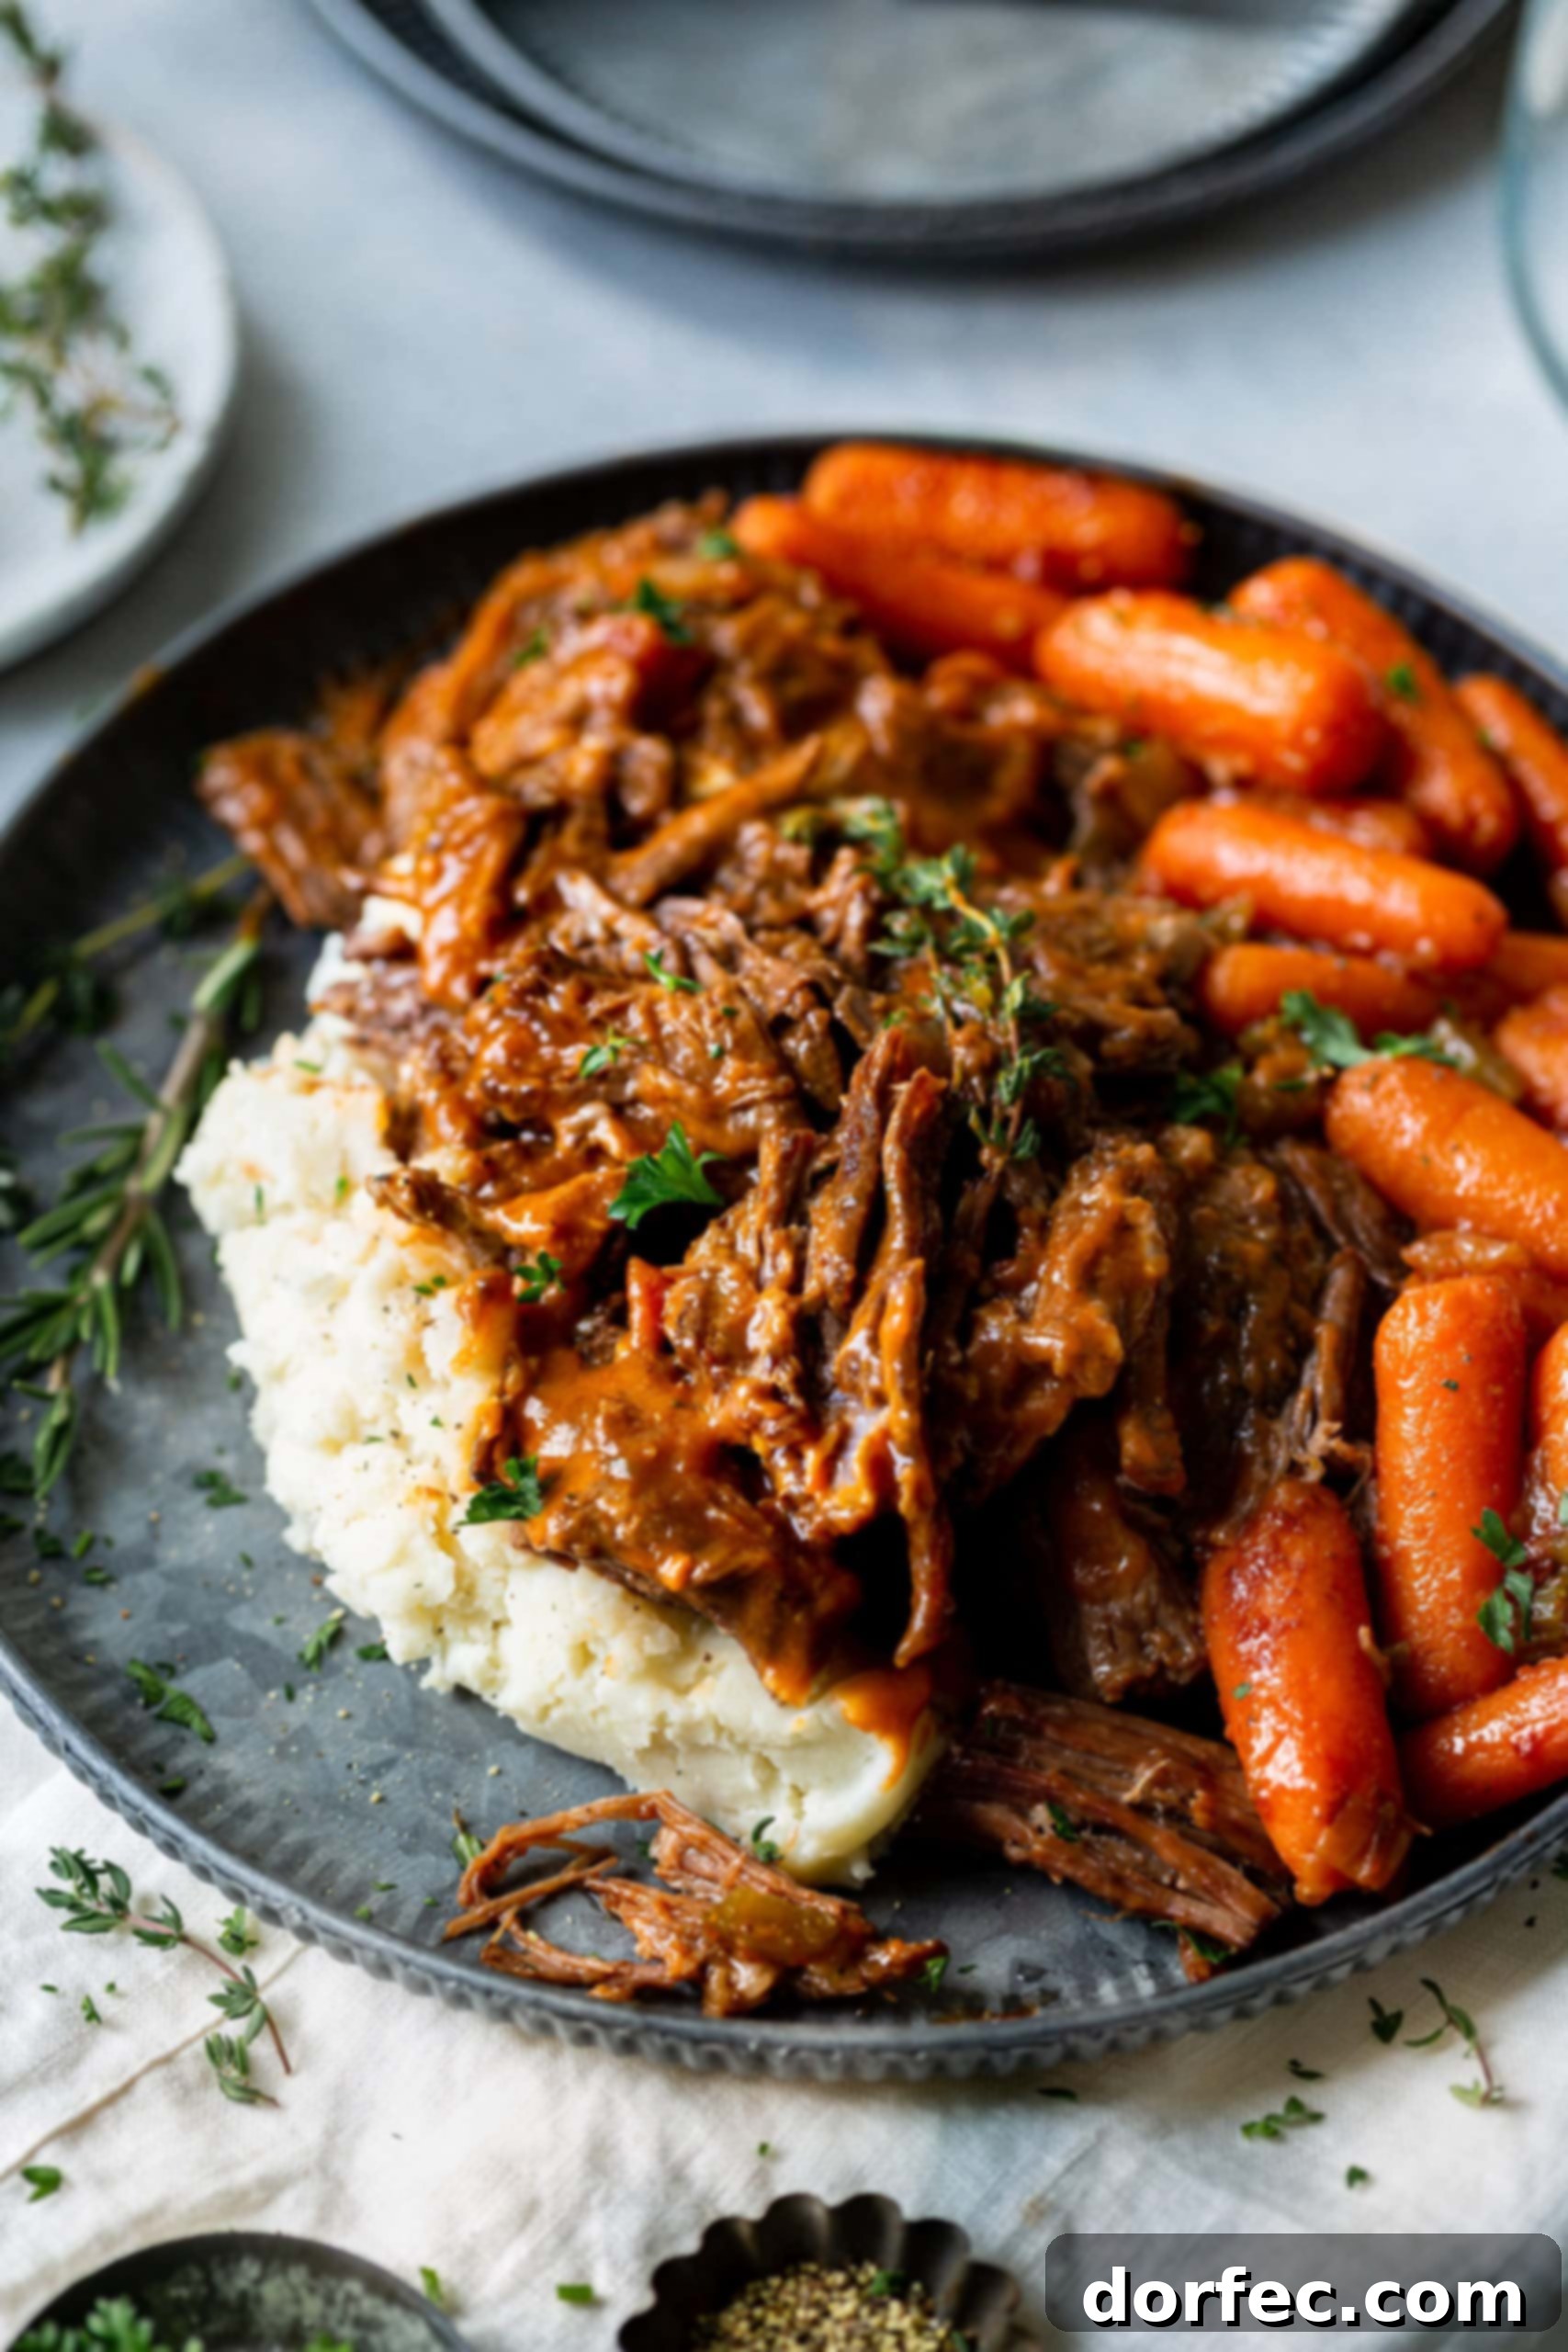
The Ultimate Homemade Pot Roast Recipe: Tender, Juicy, and Unforgettable
Imagine a pot roast that’s not just good, but truly exceptional. A dish where every forkful delivers melt-in-your-mouth tenderness, rich, savory flavors, and a comforting warmth that fills your soul. This isn’t just any pot roast recipe; it’s the best pot roast I’ve ever had the pleasure of tasting, designed to be juicy, tender, and falling apart in the most delightful way. Prepare to elevate your dinner experience and create lasting memories with this exquisite homemade pot roast masterpiece.
For many, Sunday dinner is more than just a meal; it’s a cherished tradition, a time for family to gather, share stories, and indulge in hearty, home-cooked fare. In my childhood home, Sunday dinner was almost always one of two comforting classics: a perfectly prepared slow cooker roast or succulent roasted chicken. While my mom, a culinary wizard, undoubtedly offered more variety over the years, these two dishes are etched most vividly in my memory.
I recall the laughter and stories shared around the table, like the time Dad, in a moment of endearing confusion, added sweetened condensed milk instead of evaporated milk to the mashed potatoes, creating a surprisingly delicious, fluffy concoction. Or the afternoon I, as a child, loved the vibrant raspberry jell-o so much that I meticulously licked the bowl clean. But most of all, I remember my mom, adorned in her Sunday dress and apron, diligently prepping dinner in the kitchen before church. These weren’t just meals; they were moments, woven into the fabric of a truly wonderful childhood.
We’ve explored various pot roast methods on the blog, from the popular slow cooker Mississippi pot roast to our flavorful oven braised beef roast. Each offers a unique twist and holds a special place in our hearts. However, this particular classic pot roast recipe has quickly become my new, undisputed favorite. It captures the essence of a traditional Sunday meal with a depth of flavor that is simply unparalleled.
Essential Ingredients for the Perfect Pot Roast
Crafting this incredible beef pot roast requires a thoughtful selection of ingredients, each playing a crucial role in building layers of flavor and achieving that coveted tender texture. You’ll need specific items for browning the roast, a rich medley for the sauce, and a couple of essentials to create the luscious gravy. Once you experience the result, your standard pot roast will never be the same! To help you prepare, here’s a quick overview of what you’ll need before we dive into the detailed instructions.
For the Roast: Building the Foundation
- Boneless Chuck Roast: The star of our show, chosen for its marbling and exceptional tenderness when slow-cooked.
- All-Purpose Flour: Essential for a golden-brown crust and thickening the sauce.
- Kosher Salt: For seasoning the meat and enhancing its natural flavors through dry brining.
- Black Pepper: A classic seasoning that complements the beef beautifully.
- Olive Oil: For searing the roast to lock in juices and develop a rich crust.
For the Rich Sauce: The Heart of the Flavor
- Yellow Onions: Providing a sweet and aromatic base as they caramelize.
- Baby Carrots: Adding natural sweetness and a vibrant touch to the stew.
- Celery: Contributing essential aromatic notes to the classic mirepoix.
- Garlic: Smashed for a mellow, slow-release of its pungent, savory essence.
- Kosher Salt & Black Pepper: To season the vegetables and deepen the sauce’s profile.
- Beef Broth: The foundational liquid, infusing the roast with rich beefy notes.
- Balsamic Vinegar: A touch of acidity to brighten flavors and tenderize the meat.
- Apple Cider: Adds a subtle, fruity sweetness and tang that complements the savory beef. (Ensure it’s not from concentrate or apple juice for best flavor.)
- Worcestershire Sauce: A secret weapon for umami depth and a complex savory kick.
- Water: To achieve the perfect consistency for the braising liquid.
- Liquid Smoke: For an authentic, smoky depth that mimics slow-cooked BBQ.
- Better than Bouillon (chicken flavor): Surprisingly, chicken bouillon enhances the richness of beef broth without overpowering it, adding another layer of savory goodness.
- Canned Peeled Tomatoes in Puree: San Marzano or similar, providing a sweet, acidic body to the sauce that breaks down beautifully.
- Fresh Thyme: Earthy and aromatic, infusing the dish with classic herb flavors.
- Fresh Rosemary: Piney and robust, pairing perfectly with beef for a fragrant, savory profile.
For the Velvety Gravy: The Finishing Touch
- Butter: For creating a smooth roux that will thicken our gravy.
- All-Purpose Flour: The other half of our roux, ensuring a perfectly thickened sauce.
Detailed measurements for each of these high-quality ingredients can be found in the comprehensive recipe section at the end of this post, ensuring you have everything you need to create this amazing tender pot roast.
Mastering the Art of the Best Pot Roast: A Step-by-Step Guide
Many people find the idea of making a pot roast intimidating, but I assure you, it’s far simpler than it seems! With this detailed guide, broken into three manageable sections, you’ll achieve a consistently flawless and flavorful homemade beef pot roast every single time. Let’s embark on this culinary journey together.
Preparing the Roast: The Secret to Exceptional Flavor and Texture
- **Dry Brine for Depth:** Begin by thoroughly patting your boneless chuck roast dry with paper towels. This crucial step removes excess surface moisture, which is essential for developing a deep, caramelized crust during searing. Liberally sprinkle all sides of the roast with Kosher salt and freshly ground black pepper. Place the seasoned roast on a large plate, uncovered, in the refrigerator for 12 to 24 hours. This dry brining process allows the salt to penetrate the meat, tenderizing it and enhancing its natural flavors from within, resulting in a significantly more tender and seasoned final dish.
- **Bring to Room Temperature:** Approximately 30 minutes before you plan to cook, remove the roast from the refrigerator and let it rest on the counter. Allowing the meat to come closer to room temperature ensures more even cooking and helps achieve a superior sear.
- **Searing for a Rich Crust:** Heat a heavy-bottomed Dutch oven over medium-high heat. Add 2 tablespoons of olive oil. While the oil heats, place about 1/2 cup of all-purpose flour into a pie dish or shallow plate. Roll the roast in the flour, coating all sides evenly. Once the oil is shimmering, carefully place the floured roast into the hot Dutch oven. Sear each side for 3-4 minutes until a beautiful, deep golden-brown crust forms. This crust is vital for building complex flavors in your sauce. Remove the seared roast to a clean plate and set aside.
- **Preheat Your Oven:** Before moving on, preheat your oven to 325°F (160°C). This ensures your oven is at the correct temperature for the long, slow braising process. Now, let’s build the incredible sauce.
Crafting the Flavorful Sauce: Where the Magic Happens
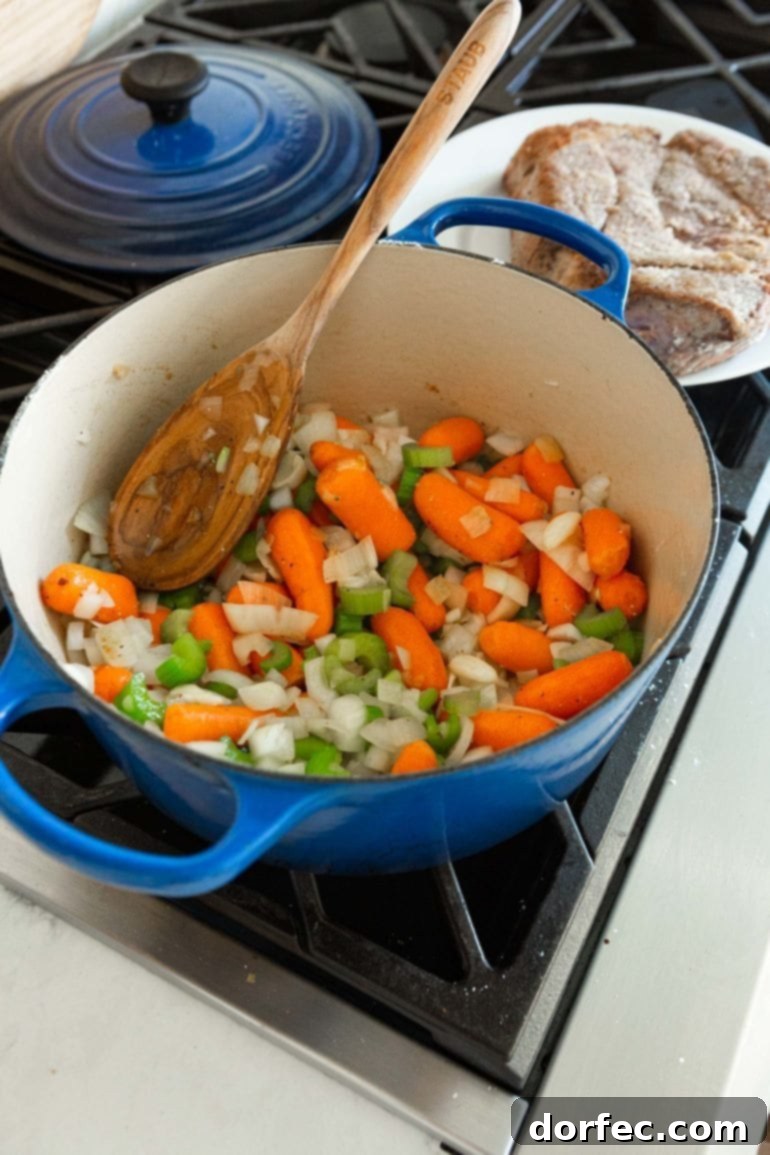
- **Sautéing the Aromatics:** In the same Dutch oven (don’t clean it – those browned bits are flavor!), add another 2 tablespoons of olive oil. Add the chopped yellow onions, baby carrots, celery (chopped into ½-1″ pieces), and smashed garlic.
- **Building the Base:** Season the vegetables with 3 teaspoons of Kosher salt and 1 teaspoon of black pepper. Sauté, stirring occasionally, for about 5 minutes, or until the onions become translucent and fragrant. This step softens the vegetables and begins to release their sweet flavors.
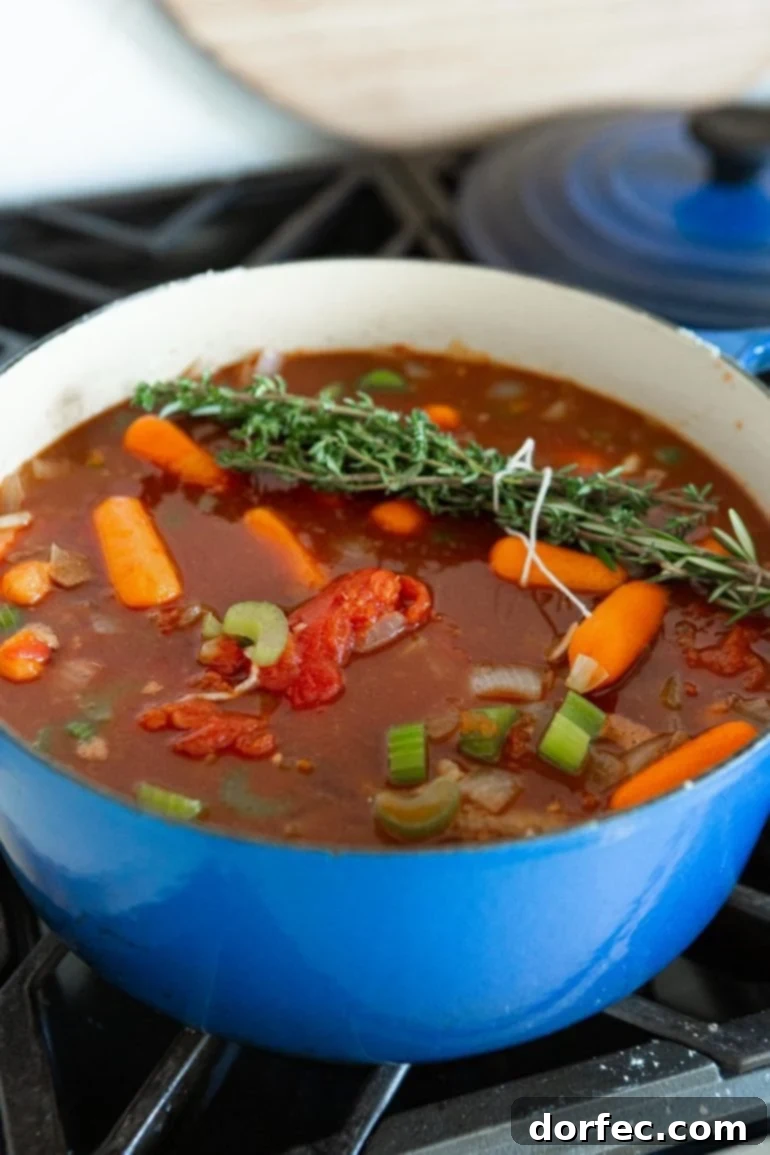
- **Adding Liquid and Herbs:** Stir in all the remaining sauce ingredients: beef broth, balsamic vinegar, apple cider, Worcestershire sauce, water, liquid smoke, Better than Bouillon (chicken flavor), canned peeled tomatoes in puree (breaking them up with a spoon), fresh thyme sprigs, and fresh rosemary branches. Stir everything together until well combined.
- **Nestle the Roast:** Carefully place your seared chuck roast back into the Dutch oven, nestling it down into the bed of vegetables and flavorful liquid. Spoon some of the vegetables and sauce over the top of the meat, ensuring it’s partially submerged and coated.
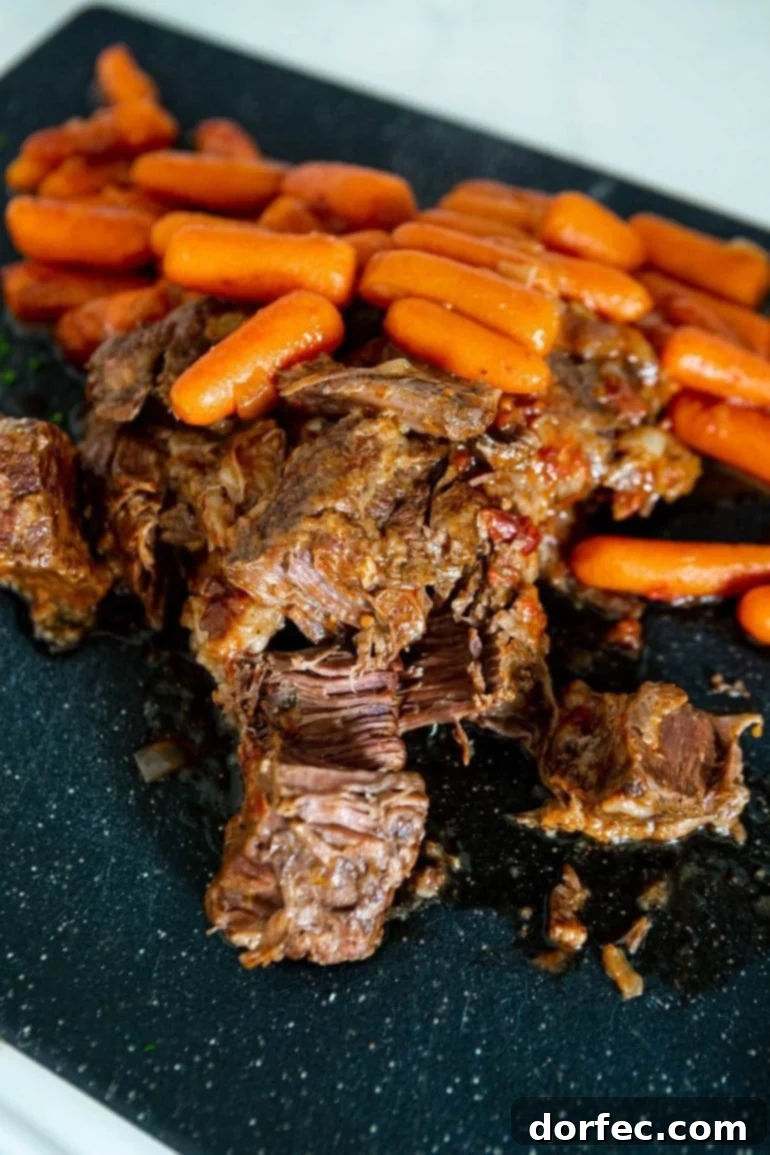
- **Braising to Perfection:** Cover your Dutch oven tightly with its oven-safe lid or aluminum foil. Transfer the covered pot to your preheated oven and bake for 2 hours at 325°F (160°C). After 2 hours, reduce the oven temperature to 250°F (120°C) and continue cooking for another 1-2 hours, or until the meat is incredibly fork-tender and practically falls apart. I generally aim for a total of 4 hours of cooking time as this ensures the meat is perfectly tender without overcooking.
Creating the Velvety Gravy: A Silky Companion
- **Resting the Meat:** Once the pot roast is cooked to perfection, carefully remove the Dutch oven from the oven. Place it on a stovetop burner over low heat to maintain a gentle simmer. Using tongs or a slotted spoon, carefully remove the tender roast and cooked carrots to a large serving platter. Shred the beef using two forks, then cover it loosely with aluminum foil to keep it warm while you prepare the gravy.
- **Pureeing for Smoothness:** For an extra smooth and flavorful gravy, take the whole peeled tomatoes and about half of the braising liquid and vegetables from the Dutch oven and transfer them to a blender. Blend until completely smooth and creamy. Return the puréed mixture to the pot with the remaining sauce and stir it all together. This step enhances the richness and texture of your gravy.
- **Thickening the Gravy:** In a small bowl, combine the softened butter and all-purpose flour to create a smooth paste, known as a beurre manié. Add this butter-flour mixture to the simmering sauce in the Dutch oven, whisking constantly to ensure no lumps form. Continue to simmer, stirring occasionally, for 2-5 minutes, or until the sauce thickens into a rich, velvety gravy.
- **Serve and Enjoy:** Ladle generous amounts of this savory gravy over the shredded beef and carrots. Serve immediately over creamy mashed potatoes for the ultimate comfort food experience.
These detailed instructions, along with ingredient quantities, are also conveniently summarized in the full recipe card below.
Unlocking Maximum Flavor: Best Tips for the Most Flavorful Pot Roast
Achieving a truly outstanding pot roast goes beyond just following the steps. Incorporating these expert tips will ensure your dish is bursting with flavor and boasts an irresistible texture.
- **The Power of Dry Brining:** This is arguably the single most impactful step for enhancing flavor and tenderness. Unwrap your boneless chuck roast and pat it thoroughly dry with paper towels. Season generously with a high-quality Kosher salt, such as Diamond Crystal or Redmond Real Kosher Salt, covering the front, back, and all sides. Place the seasoned roast on a plate or dish, uncovered, in the refrigerator for 12 to 24 hours. This process draws moisture from the meat’s surface, concentrating its natural juices and allowing the salt to deeply penetrate the muscle fibers. The result is a much more deeply seasoned and incredibly tender roast that caramelizes beautifully when seared, developing an unparalleled depth of flavor.
- **Room Temperature Resting:** Always allow your seasoned pot roast to rest on the counter for at least 30 minutes before searing it in the pan. Taking the chill off the meat is crucial for several reasons: it promotes more even cooking throughout the roast, and it allows the surface to brown much more effectively. A well-browned crust is key to developing complex, savory notes that will carry through the entire dish.
Smashed Garlic vs. Minced Garlic: Understanding the Flavor Difference
The method you use to prepare your garlic significantly impacts its flavor release. For a dish like pot roast, which cooks for several hours, we opt for smashed garlic. Smashed garlic releases a mild, sweet, and more mellow flavor over a long period of time, slowly infusing the braising liquid without becoming too pungent or bitter. In contrast, minced garlic has a more intense, immediate, and sharper flavor, which might be overwhelming in a slow-cooked dish where balance is key.
Choosing the Best Roast for Your Pot Roast
The cut of beef you select is paramount to the success of your pot roast. Our absolute go-to recommendation is a boneless chuck roast. This cut is perfect because it boasts beautiful marbling – those streaks of fat that melt during the long cooking process, infusing the meat with moisture and rich flavor. This results in an incredibly juicy and tender beef that effortlessly falls apart. Plus, chuck roasts are usually quite economical, offering fantastic value. If a chuck roast isn’t available, excellent alternatives include a beef brisket or a round roast; both will yield delicious results when slow-braised.
Frequently Asked Questions About Pot Roast
Can I Use Regular Carrots Instead of Baby Carrots?
Absolutely! If you prefer to use regular carrots, you will need approximately 2 ½ cups, which generally translates to about 3 large carrots. Simply peel and slice the carrots into bite-sized pieces before adding them to the sauce. They will cook down just as beautifully and absorb all the wonderful flavors of the braising liquid.
Can I Add Potatoes Directly to the Pot Roast?
You can certainly add potatoes directly into the Dutch oven with the roast and vegetables! However, we’ve found that we personally adore serving this rich beef pot roast over fluffy, creamy mashed potatoes, as it allows the gravy to really shine. If you do wish to include potatoes in the pot, peel and cube 3-4 medium-sized potatoes into uniform pieces. Add them in step 1 of the sauce instructions, when you’re sautéing the other vegetables. This timing ensures they cook perfectly alongside the roast without becoming mushy.
Making Ahead: Tips for Preparing Pot Roast in Advance
This homemade pot roast is an excellent dish for making ahead, perfect for busy weeknights or entertaining guests. You can prepare the entire dish up to one day in advance. After cooking the roast and sauce as directed, simply allow it to cool completely, then transfer it to an airtight container and refrigerate until you’re ready to bake and serve. When it’s time to reheat:
- Remove the pot from the refrigerator and let it sit on the counter for 15-30 minutes to take the chill off.
- You can either bring the pot roast and sauce back to a simmer on the stovetop before transferring it to the oven, or simply place it directly into a preheated oven at 300°F (150°C) for about 30-45 minutes, or until thoroughly heated through.
- Alternatively, you can make the dish entirely, store the cooked carrots separately, and then reheat the beef and sauce the next day, adding the carrots back in at the end.
Can This Pot Roast Be Made in a Slow Cooker?
Yes, absolutely! This recipe adapts beautifully to a slow cooker, making it perfect for hands-off cooking throughout the day. To convert this oven braised beef roast to a slow cooker pot roast:
Follow the recipe as written through step 3 of the “Preparing the Roast” section (patting dry, seasoning, bringing to room temp, and searing the floured roast). The searing step is highly recommended even for slow cooker versions, as it develops crucial flavor and color.
Once your roast is seared, proceed with step 1 of the “Crafting the Flavorful Sauce” section by sautéing the onions, carrots, celery, and smashed garlic in a skillet until translucent. Then, stir in the remaining sauce ingredients as directed in step 3.
After preparing the sauce, transfer all the sautéed vegetables and the rich sauce into your slow cooker. Place the seared chuck roast into the slow cooker, nestling it gently into the vegetables and liquid. Cover and cook on the LOW setting for 8 hours, or on HIGH for 3-4 hours followed by an additional 2-3 hours on LOW. The roast is ready when the meat is incredibly fork-tender and easily falls apart. Finish with the gravy steps as outlined in the recipe.
Storage and Reheating Tips for Pot Roast Leftovers
Proper storage is key to enjoying your delicious pot roast leftovers. Any uneaten portions should be stored in an airtight container in the refrigerator. It will maintain its excellent quality and flavor for 3-4 days. When it comes to reheating, the best way to ensure the meat stays tender and juicy, avoiding dryness, is to follow these steps:
Place the leftover pot roast and gravy in a baking dish. Add a little extra beef broth (about ¼ to ½ cup, depending on the amount of leftovers) to the pan to provide additional moisture. Cover the baking dish tightly with aluminum foil. Place it in an oven preheated to 350°F (175°C) for 15-20 minutes, or until it’s thoroughly heated through. The foil helps to steam the meat gently, keeping it tender and succulent.
Your next Sunday dinner is about to be truly spectacular! Prepare a batch of warm, fluffy dinner rolls, invite some cherished friends or family over, and serve them this phenomenal pot roast. This isn’t just a meal; it’s an experience, a tradition in the making. It will undoubtedly be the best pot roast recipe you’ve ever had the pleasure of eating, creating cherished memories around your table.
More Irresistible Comfort Food Recipes:
If you’re craving more heartwarming dishes that evoke the cozy feeling of home, explore these other fantastic comfort food recipes:
- Classic Meatloaf
- Hearty Beef Stew
- Creamy Broccoli Cheddar Soup
- Better-Than-Grandma’s Chicken Noodle Soup
- Easy Garlic Butter Steak
- Award-Winning Instant Pot Chili
- Roasted Tomatillo Chicken Enchiladas
- Classic Sloppy Joes
- One-Pot Lasagna Pasta
- Southern Macaroni and Cheese
Beef Pot Roast Recipe
By Sweet Basil
Prep Time: 30 minutes (plus 12-24 hours for dry brining)
Cook Time: 4 hours
Total Time: 1 day, 4 hours, 30 minutes
Yields: 6 servings
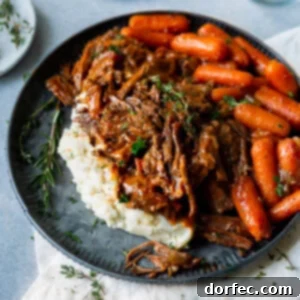
A pot roast should be juicy, tender, and falling apart in your mouth, and this pot roast recipe is all those things! It is the best pot roast I’ve ever had!
Ingredients
For the Roast
- 4-5 Pounds Boneless Chuck Roast, tied or flat
- Kosher Salt, for liberal seasoning
- Black Pepper, for liberal seasoning
- 4 Tablespoons Olive Oil, divided
- 1/2 Cup All Purpose Flour
For the Sauce
- 2 Yellow Onions, chopped
- 1 Pound Baby Carrots (or 2 ½ cups sliced regular carrots)
- 5 Ribs Celery, chopped in ½-1″ pieces
- 6 Cloves Garlic, smashed
- 3 teaspoons Kosher Salt
- 1 teaspoon Black Pepper
- 1 Cup Beef Broth
- 1/2 Cup Balsamic Vinegar
- 1/2 Cup Apple Cider, not from concentrate and not apple juice
- 1 Tablespoon Worcestershire Sauce
- 1/2 Cup Water
- 1 Tablespoon Liquid Smoke
- 1 ½ teaspoons Better than Bouillon, chicken flavor
- 28 Ounce Canned Peeled Tomatoes in Puree, San Marzano or similar
- 3 Sprigs Fresh Thyme
- 2 Branches Fresh Rosemary
For the Gravy
- 1 Tablespoon Butter, softened
- 2 Tablespoons All Purpose Flour
Instructions
For the Roast
- **Season and Dry Brine:** Pat the roast dry and sprinkle liberally with kosher salt and pepper on all sides. Place on a large plate in the fridge, uncovered, for up to 24 hours. This dry brining enhances flavor and tenderness.
- **Bring to Room Temperature:** Remove the roast from the fridge 30 minutes prior to cooking to allow it to come to room temperature for even cooking and better searing.
- **Prepare for Searing:** Preheat the oven to 325°F (160°C). In a large Dutch oven over medium-high heat, add 2 tablespoons of olive oil. In a pie dish or similar, roll the roast in the flour to coat all sides evenly.
- **Sear the Roast:** Sear each side of the floured roast in the hot Dutch oven for about 3-4 minutes per side until deeply browned. Remove the seared roast to a clean plate and set aside.
For the Sauce
- **Sauté Vegetables:** Add the remaining 2 tablespoons of olive oil to the Dutch oven. Add the chopped onions, carrots, celery, and smashed garlic.
- **Season and Soften:** Add 3 teaspoons of Kosher salt and 1 teaspoon of black pepper. Sauté, stirring occasionally, for about 5 minutes, or until the onions are translucent.
- **Combine Sauce Ingredients:** Stir in all remaining ingredients for the sauce: beef broth, balsamic vinegar, apple cider, Worcestershire sauce, water, liquid smoke, Better than Bouillon, canned peeled tomatoes (break them up), fresh thyme, and fresh rosemary. Ensure everything is well mixed.
- **Braise the Roast:** Nestle the seared roast back into the Dutch oven, pushing some vegetables and liquid over the top of the meat.
- **Cook to Tenderness:** Cover the Dutch oven tightly with an oven-safe lid or aluminum foil. Bake for 2 hours at 325°F (160°C). Then, reduce the heat to 250°F (120°C) and continue cooking for another 1-2 hours, or until the meat is incredibly fork-tender and falls apart easily. (Total cooking time is typically 4 hours.)
For the Gravy
- **Rest and Shred Meat:** Carefully remove the Dutch oven from the oven and place it on a stovetop burner over low heat to keep warm. Remove the cooked meat and carrots to a large serving platter. Shred the meat with two forks and cover it loosely with foil to keep it warm.
- **Purée Sauce (Optional for smoothness):** For an extra smooth gravy, take the tomatoes and about half of the remaining sauce from the pot and purée in a blender until smooth. Return the puréed mixture to the pot with the rest of the sauce and stir.
- **Thicken Gravy:** In a small bowl, mix together the softened butter and 2 tablespoons of flour to form a smooth paste (beurre manié). Add this mixture to the simmering sauce in the pot, whisking constantly. Bring to a gentle simmer and cook for 2-5 minutes, stirring, until the sauce thickens into a rich gravy.
- **Serve:** Serve the shredded pot roast and carrots immediately, generously topped with the homemade gravy, preferably over creamy mashed potatoes.
Recipe Notes
Slow Cooker Version: Follow the recipe steps through searing the roast and sautéing the aromatics. Then, place all vegetables and sauce ingredients into the slow cooker. Add the seared roast, nestling it into the veggies. Cook on LOW for 8 hours or on HIGH for 3 hours, then LOW for 2 more, or until the meat is exceptionally tender and falls apart. Proceed with gravy as directed.
Nutrition Information (Approximate per serving: 1 cup)
- Calories: 801kcal
- Carbohydrates: 34g
- Protein: 62g
- Fat: 47g
- Saturated Fat: 18g
- Polyunsaturated Fat: 4g
- Monounsaturated Fat: 25g
- Trans Fat: 2g
- Cholesterol: 214mg
- Sodium: 2010mg
- Potassium: 1699mg
- Fiber: 5g
- Sugar: 14g
- Vitamin A: 10867IU
- Vitamin C: 21mg
- Calcium: 169mg
- Iron: 10mg
Nutrition information is automatically calculated and should only be used as an approximation.
Remember to subscribe to our FREE Oh Sweet Basil Newsletter and receive easy recipes delivered into your inbox every day!
When you try a recipe, please use the hashtag #ohsweetbasil on Instagram for a chance to be featured in our stories! Follow Oh, Sweet Basil on Facebook | Instagram | Pinterest | Twitter for all of our latest content, recipes, and stories.