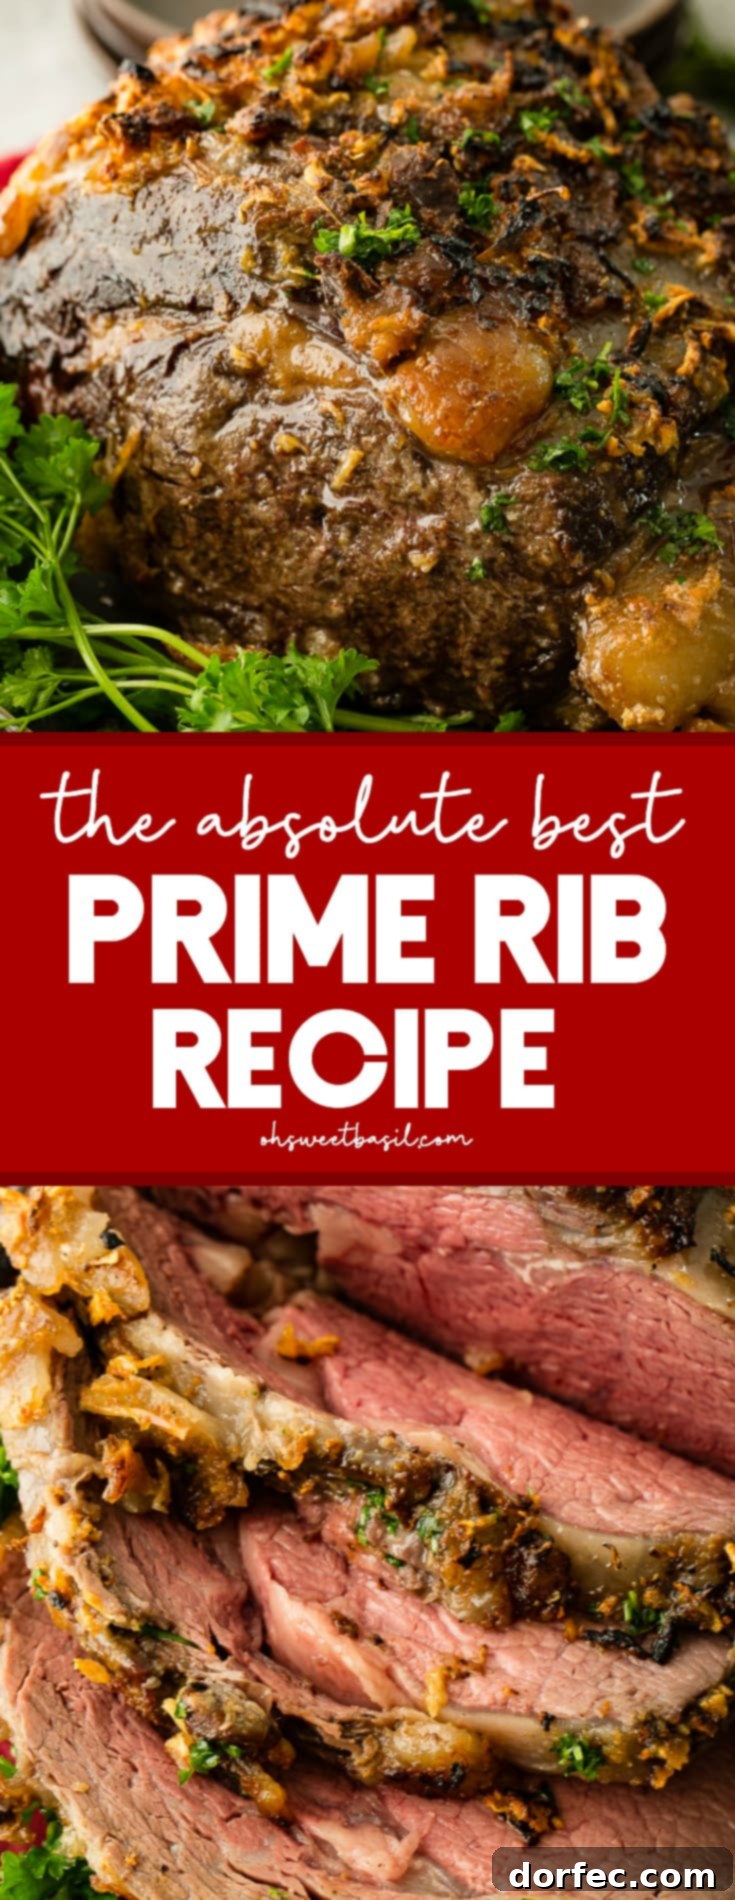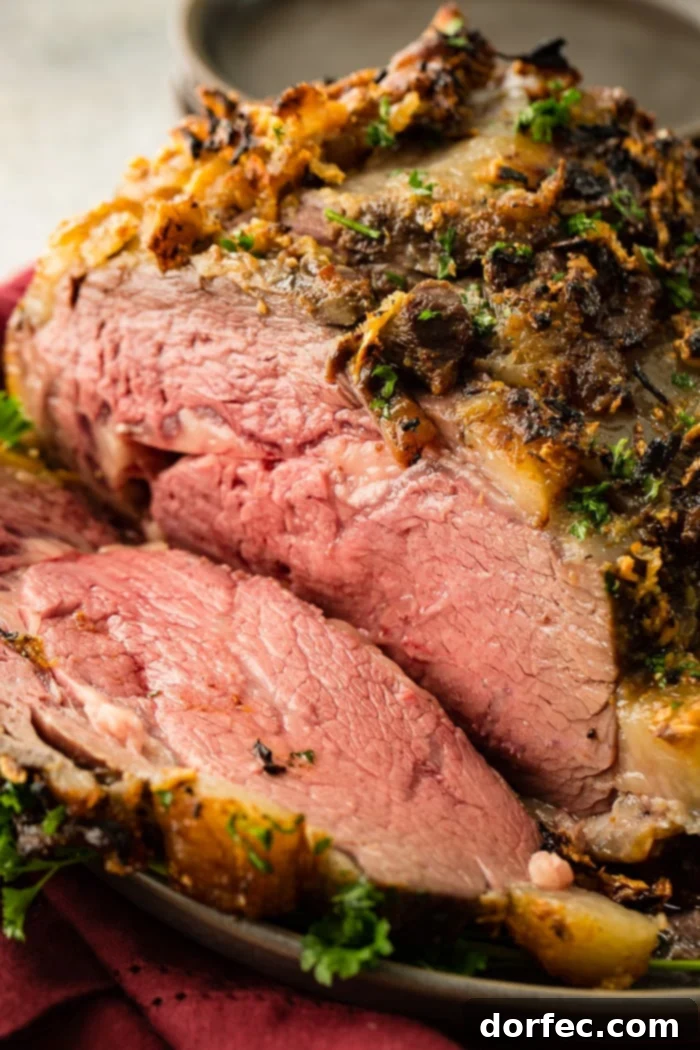
Every year, I promise to unveil the secret to a truly unforgettable holiday meal: The Absolute Best Prime Rib Recipe. And every year, amidst the festive chaos, I somehow forget to capture the perfect pictures or publish the detailed guide. But not this year! This year, I’m not just making prime rib; I’m finally sharing the definitive recipe that will elevate your holiday feast to legendary status.
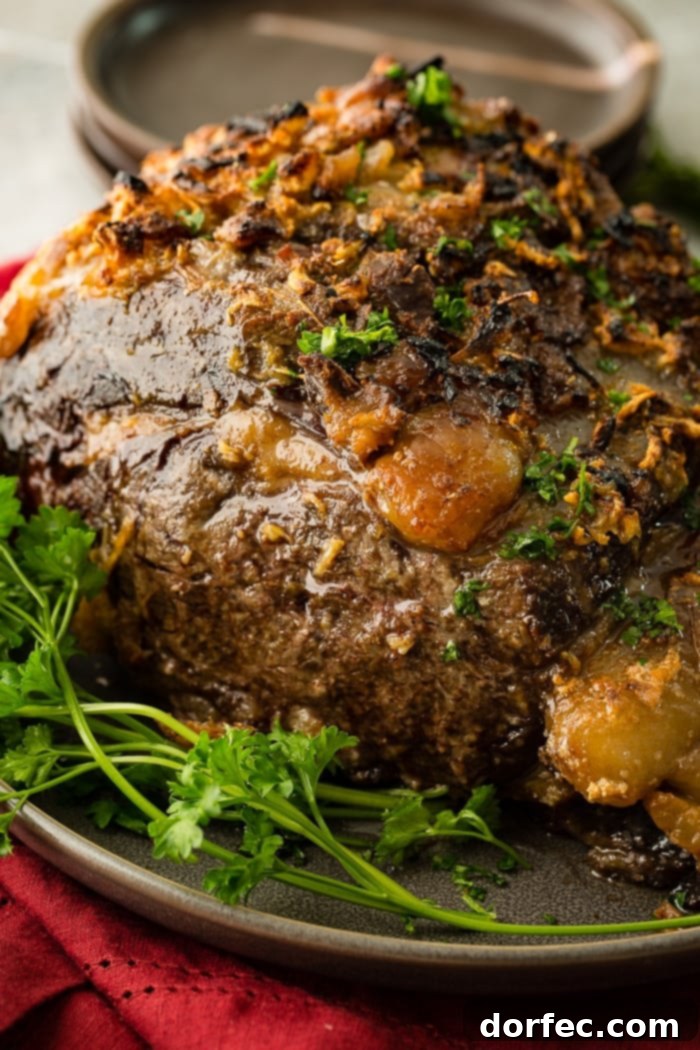
I know, I know. I’m notorious for promising this incredible prime rib recipe and then delaying its release until the last minute, leaving you scrambling before the holidays. But I made a firm commitment to myself this year to get it done early, and here we are! This timing should give you ample opportunity to prepare for an extraordinary culinary experience.
And because I want you to succeed spectacularly, I’m not just handing you a recipe; I’m providing an exhaustive guide filled with invaluable tips, crucial tricks, and common pitfalls to avoid. My goal is for your prime rib to turn out absolutely perfect, creating a show-stopping centerpiece that will impress even the most discerning palates.
Consider this your culinary gift: the roadmap to a flawless prime rib. You are truly welcome!
There’s something undeniably magical about prime rib. Mention it, and people’s eyes light up, their appetites instantly piqued. I was chatting with my mom while preparing this very roast, and sure enough, her immediate response was, “Oh, what I wouldn’t give to be there!” Part of its allure is undoubtedly the meat itself – so incredibly tender, succulently juicy, and dare I say, almost buttery in texture. It’s simply irresistible.
But for me, that’s not even the crowning glory. My absolute favorite part is the exterior: that glorious, deeply caramelized, flavor-packed crust. It’s akin to the prized burnt ends of a perfectly smoked brisket – crispy, savory, and unbelievably delicious. This recipe focuses heavily on achieving that exquisite outer layer alongside a perfectly cooked interior.
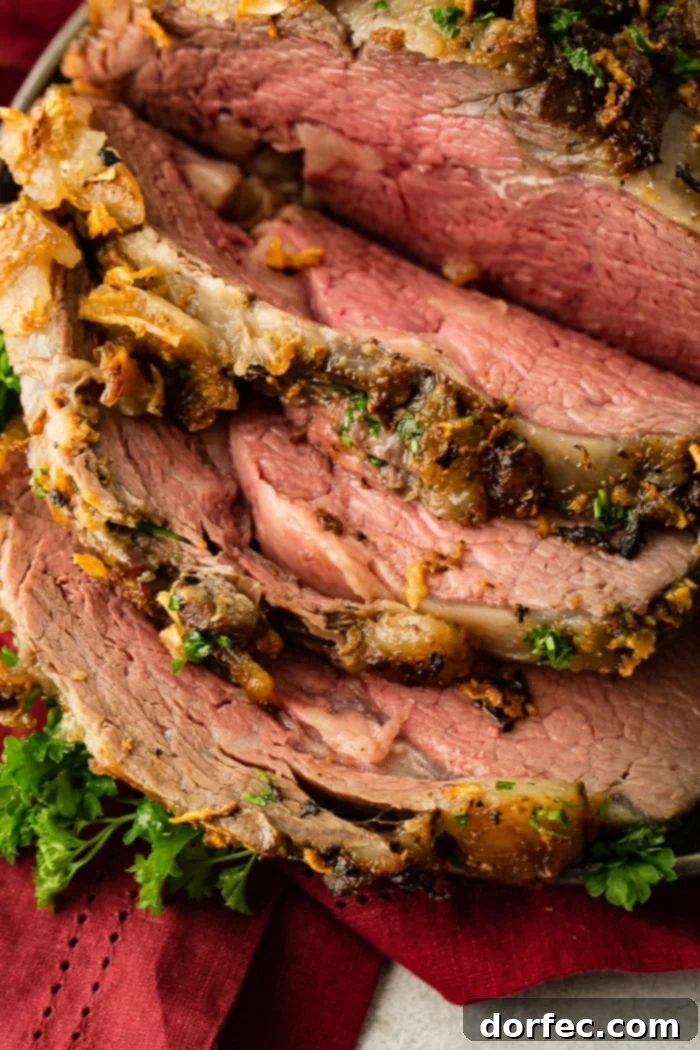
Traditionally, prime rib is served rare to medium-rare, allowing its natural tenderness to shine. However, I’ll be honest, I personally prefer mine closer to medium. The beauty of this recipe is its adaptability; you can easily adjust the cooking to achieve your ideal doneness. Below, I’ll outline all the various prime rib temperatures and corresponding doneness levels, ensuring you can tailor it precisely to your preference.
Having encountered my fair share of prime rib mishaps over the years, I’ve learned exactly what to do and, more importantly, what not to do. These lessons have been distilled into this guide, so you can bypass the guesswork and head straight for success. So, let’s dive right in and get cooking!
What is Prime Rib? Unveiling the King of Roasts
Let’s demystify this majestic cut of beef. “Prime Rib” and “Standing Rib Roast” are, in essence, two names for the same magnificent thing. The term simply varies depending on regional parlance or individual preference. A prime rib is a cut of beef from the primal rib section of the steer, one of the nine primal cuts of beef. This particular section, spanning ribs six through twelve, is highly prized for its exceptional tenderness, rich flavor, and generous marbling.
While the entire rib section comprises seven ribs (six through twelve), a Standing Rib Roast, as you’d typically purchase it, may contain anywhere from two to seven ribs. The number of ribs determines the size of your roast, allowing for flexibility based on your guest count. This primal cut is where the ribeye steaks also originate, underscoring its reputation as a premium and highly flavorful part of the animal.
What’s the Difference Between Prime Rib vs. Ribeye?
This is a common point of confusion, but the distinction is quite straightforward. The term “Prime Rib” fundamentally refers to a larger, bone-in roast cut from the rib primal. It’s a robust piece of meat, designed for slow roasting to feed a crowd, and often presented grandly with the bones intact.
A “Ribeye Roast,” on the other hand, is essentially a prime rib roast that has been carved off the bone before or after cooking. When individual steaks are cut from this boneless roast, they become “Ribeye Steaks.” So, while a ribeye steak is a delicious, single-serving portion, it originates from the same larger cut as a standing rib roast. The primary difference lies in the presentation and typical cooking methods: one is a grand roast, the other is an individual steak.
How to Buy the Perfect Prime Rib for Your Feast
The journey to the absolute best prime rib begins with selecting the right cut. This premium roast deserves careful consideration when purchasing. Most conventional grocery stores don’t consistently stock the highest quality prime rib cuts, so your first and best step is to visit a butcher you trust. Here’s what to look for to ensure you get a stellar piece of meat:
USDA Grading: Look for a prime rib roast graded “Prime” or “Choice” by the USDA.
- Prime Grade: This is the highest quality grade, characterized by abundant and well-distributed marbling (intramuscular fat). This marbling melts during cooking, leading to unparalleled tenderness, juiciness, and rich flavor. It’s often found at specialty butchers or high-end markets.
- Choice Grade: More widely available, Choice grade still offers good marbling and delivers an excellent, flavorful roast. It’s a fantastic option if Prime grade is hard to find or outside your budget.
- Select Grade: While a valid grade, Select grade has the least marbling, which can result in a less tender and flavorful roast, making it less ideal for a show-stopping prime rib.
Fat Cap: Insist on a prime rib roast with an untrimmed fat cap, ideally about ½ to ¾ inch thick. This external layer of fat is crucial. As it renders during the slow roasting process, it bastes the meat, locking in moisture and developing that incredibly rich, crispy, caramelized crust that is a hallmark of a truly great prime rib. Don’t let the butcher remove too much of this precious layer.
Bone-In Preference: If possible, always buy a prime rib roast that has the bones attached. The bones serve multiple purposes: they act as natural insulators, helping the meat cook more evenly, and they impart a deeper, richer flavor to the roast and the pan drippings, which are essential for making a delicious au jus. While you can certainly cook a boneless prime rib, tying the ribs back onto the meat (as we will do in this recipe) will give you a more consistently even and juicy roast compared to leaving it entirely boneless.
Why is Prime Rib So Expensive?
You’re not alone in asking, “Why is prime rib roast so expensive?!” The cost reflects its status as a premium cut. Firstly, its exceptional marbling – the fine streaks of fat within the muscle – is what makes it incredibly tender and flavorful. Meat with higher marbling demands a higher price. A full prime rib is cut from ribs 6 through 12, encompassing seven ribs in total, meaning you are purchasing a substantial amount of high-quality meat and bone. Additionally, it’s a cut that often requires extra skill and time from the butcher to prepare properly, adding to its value. Its high demand for special occasions and its inherent quality make it a culinary investment, but one that truly delivers a luxurious and memorable dining experience.
How Much Prime Rib Per Person? Planning Your Perfect Portion
Determining the right amount of prime rib for your guests can be tricky, as appetites vary widely. However, a reliable rule of thumb for prime rib is to plan for approximately 1 pound of bone-in roast per adult. This generous estimate ensures that even the heartiest eaters will be satisfied, and often leaves you with some delicious leftovers for sandwiches or a second meal.
- How much prime rib for 8 adults? For a group of 8 to 10 people, a 4-bone prime rib (which typically weighs between 8 to 10 pounds) is usually sufficient.
- How much prime rib for 20 adults? For a larger gathering of around 20 adults, an 8 to 10-bone prime rib, weighing approximately 16 to 20 pounds, would be more appropriate.
Remember to consider if you’re serving many rich side dishes, which might reduce individual meat consumption slightly, or if your guests are particularly fond of beef and you’d like to ensure extra portions for everyone.
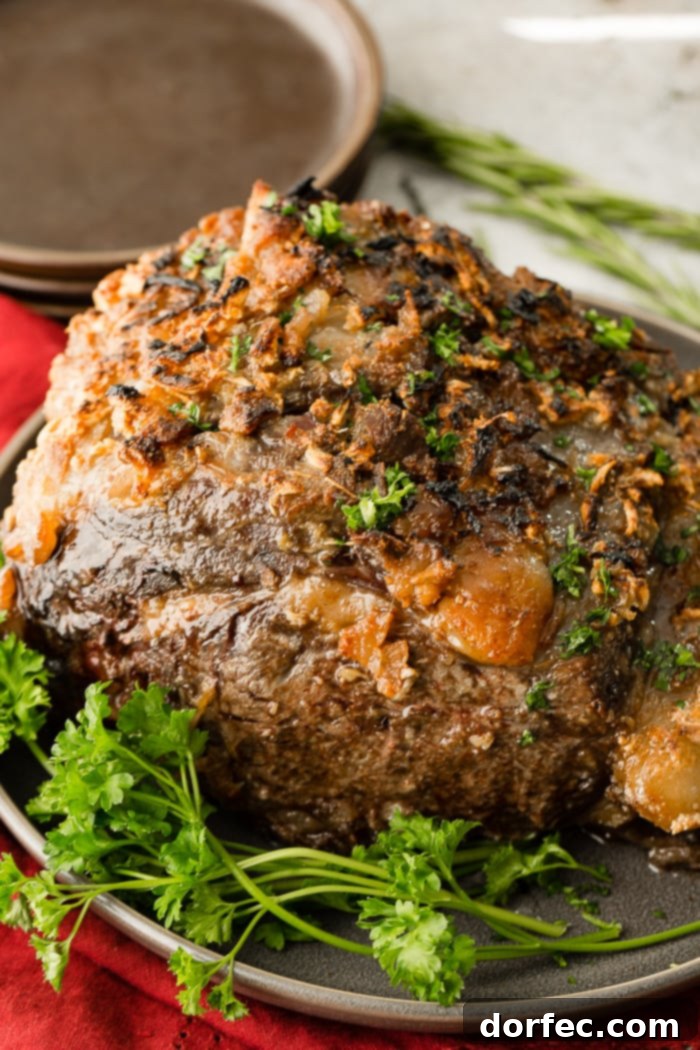
How to Cook Prime Rib: The Reverse Sear Method for Perfection
The secret to cooking the absolute best prime rib roast lies in the “reverse sear” method. This technique involves roasting the meat slowly at a low temperature to achieve perfectly even doneness from edge to edge, followed by a high-heat blast to create that irresistible, crispy, caramelized crust. I’ve shared very detailed instructions in the recipe card below, but here’s a comprehensive overview of the basic steps to making the best prime rib EVER:
- Prepare with Precision: Carefully slice the meat off the bones. This initial step allows you to season the entire roast more thoroughly and achieve a better sear. Once separated, rub a generous amount of good quality kosher salt all over the prime rib, ensuring it covers all surfaces and gets into any natural crevices. Refrigerate the roast, uncovered, for at least 24 hours, and ideally up to 96 hours. This crucial dry-brining process draws out moisture, then reabsorbs the seasoned juices, resulting in an incredibly tender and deeply flavorful roast.
- Reach Room Temperature: Before cooking, remove the prime rib from the refrigerator and allow it to sit on your kitchen counter for 2-3 hours. Bringing the roast closer to room temperature ensures more even cooking throughout and prevents the outer layers from overcooking before the center reaches your desired doneness.
- Sear for Deep Flavor: Heat a large, heavy-bottomed skillet or Dutch oven over high heat with a high-smoke-point oil (like grapeseed or avocado oil) until it’s just smoking. Sear all sides of the boneless roast until a beautiful, deep brown crust forms. This step, known as the Maillard reaction, creates complex, savory flavors on the surface. You can skip searing the bottom side if you plan to reattach the bones.
- Re-tie for Even Cooking: Once the seared roast is cool enough to handle, carefully place it back onto its bones, aligning them where they were originally cut. Secure the meat tightly to the bones with 2-3 pieces of butcher’s twine, tying between the ribs. This helps the roast maintain its shape and promotes uniform cooking.
- Season with Garlic Butter: Transfer the tied roast, fat side up, to a wire rack set on top of a rimmed baking sheet. Season generously with freshly ground black pepper. In a small bowl, mix softened unsalted butter with minced garlic (and feel free to add fresh herbs like rosemary or thyme here). Rub this aromatic garlic butter mixture generously all over the surface of the roast.
- Slow Roast to Perfection: Place the baking sheet with the roast into a preheated oven set to a low temperature, typically 200°F (95°C). Roast until the internal temperature of the meat (measured with a reliable meat thermometer inserted into the thickest part, avoiding the bone) registers about 5-10 degrees Fahrenheit below your desired final doneness (see our temperature notes below). This slow roasting can take anywhere from 3 ½ to 4 ½ hours, depending on the size of your roast and your specific oven.
- The Essential Rest: Remove the roast from the oven (keeping it on the baking sheet). Tent it loosely with aluminum foil. This resting period is critical; allow it to rest for at least 30 minutes, and up to 75 minutes. Resting allows the meat’s juices, which are concentrated in the center during cooking, to redistribute evenly throughout the roast, ensuring every slice is incredibly juicy and tender.
- Final Broil for the Ultimate Crust: After resting, adjust your oven rack so that the roast is about 8 inches from the broiler element. Heat the broiler to high. Remove the foil from the roast and broil for 2 to 8 minutes, watching very closely, until the fat cap is beautifully golden brown and delightfully crisp. This step gives you that perfect, crunchy exterior.
- Carve and Serve: Transfer the majestic roast to a carving board. Cut the twine and carefully remove the roast from the ribs. Slice the meat into ¾-inch thick slices, or your preferred thickness. Season with coarse salt to taste, and serve immediately with any delicious pan drippings, which can be made into a simple au jus or gravy!
Is this the best prime rib roast recipe ever? I believe it truly might be! This method guarantees a melt-in-your-mouth, flavorful roast every single time.
How Long to Cook Prime Rib
The duration for cooking prime rib is primarily dictated by the roast’s internal temperature, not by a fixed time on the clock. While a 7-pound roast might take anywhere from 3 ½ to 4 ½ hours at 200ºF (95ºC), this is merely an approximation. Factors like your roast’s starting temperature, its exact dimensions, and even your oven’s specific calibration can influence the total cooking time. Always prioritize an accurate meat thermometer to achieve your desired doneness reliably. If you need a prime rib done faster without compromising flavor, try our Instant Pot Prime Rib! It’s surprisingly delicious and cuts down significantly on cooking time.
How to Remove the Bones from a Prime Rib Roast
Removing the bones from your prime rib roast before cooking, and then tying them back on, is a technique that offers several advantages: it allows for more even seasoning and searing of the entire meat surface, and it makes carving significantly easier after the roast is cooked. To remove the bones, you’ll need a very sharp boning knife – we highly recommend quality cutlery like a Wusthof knife for precision. Carefully run the knife down the length of the bones, following the natural contours and curve of the roast as closely as possible. Work slowly and precisely until the entire slab of meat is separated from the bone section. Be sure not to discard these bones; they will be tied back onto the roast for cooking, which helps with heat distribution and adds flavor to your pan drippings.
Prime Rib Temperatures to Remember for Perfect Doneness
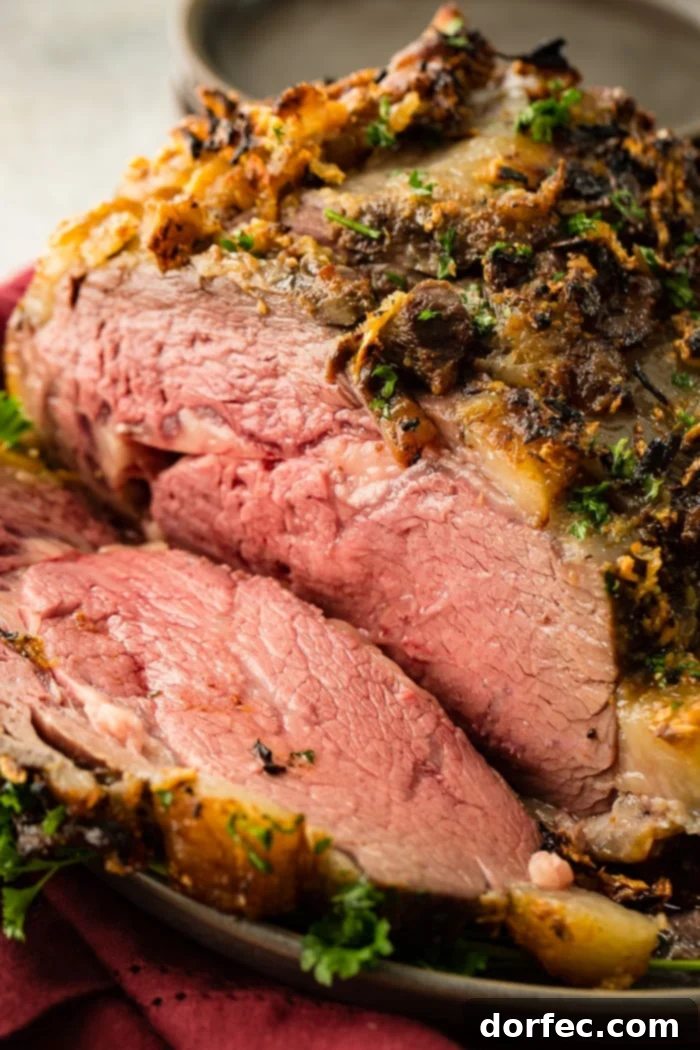
Achieving your preferred doneness is the most critical aspect of cooking prime rib. Always use a reliable meat thermometer inserted into the thickest part of the roast, making sure it doesn’t touch any bone. It’s important to remember that the internal temperature of the roast will continue to rise by 5-10 degrees Fahrenheit after it’s removed from the oven, during the resting period (this is known as carryover cooking). Therefore, always remove your prime rib from the oven when it’s 5-10 degrees below your target final temperature.
- Rare Prime Rib: The center will be cool and deep red. Remove from oven at **120-125ºF (49-52ºC)**.
- Medium Rare Prime Rib: This is the most popular doneness, featuring a warm, bright red center. Remove from oven at **125-130ºF (52-54ºC)**.
- Medium Prime Rib: The center will be warm and pink. Remove from oven at **130-135ºF (54-57ºC)**.
- Medium Well Prime Rib: Mostly pink with hints of gray, starting to firm up. Remove from oven at **135-140ºF (57-60ºC)**.
- Well Done Prime Rib: Very little to no pink, firm texture. Remove from oven at **140-145ºF (60-63ºC)**.
For the juiciest and most tender results, aiming for medium-rare or medium is generally recommended. However, this guide allows you to cater to all preferences!
Tips for Making the Best Prime Rib Ever
Mastering the art of prime rib requires attention to a few critical details. Here are my top tips, gleaned from years of experience, to ensure your roast is nothing short of spectacular:
Salt the Prime Rib Overnight: The Dry Brining Advantage
First and foremost, overnight salting is arguably the single most important step for achieving a truly exceptional prime rib. Many might emphasize the resting stage, which is indeed crucial, but dry brining takes the top spot for foundational flavor and texture.
Generously rub a good quality kosher salt all over the meat the day before you plan to cook it. Then, place it in the refrigerator overnight, uncovered. This process initially draws moisture out of the meat, creating a concentrated brine on the surface. This brine is then reabsorbed, breaking down muscle proteins and enhancing the beefy flavor while simultaneously yielding an unbelievably buttery-tender and juicy roast. It’s a game-changer for moisture retention and tenderness.
Keep the Oven Door Shut & Trust Your Thermometer
Take it from me, cooking prime rib can feel stressful the first time, especially if you haven’t been given the right tips. I used to be so worried about undercooking the roast that I checked it far too often. This habit significantly lengthens the cooking process and often leads to overcooked, drier meat.
The key is consistency. Invest in a reliable, oven-safe, leave-in meat probe thermometer. Insert the probe into the thickest part of the roast, ensuring it doesn’t touch any bone. Monitor the roast’s internal temperature without opening the oven door. If you’re using an instant-read thermometer like a Thermopro Instant Read, open the oven door as little as possible, and remove the roast briefly to take its temperature, minimizing heat loss.
My Prime Rib is Still Not Done!
If your roast has not reached your desired internal temperature within the specified time range, don’t panic or drastically increase the oven temperature. Instead, gently bring it to temperature: Heat the oven to 200°F (95°C), wait for about 5 minutes for it to stabilize, then shut the oven off completely. Leave the roast inside to continue cooking in the residual heat until it registers your desired internal temperature. This gentle, indirect heat will slowly bring it to doneness without overcooking the exterior.
Let the Standing Rib Roast Rest: The Non-Negotiable Step
Another absolutely crucial step when making any standing rib roast recipe is to give it adequate time to rest. This happens after you remove it from the oven and before you even think about carving and serving it to your eager guests.
During cooking, intense heat forces the meat’s natural juices toward the center. Think of cutting into a steak that hasn’t rested: all the precious juices immediately flood the cutting board, leaving the meat dry and chewy. Conversely, when you see a perfectly cooked steak at a restaurant, you notice the juices are beautifully distributed throughout. A proper rest gives these juices the essential time to redistribute themselves evenly back through the entire roast.
You’ll want to loosely tent the meat with aluminum foil and let it rest for a minimum of 30 minutes, and up to 75 minutes, before carving. This patience is truly rewarded with an incomparably juicy and tender prime rib.
More Holiday Recipes:
Looking for more show-stopping holiday recipes to complete your feast? Here’s an entire list of our favorites:
- Award Winning Instant Pot Turkey
- Cade’s Bananas Foster French Toast
- Orange Cinnamon Butterflake Rolls
- Instant Pot Blueberry French Toast Bake 3 Ways
- Candied Pecan Brussel Sprouts
- Mom’s Sticky Buns
- The Best Potato Rolls
- World’s Best Brown Sugar Ham
- Southern Macaroni and Cheese
Or if you want a different beef recipe, try this Corned Beef Brisket!
More Decadent Main Dishes You Must Try:
- Oven Braised Short Ribs
- Smoked Prime Rib
- Instant Pot Turkey Breast
- Carolina Pulled Pork
- Korean Oven Braised Short Ribs
- Oven Braised Beef Roast
- Creamy Herb Chicken with Sun-Dried Tomatoes
- Herb Roasted Turkey Breast
- Smoked Tri Tip
- Easy Garlic Butter Steak
- Authentic Italian Bolognese Sauce
- Beef Ribs with Charred Pepper Cream Gnocchi
- All our Main Dish recipes!
How to Make Prime Rib (Recipe)
Best Prime Rib Roast
Ingredients
- 7 Pound Standing Rib Roast, Prime Rib
- 2 Tablespoons Kosher Salt, heaping
- 1 ½ teaspoons Black Pepper
- 4 Tablespoons Butter, unsalted
- 4-6 Cloves Garlic, minced
Instructions
-
Using a very sharp knife, cut slits in the outer surface layer of fat, spaced 1 inch apart, in a cross pattern, much like crossing on a baked ham. Do not cut into the meat.7 Pound Standing Rib Roast
-
Gently slice down through the meat, following the bones to remove them from the meat. Do not discard the bones.
-
Rub 2 heaping tablespoons of Kosher salt over the entire roast and especially rub it into the slits you made.2 Tablespoons Kosher Salt
-
Place the seasoned meat back on its bones and onto a plate.
-
Refrigerate the meat, uncovered, for at least 24 hours and up to 96 hours (for dry brining).
-
Place the meat on the counter to rest for 2-3 hours so it comes to room temperature.
-
Adjust the oven rack to a middle position and preheat the oven to 200ºF (95ºC).
-
Heat a high-smoke-point oil in a 12-inch skillet or Dutch oven over high heat until smoking.
-
Sear the sides and top of the boneless roast until beautifully browned; avoid searing the bottom of the roast where you removed the bones (reserving bone on the plate). Place the meat back on the rib bones, aligning them where they were cut, and let it cool for 10 minutes so it’s safe to handle. Tie the meat to the bones with 2 pieces of twine between the ribs.
-
Transfer the roast, fat side up, to a wire rack set in a rimmed baking sheet and season with pepper.1 ½ teaspoons Black Pepper
-
Mix the softened butter and minced garlic in a bowl, and rub it all over the meat.4-6 Cloves Garlic, 4 Tablespoons Butter
-
Roast until the meat registers 120ºF (49ºC) for rare, approximately 3 ½ to 4 ½ hours, depending on desired doneness (see temperature guide above).
-
Turn off the oven. Leave the roast in the oven, opening the door as little as possible, until the meat registers about 120-125ºF (49-52ºC) for rare, 125-130ºF (52-54ºC) for medium-rare, 130-135ºF (54-57ºC) for medium, and 140-145ºF (60-63ºC) for well done. This will take an additional 30 to 75 minutes, allowing for carryover cooking.
-
Remove the roast from the oven (leave the roast on the baking sheet), tent it loosely with aluminum foil, and let it rest for at least 30 minutes and up to 75 minutes.
-
Adjust the oven rack about 8 inches from the broiler element and preheat the broiler. Remove foil from the roast. Broil until the top of the roast is well browned and crisp, 2 to 8 minutes, watching very carefully to prevent burning.
-
Transfer the roast to a carving board; cut the twine and remove the roast from the ribs.
-
Slice the meat into ¾-inch-thick slices. Season with coarse salt to taste along with any drippings (which can be turned into a gravy or au jus), and serve immediately.
Recipe Notes
Nutrition
Nutrition information is automatically calculated, so should only be used as an approximation.
REMEMBER TO SUBSCRIBE TO our FREE Oh Sweet Basil NEWSLETTER AND RECEIVE EASY RECIPES DELIVERED INTO YOUR INBOX EVERY DAY!
When you try a recipe, please use the hashtag #ohsweetbasil on INSTAGRAM for a chance to be featured in our stories! FOLLOW OH, SWEET BASIL ON FACEBOOK | INSTAGRAM | PINTEREST | TWITTER FOR ALL OF OUR LATEST CONTENT, RECIPES AND STORIES.