
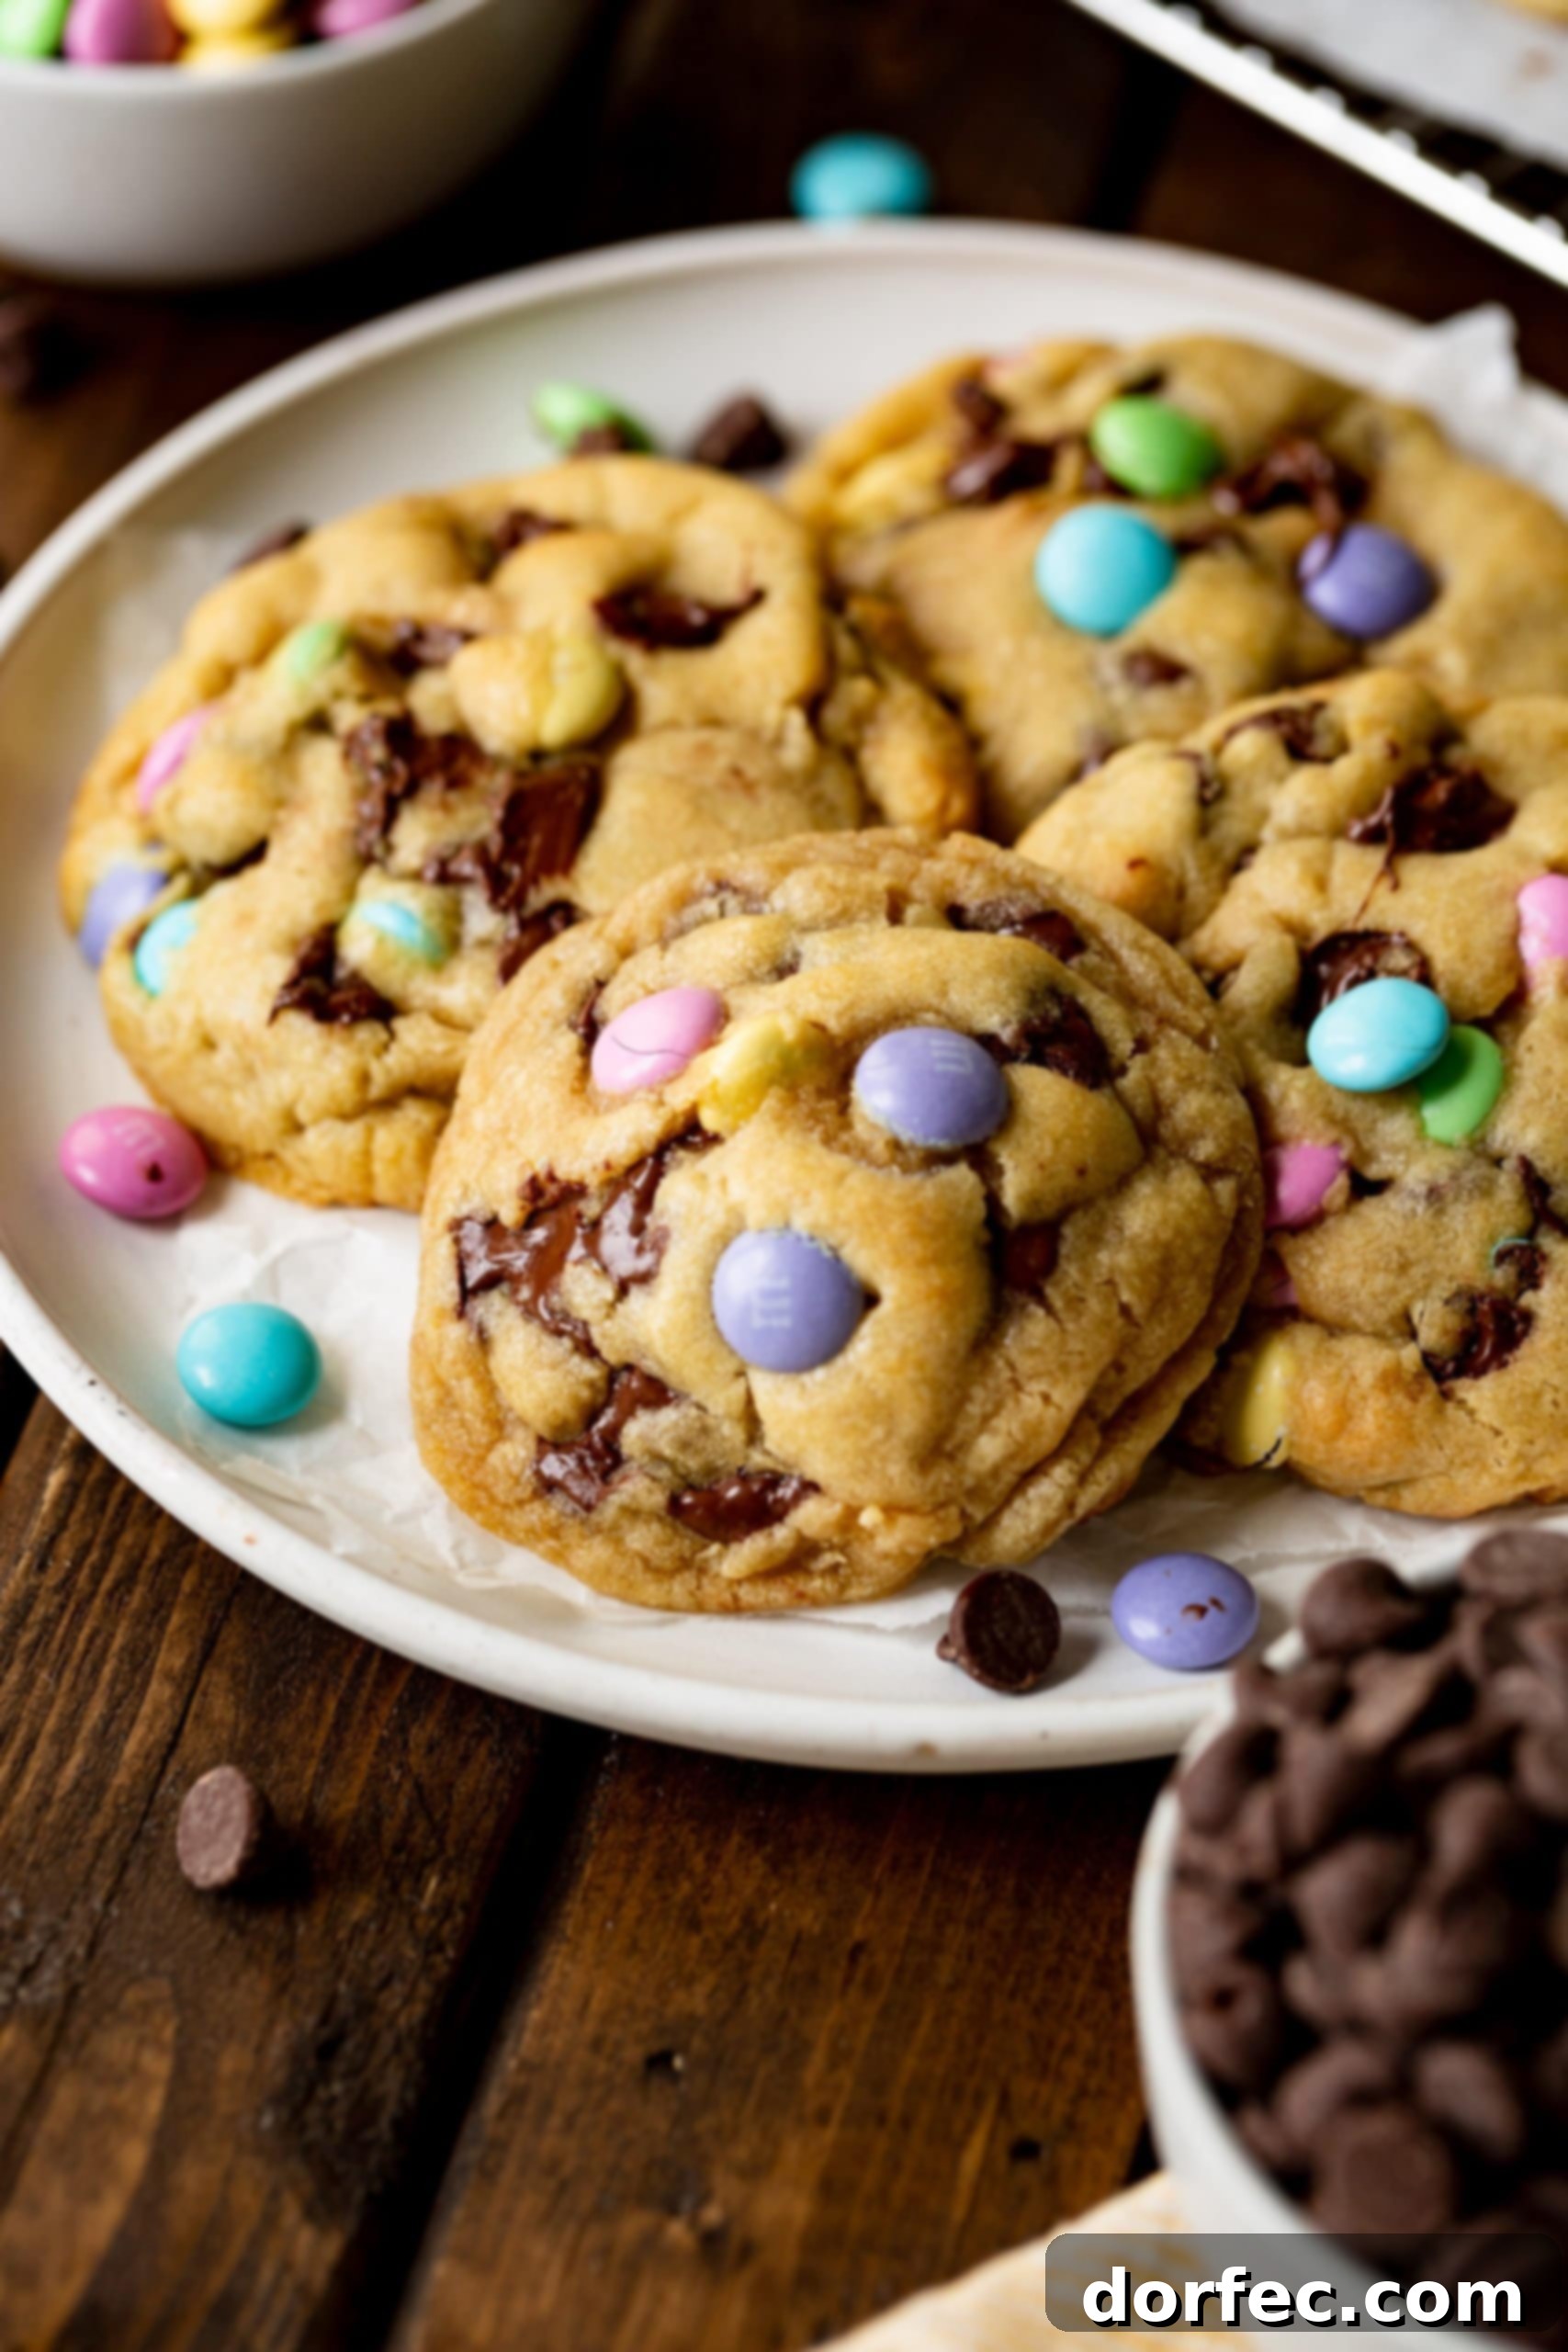
Indulge in the ultimate cookie experience with these delightfully thick, soft, and chewy M&M cookies! Perfectly embodying the ideal chocolate chip cookie, they boast a gratifying crunch around the edges while maintaining a lusciously warm and tender center. While undeniably delicious at any time, a bite into one of these vibrant treats while still warm is an absolute must-try. Prepare to be enchanted by their irresistible charm and vibrant springtime appeal.
The overwhelming enthusiasm for these M&M cookies on our social media channels prompted an immediate release of this much-anticipated recipe. We simply couldn’t wait another year to share these spectacular Easter M&M cookies with you, even if Easter has already passed. The demand was truly extraordinary, and we’re thrilled to finally place this beloved recipe into your hands.
Typically, I work far ahead, developing and photographing recipes for upcoming seasons a year in advance. However, the sheer perfection of these Easter M&M cookies, which I crafted just last week, proved too magnificent to keep under wraps. Their vibrant colors and impeccable texture were simply too glorious not to share immediately, and your enthusiastic feedback overwhelmingly confirmed it! The influx of emails, DMs, and comments was incredible, and I genuinely cherish your engagement. So, here they are, ready for you to bake and enjoy without the long wait. Consider it my special treat to you!
Unleash Your Creativity: Endless Possibilities for Cookie Add-Ins
While these cookies originally celebrate Easter with their pastel M&M’s, the beauty of this recipe lies in its incredible versatility. The foundational dough is so perfect that it serves as an ideal canvas for any mix-ins you desire, making it suitable for any season or occasion. For example, you can effortlessly swap the festive Easter M&M’s for standard M&M’s or any holiday-themed varieties throughout the year. With the Fourth of July just around the corner, imagine these chewy delights studded with vibrant red, white, and blue M&M’s – a truly spectacular treat! Beyond M&M’s, feel free to experiment with Reese’s Pieces, chocolate chunks, or virtually any other candy or nut you fancy. We’ll dive into a more comprehensive list of add-in possibilities later in this article, offering even more inspiration for your next baking adventure.
One of the fantastic aspects of this recipe is that the cookie dough doesn’t strictly require refrigeration before baking, allowing you to enjoy fresh-baked cookies in record time. However, for an even deeper flavor profile and slightly chewier texture, I highly recommend letting the dough rest in the refrigerator for at least 30 minutes, or even overnight. If you choose to refrigerate the dough overnight or freeze it, remember to allow the cookie balls to sit at room temperature for about 15-30 minutes before baking. This crucial step helps the butter soften slightly, ensuring your cookies spread just enough and bake perfectly to a soft, thick consistency. Whether you’re in a hurry or patiently waiting, these cookies promise a delightful experience.
Essential Ingredients for Your Delicious M&M Cookies
Crafting these exceptional M&M cookies requires a straightforward list of ingredients, largely mirroring those found in a classic chocolate chip cookie recipe, with the joyful addition of colorful M&M’s. Each component plays a vital role in achieving that perfect thick, soft, and chewy texture we all adore. Here’s a closer look at what you’ll need to gather:
- Unsalted Butter: Opting for unsalted butter gives you precise control over the overall saltiness of your cookies. It’s crucial that your butter is properly softened—meaning it’s pliable enough to leave an indentation when gently pressed, but not so soft that your finger sinks right through.
- Brown Sugar: Fresh, moist light brown sugar is key to achieving the characteristic chewy texture and rich, caramel-like flavor that makes these cookies so irresistible. Avoid using hardened or dry brown sugar.
- White Sugar: Standard granulated white sugar provides the necessary sweetness and contributes to the crispy edges of the cookies, balancing the chewiness from the brown sugar.
- Large Egg: A single large egg acts as a binder, lending structure to the cookies and helping to hold all the delicious ingredients together, while also contributing to their moistness.
- Vanilla Extract: Always reach for pure vanilla extract! Its rich aroma and flavor elevate the overall taste of the cookies, making a noticeable difference compared to imitation vanilla.
- All-Purpose Flour: The foundation of our cookies! Correctly measuring your flour is paramount for achieving that perfect chewy and soft texture. Too much flour can result in dry, dense cookies, while too little might make them spread too thin.
- Baking Soda: This leavening agent is essential for giving the cookies their signature rise and a delicate fluffiness, ensuring they aren’t overly flat or dense.
- Cornstarch: A secret ingredient for ultimate cookie thickness and softness! Cornstarch helps keep the cookies from spreading too much, resulting in that coveted bakery-style, thick center.
- Salt: Often overlooked, salt is a critical flavor enhancer. It perfectly balances the sweetness from the sugars and M&M’s, bringing out the full depth of flavor in every bite.
- Semi-Sweet Chocolate Chips: Feel free to use regular or mini semi-sweet chocolate chips. Don’t hesitate to customize by swapping them for milk chocolate, dark chocolate, or even a mix of your favorite chocolate varieties.
- Easter M&M’s: These vibrant, candy-coated chocolates add a festive burst of color and a delightful crunch. While Easter M&M’s are perfect for spring, any regular or holiday-themed M&M’s will work wonderfully.
The precise quantities for each of these ingredients are detailed in the full recipe provided below. You can easily save this recipe for later or print it for your convenience from the recipe section.
Mastering the Art of Baking M&M Cookies: A Step-by-Step Guide
Creating these delightful M&M cookies is a straightforward and rewarding process. The detailed instructions are available in the comprehensive recipe section below, but here’s a quick overview of the essential steps to guide you through the baking journey and ensure perfect results every time:
- Prepare Your Dry Ingredients: In a medium bowl, whisk together the all-purpose flour, cornstarch, baking soda, and salt. This ensures all the dry ingredients are evenly distributed, which is crucial for uniform texture and rise in your cookies. Set this mixture aside.
- Cream Your Wet Ingredients: In the bowl of a stand mixer fitted with a paddle attachment (or using a hand mixer), cream together the softened unsalted butter, light brown sugar, and white granulated sugar until the mixture is light and fluffy. This typically takes about 1-2 minutes. Then, beat in the large egg and pure vanilla extract until just combined. Scrape down the sides of the bowl to ensure everything is well incorporated.
- Combine Wet and Dry Ingredients: Gradually add the whisked dry ingredients to the wet mixture, mixing on low speed until just combined. Be careful not to overmix the dough, as this can lead to tough cookies. Mix until no streaks of dry flour remain.
- Gently Fold in M&M’s and Chocolate Chips: Crucially, switch to a sturdy wooden spoon or a spatula for this step. Add your semi-sweet chocolate chips and Easter M&M’s to the dough and fold them in by hand. Using a stand mixer for this part can crush the M&M’s, compromising their delightful candy shell and visual appeal.
- Form Your Cookie Balls: Using a regular-sized cookie scoop, scoop out generous mounds of dough to form thick cookie balls. For that extra bakery-quality look, gently press a few extra M&M’s and chocolate chips onto the tops of the dough balls. This ensures a beautiful, colorful presentation once baked.
- Bake to Perfection: Place your formed cookie dough balls onto a parchment-lined baking sheet, leaving ample space between them. Bake for approximately 8-10 minutes in a preheated oven. They will look slightly under-baked when you remove them from the oven, with edges that are just set and centers that appear soft. This is exactly what you want! The cookies will continue to set and firm up as they cool on the baking sheet, resulting in that ideal thick, soft, and chewy texture. Over-baking will lead to dry, hard cookies.
Achieving Bakery-Worthy M&M Cookies: Pro Tips for Presentation
While the taste of these M&M cookies is undeniably incredible, a beautiful presentation can elevate them from homemade to bakery-level masterpieces. Follow these simple yet effective tips to ensure your cookies look as good as they taste, impressing everyone who sees them:
- Strategic Candy Placement: For that professional, picture-perfect finish, gently press a few extra chocolate chips and M&M’s onto the tops of your cookie dough balls just before they go into the oven. Alternatively, for even more vibrant color that doesn’t melt quite as much, you can add a few extra M&M’s right after they come out of the oven while they are still warm and pliable. This ensures that the beautiful colors of the M&M’s and the tempting gleam of the chocolate are prominently displayed.
- Perfectly Round Shapes: If some of your cookies spread a little unevenly or you simply desire a flawlessly round shape, here’s a clever trick: immediately after removing the cookies from the oven and letting them cool for just about 2 minutes on the baking sheet (while they are still warm and soft), take a large glass or a round biscuit cutter (slightly larger than your cookies). Place it over a cookie and gently swirl the glass around the cookie in a circular motion. This coaxes the warm edges back into a perfect round shape, creating that coveted uniform, thick appearance. This small detail makes a huge difference in achieving a professional look.
Why These M&M Cookies Will Become Your New Favorite
These M&M cookies aren’t just another sweet treat; they are an experience, offering a multitude of reasons why they’ll quickly earn a permanent spot in your baking rotation and your heart. From their captivating texture to their delightful flavor, every aspect is designed for pure enjoyment:
- Irresistible Texture: Prepare for a symphony of textures in every bite! These cookies boast wonderfully crispy, golden-brown edges that yield to an incredibly chewy, thick, and supremely soft center. The embedded M&M’s add another layer of delight with their signature candy-coated crunch, creating a truly dynamic and satisfying mouthfeel.
- Eye-Catching Appearance: Visually, these cookies are a feast for the eyes. Their perfectly golden hue provides the ideal backdrop for the bright, cheerful pops of color from the M&M’s, making them exceptionally pretty and inviting. They’re guaranteed to brighten any dessert platter.
- Heavenly Flavor Profile: Each cookie delivers a rich, buttery, and sugary base, deepened by the molasses notes of the brown sugar. The harmonious combination of classic semi-sweet chocolate chips with the added sweetness and crunch of the M&M’s creates a flavor sensation that is truly heavenly and utterly addictive.
- Effortless to Make: You’ll be surprised at how simple these cookies are to whip up! They’re so easy, in fact, that even my youngest loves to lend a hand. There’s something about M&M’s that magically reels in the kids, making the baking process a fun and effortless family activity.
- Quick Satisfaction: No need to wait hours for deliciousness! While I do recommend a short chill time (about 30 minutes) for optimal flavor development and a thicker cookie, these M&M cookies don’t strictly require it. This means you can go from mixing bowl to warm, delectable cookie in your mouth in less than an hour, making them perfect for those spontaneous sweet cravings.
Beyond M&M’s: Creative Variations for Your Add-Ins
As previously mentioned, the possibilities for customizing this cookie recipe are truly limitless once you have such a solid, delicious dough base. This versatile recipe allows you to tailor your cookies to any preference, season, or craving imaginable. Don’t be afraid to experiment and create your own signature cookie blend! Here are just a few ideas to spark your creativity and inspire your next batch:
- Peanut Butter Chips: For a creamy, nutty twist that pairs wonderfully with chocolate.
- Caramel Bits: Adding pockets of gooey, sweet caramel throughout the cookie.
- White, Dark, or Milk Chocolate Chips: Mix and match your favorite chocolate varieties for a complex chocolate flavor, or use them in place of semi-sweet.
- Different M&M’s: Expand beyond regular M&M’s! Try peanut, peanut butter, almond, pretzel, crispy, or dark chocolate M&M’s for varied textures and flavors.
- Broken Pretzel Pieces: For a delightful salty-sweet crunch that contrasts beautifully with the soft cookie.
- Toffee Bits: These add a rich, buttery, and slightly crunchy texture with a hint of caramel.
- Butterscotch Chips: For a classic, rich, and sweet butterscotch flavor that complements chocolate.
- Reese’s Pieces: A fantastic peanut butter and chocolate flavor combination that brings bright orange and yellow hues.
- Reese’s Mini Peanut Butter Cups: For an indulgent, soft peanut butter center in every bite.
We encourage you to experiment with these suggestions, or even come up with your own unique combinations! We’d absolutely love to hear about what amazing add-ins you use to make your very best cookies!
Maximizing Freshness: Can You Freeze These M&M Cookies?
Absolutely! These M&M cookies are wonderfully freezer-friendly, offering a fantastic way to prepare ahead for future cravings or unexpected guests. You have two convenient options for freezing: you can either freeze the raw cookie dough balls or store the fully baked cookies. Both methods ensure you always have a delicious homemade treat readily available.
Freezing Cookie Dough: This is an excellent option for baking fresh cookies whenever the mood strikes. Begin by forming all your cookie dough into balls as instructed in the recipe. Place these dough balls onto a baking sheet, ensuring they are not touching each other. Transfer the baking sheet to the freezer and allow the dough balls to freeze completely, which usually takes about one hour. Once firm, transfer the frozen dough balls into a freezer-safe ziploc bag or an airtight container. Label with the date. They will keep beautifully in the freezer for 2-3 months.
When you’re ready for freshly baked cookies, simply remove the desired number of frozen dough balls from the freezer and place them on a parchment-lined baking sheet. Let them thaw at room temperature for approximately 20-30 minutes before baking according to the original recipe instructions. You may need to add an extra minute or two to the baking time.
Freezing Baked Cookies: If you prefer to have ready-to-eat cookies on hand, freezing them after baking is a great choice. First, ensure your cookies have cooled completely to room temperature. Stacking or bagging warm cookies can lead to condensation and soggy results. Once cooled, place the baked cookies in a freezer-safe ziploc bag or an airtight container, again, labeling with the date. They will maintain their deliciousness in the freezer for 2-3 months.
To enjoy a frozen baked cookie, simply remove it from the freezer and let it thaw on the counter for about 30 minutes. If you desire a warm, gooey cookie experience, you can gently reheat thawed cookies in the microwave for 10-15 seconds or in a preheated oven at 275°F (135°C) for a few minutes until warmed through.
You asked, you begged, and we delivered! We put our heart and soul into creating and sharing this recipe for the most irresistible spring Easter M&M cookies with chocolate chips. We truly believe this is one of our finest creations yet, boasting that perfect thick, soft, and chewy texture with vibrant bursts of color and flavor. Now, we eagerly await your pictures and stories! Share with us what celebrations you’re bringing these gorgeous cookies to, or simply tell us about your cozy moments enjoying them at home. These cookies are pure perfection, and we’re sending all our heart eyes their way!
Explore More Irresistible M&M Cookie Recipes:
- Decadent Chocolate M&M Cookies
- Buttery Shortbread M&M Cookies
- Peanut Butter Chocolate Chip and M&M Cookies
- Festive Red Velvet M&M Cookies
- Everything-But-The-Kitchen-Sink Cookies
- Beloved Boyfriend Cookies
Watch How These Cookies are Made…
For a visual guide to baking these perfect M&M cookies, watch the instructional video below. See every step of the process, from mixing the dough to forming the cookie balls, ensuring your cookies turn out beautifully every time.
(Original Video Details: Upload Date: March 17, 2025; Name: Longer easter cookies -1.mov; Description: Deliciously thick, soft, and chewy spring Easter M&M Cookies! These cookies are the epitome of a perfect chocolate chip cookie: delightfully crunchy around the edges with a warm, soft center. Trust me, you absolutely must enjoy one while it’s warm!)
Average Rating: 4.27 from 38 votes
Spring Easter M&M Cookies
By Carrian Cheney
Prep Time: 10 mins
Cook Time: 10 mins
Total Time: 50 mins
Servings: 24 cookies

Pin Recipe
Print Recipe
Deliciously Thick, Soft, and Chewy Spring Easter M&M Cookies! These cookies are the epitome of a perfect chocolate chip cookie!
Ingredients
- 2 ½ Cups All-Purpose Flour
- 2 teaspoons Cornstarch
- 1 teaspoon Baking Soda
- ½ teaspoon Salt
- 14 Tablespoons Unsalted Butter, softened (ensure it’s pliable but not too soft)
- 1 Cup Light Brown Sugar, packed
- ½ Cup White Granulated Sugar
- 1 Large Egg
- 3 teaspoons Pure Vanilla Extract
- 1 ¼ Cup Semi-Sweet Chocolate Chips, plus more for topping
- 1 Cup Easter M&Ms, plus more for topping
Instructions
- Preheat your oven to 350°F (175°C).
- Line two large cookie sheets with parchment paper or silicone baking mats. Set aside.
- In a medium bowl, whisk together the flour, cornstarch, baking soda, and salt until well combined. Set this dry mixture aside.
- In the bowl of a stand mixer (or using a hand mixer), beat the softened unsalted butter and both sugars (light brown and white) for about 1 minute, or until the mixture is light and creamy.
- Add the large egg and pure vanilla extract to the creamed mixture. Beat until just combined, scraping down the sides of the bowl as needed to ensure all ingredients are incorporated.
- Gradually add the reserved dry ingredients to the wet ingredients, mixing on low speed until just combined. Be careful not to overmix; stop as soon as no dry flour streaks remain.
- Switch to a sturdy wooden spoon or rubber spatula. Gently fold in the semi-sweet chocolate chips and Easter M&M’s by hand. Mixing these in with a stand mixer can crush the M&M’s.
- Using a regular-sized cookie scoop, form heaping scoops of dough into balls. For a professional appearance, gently press 2-3 extra M&M’s and chocolate chips onto the tops of each dough ball.
- If desired, cover the dough balls loosely with plastic wrap and refrigerate for 30 minutes for enhanced flavor and thickness. If refrigerating overnight, let them sit at room temperature for 15-20 minutes before baking. Otherwise, proceed directly to baking.
- Place the cookie dough balls onto the prepared parchment-lined baking sheets, leaving enough space between each cookie (I recommend baking in sets of 8 per sheet).
- Bake for 8-10 minutes. The cookies will appear slightly under-baked in the center with set edges. This is perfectly normal and desired for a soft, chewy texture.
- Remove the baking sheets from the oven and let the cookies cool on the sheets for at least 5-10 minutes before transferring them to a wire rack to cool completely. This allows them to finish baking and set properly.
Recipe Notes
For best results, ensure your unsalted butter is properly softened. You should only be able to gently press into the butter, leaving an indentation. If your finger goes completely through the stick, the butter is too soft and may cause your cookies to spread excessively.
Nutrition Facts (Approximate)
Serving: 1 cookie
- Calories: 260 kcal
- Carbohydrates: 34 g
- Protein: 3 g
- Fat: 13 g
- Saturated Fat: 8 g
- Polyunsaturated Fat: 1 g
- Monounsaturated Fat: 3 g
- Trans Fat: 1 g
- Cholesterol: 27 mg
- Sodium: 108 mg
- Potassium: 85 mg
- Fiber: 1 g
- Sugar: 22 g
- Vitamin A: 239 IU
- Vitamin C: 1 mg
- Calcium: 29 mg
- Iron: 1 mg
Nutrition information is automatically calculated and should only be used as an approximation.
Enjoyed this recipe? Share your thoughts below!
We love hearing from you! Leave a comment and let us know how your M&M cookies turned out.