
The Ultimate Easy Milk Chocolate Brownies: A Perfect Treat
Few desserts offer the universal comfort and delight that a warm, fudgy brownie does. At our core, we’re always on the hunt for those exceptional brownie recipes that stand out, whether for their profound depth of flavor or their sheer simplicity. While our hearts might forever hold a special place for richer, more elaborate creations, these Milk Chocolate Brownies have emerged as a go-to for moments when time is short, but the craving for something truly delicious is undeniable.
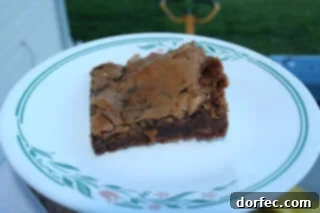
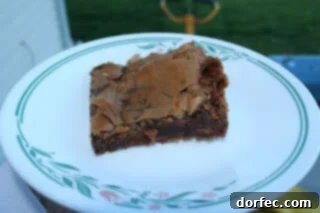
What makes this recipe a true winner? It delivers on all fronts: a wonderfully moist and chewy texture, an abundance of rich milk chocolate flavor, and that coveted, delicate flaky crust that signals a perfectly baked brownie. Despite their humble appearance, these brownies boast a taste that’s nothing short of awesome. If you’re seeking a quick, straightforward, and utterly satisfying brownie recipe, look no further – this one is an absolute must-try! It’s the ideal solution for last-minute dessert needs, potlucks, or simply a cozy evening indulgence.
This recipe is inspired by Karen at Tasty Kitchen and shared by Sweet Basil.
Mastering the Bake: How Do You Know If Brownies Are Done?
Achieving the perfect brownie texture is an art, and knowing precisely when to pull them from the oven is key. Underbake them, and you risk a gooey mess; overbake them, and you’re left with dry, cake-like squares that lack that signature fudgy appeal. Here’s how to ensure your brownies are just right, every single time.
One of the most reliable indicators of doneness is when the edges of the brownies begin to gently pull away from the sides of the pan. This visual cue suggests that the outer portions have set and are developing a slightly firmer structure. However, relying solely on this can sometimes be misleading, especially for denser, fudgier recipes.
The toothpick test remains the gold standard, but the interpretation of its results varies depending on your desired brownie consistency:
- For Cake-Like Brownies: Insert a toothpick into the center of the pan. If it comes out clean, with no wet batter clinging to it, your brownies will be more cake-like in texture. This means they are fully cooked through, with a lighter crumb.
- For Fudgy Brownies: For that irresistible dense, moist, and rich texture, remove the brownies from the oven when the toothpick comes out with a few moist crumbs still clinging to it. These aren’t wet batter, but rather moist, half-baked crumbs. This indicates that the brownies are cooked enough to hold their shape but still retain plenty of moisture, ensuring a soft, gooey interior after cooling.
It’s crucial to remember that brownies continue to cook slightly as they cool in the hot pan (this is called “carryover cooking”). Therefore, slightly underbaking them for fudginess often yields the best results. Always err on the side of caution for fudgy brownies, as it’s better to have them a little too gooey than too dry.
Preserving Freshness: How Long Will Brownies Keep?
Once you’ve baked a batch of delicious milk chocolate brownies, you’ll want to ensure they stay fresh and delectable for as long as possible. Proper storage is essential to maintain their moist texture and rich flavor. The shelf life of brownies depends largely on how they are stored and whether they have been cut.
- Cut Brownies: If your brownies are already cut into individual squares, they are more exposed to air, which can lead to drying out. To keep them fresh, wrap them individually or in small batches tightly in plastic wrap. Once wrapped, store them in an airtight container at room temperature. Properly stored cut brownies will typically retain their quality for up to 2 days. For longer storage or warmer climates, refrigeration can extend this, but it might slightly alter the texture.
- Uncut Brownies: A pan of uncut brownies has less surface area exposed to air, which helps them stay moist for a longer period. To store, allow the brownies to cool completely in the pan. Once cool, wrap the entire pan tightly with multiple layers of plastic wrap, ensuring no air can get in. Then, place the wrapped pan in an airtight container or cover it securely. Uncut brownies stored this way at room temperature can last for up to 4 days, remaining wonderfully moist and flavorful.
Always store brownies in a cool, dry place away from direct sunlight or heat, as these can accelerate spoilage and affect their texture. If you notice any signs of mold, unusual odors, or a significantly hardened texture, it’s best to discard them.
Extend the Delight: Can Brownies Be Frozen?
Absolutely! Freezing brownies is an excellent way to extend their shelf life and enjoy them whenever a craving strikes. This method is particularly useful for meal prepping desserts, baking in large batches for future events, or simply ensuring you always have a sweet treat on hand. When properly frozen, brownies can maintain their quality for up to 3 months without significant loss of flavor or texture.
Here’s how to freeze brownies effectively:
- Cool Completely: Before freezing, it’s critical that your brownies are completely cooled. Freezing warm brownies can lead to condensation and ice crystals, which will compromise their texture and make them soggy upon thawing.
- Cut into Portions (Optional but Recommended): For convenience, consider cutting your brownies into individual squares before freezing. This allows you to thaw only the amount you need, preventing waste.
- Wrap Individually: Wrap each brownie square (or the entire uncut slab) tightly in plastic wrap. Ensure the plastic wrap is snug against the surface of the brownie to prevent freezer burn and keep air out.
- Add an Extra Layer of Protection: For ultimate protection against freezer burn, wrap the plastic-wrapped brownies again in aluminum foil, or place them into a heavy-duty freezer bag. If using a freezer bag, press out as much air as possible before sealing.
- Label and Date: Always label your freezer bags or containers with the date they were frozen. This helps you keep track of their freshness and ensures you consume them within the recommended 3-month period.
- Thawing: When you’re ready to enjoy your frozen brownies, simply remove them from the freezer and let them thaw at room temperature for an hour or two. You can also warm them gently in a microwave for a few seconds for that fresh-baked feel, or in a preheated oven at a low temperature (around 250°F / 120°C) for 5-10 minutes.
Freezing brownies is a fantastic hack for dessert lovers, ensuring you always have a comforting treat available without the need for last-minute baking.
Milk Chocolate Brownies: The Irresistible Classic
By: Sweet Basil
Prep Time: 5 mins
Cook Time: 40 mins
Total Time: 45 mins
Servings: 9
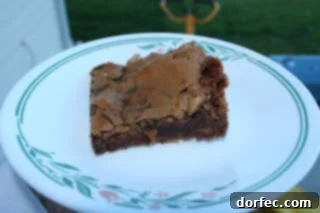
These milk chocolate brownies are a dream come true: moist, chewy, intensely chocolatey, and topped with that coveted flaky crust everyone loves. A quick and easy recipe for pure indulgence.
Ingredients
- ¾ cups All-Purpose Flour
- ¼ teaspoons Salt
- ¼ teaspoons Baking Soda
- ⅓ Cups Unsalted Butter, melted (no substitutions for best results)
- 2 Tablespoons Milk
- ¾ Cups Granulated Sugar
- 2 Cups Milk Chocolate Baking Chips, divided
- 2 Large Eggs
- 1 teaspoon Pure Vanilla Extract
- 1 Cup Walnuts, toasted and chopped (optional, for added texture)
Instructions
- In a medium bowl, combine the flour, salt, and baking soda. Whisk them together until well combined, then set aside.
- In a small saucepan, melt the butter, milk, and sugar together over medium-low heat. Stir continuously to ensure the sugar dissolves and the mixture heats evenly.
- Just as the mixture begins to boil, remove it immediately from the heat. Stir in 1 cup of the milk chocolate chips until they are fully melted and incorporated, creating a smooth chocolate base.
- Transfer the warm chocolate mixture to a large mixing bowl. Allow it to cool for a few minutes to prevent scrambling the eggs.
- Once slightly cooled, stir in the eggs, one at a time, until each is fully incorporated into the mixture.
- Add the vanilla extract and the reserved flour mixture to the chocolate mixture. Mix gently until just combined. Be careful not to overmix, as this can lead to tough brownies.
- If desired, gently fold in the remaining 1 cup of milk chocolate chips and the toasted chopped walnuts. This adds extra pockets of melted chocolate and a delightful crunch.
- Pour the brownie batter evenly into a greased 9×9 inch baking pan. For easy removal, you can line the pan with parchment paper, leaving an overhang on the sides.
- Bake in a preheated oven at 325°F (160°C) for 30-35 minutes. Refer to the “How Do You Know If Brownies Are Done?” section above for tips on achieving your desired fudgy or cake-like texture.
- Once baked, remove the pan from the oven and let the brownies cool completely on a wire rack before slicing and serving. This allows them to set properly and enhances their fudgy texture.
Recipe Notes
For optimal freshness, well-wrapped brownies will keep at room temperature for up to 4 days. If you wish to store them longer, they can be safely frozen for up to 3 months. Ensure they are tightly wrapped to prevent freezer burn.
Nutrition
- Serving Size:
- 1g
- Calories:
- 550kcal
- Carbohydrates:
- 58g
- Protein:
- 7g
- Fat:
- 35g
- Saturated Fat:
- 21g
- Cholesterol:
- 55mg
- Sodium:
- 204mg
- Potassium:
- 86mg
- Fiber:
- 1g
- Sugar:
- 47g
- Vitamin A:
- 263IU
- Vitamin C:
- 1mg
- Calcium:
- 104mg
- Iron:
- 1mg
Nutrition information is automatically calculated and should only be used as an approximation. Individual ingredient variations may affect actual nutritional values.
Tips for Baking the Perfect Brownies
Baking brownies might seem straightforward, but a few simple tips can elevate your batch from good to truly exceptional. Beyond the recipe, understanding the nuances of ingredients and technique is crucial for that perfect fudgy center and delightful crispy edge.
Firstly, ingredient quality matters. Using high-quality milk chocolate chips or chopped chocolate will significantly impact the depth of flavor. Similarly, real butter (as specified in the recipe, with no substitutions) contributes to the rich taste and tender crumb that margarines or oils might not replicate. Always opt for large, fresh eggs and pure vanilla extract for the best results.
Secondly, don’t overmix the batter. Once you’ve added the dry ingredients to the wet, mix only until just combined. Overmixing develops the gluten in the flour, leading to a tougher, more cake-like brownie rather than the desired fudgy texture. A few streaks of flour are perfectly fine – they will disappear during baking.
Another crucial tip is to line your baking pan. Using parchment paper with an overhang on two sides makes lifting the cooled brownies out of the pan incredibly easy, allowing for clean cuts without damaging the edges. A little bit of grease on the bottom of the pan before adding parchment paper can help the paper stick better.
Lastly, always allow your brownies to cool completely before attempting to cut them. While the temptation to dig into warm, gooey brownies is immense, cooling allows the brownies to fully set and firm up, making them much easier to slice into neat squares. Cutting them warm often results in a crumbly, messy outcome. If you absolutely can’t wait, chilling them in the refrigerator for an hour can speed up the setting process.
Serving Suggestions and Customizations
These Milk Chocolate Brownies are incredibly versatile and can be enjoyed in a multitude of ways, making them perfect for any occasion.
For a truly indulgent experience, serve them warm with a scoop of premium vanilla bean ice cream. The contrast between the warm, fudgy brownie and the cold, creamy ice cream is a classic pairing that never disappoints. A dollop of freshly whipped cream or a drizzle of caramel sauce can also elevate the presentation and flavor profile. Pair them with a cold glass of milk for a nostalgic treat, or a steaming cup of coffee or espresso for a sophisticated dessert.
Feeling creative? This recipe is also ripe for customization. While the walnuts are optional, consider adding other mix-ins like mini marshmallows, white chocolate chips, chopped pretzels for a salty-sweet crunch, or even a swirl of peanut butter for a marbled effect. For a hint of warmth, a pinch of cinnamon or a dash of espresso powder can deepen the chocolate flavor without overpowering it. Experiment with different types of chocolate, such as dark chocolate chips alongside the milk chocolate, for a more complex flavor.
Whether served at a festive gathering, a casual potluck, or simply enjoyed as an everyday treat with family, these Milk Chocolate Brownies are guaranteed to be a crowd-pleaser. Their effortless preparation and delightful taste make them a staple in any baker’s repertoire.
Conclusion: Your New Favorite Milk Chocolate Brownie Recipe
In the vast world of dessert recipes, finding a brownie that consistently hits all the right notes — moist, chewy, perfectly chocolatey, and delightfully flaky — can feel like a quest. This Milk Chocolate Brownie recipe unequivocally ends that search, proving that simplicity can indeed lead to extraordinary results. It’s the ideal blend of ease and indulgence, offering a quick solution for those urgent sweet cravings without compromising on flavor or texture.
We are confident that once you try these brownies, they will quickly earn a cherished spot in your recipe collection, perhaps even rivaling your long-time favorites. Their approachable nature makes them perfect for beginner bakers, while their delectable outcome satisfies even the most discerning dessert connoisseurs.
Don’t just take our word for it; bake a batch today and experience the magic yourself. We’d love to hear about your baking adventures and how these brownies brought joy to your kitchen.
Like this recipe? Leave a comment below and share your thoughts!