
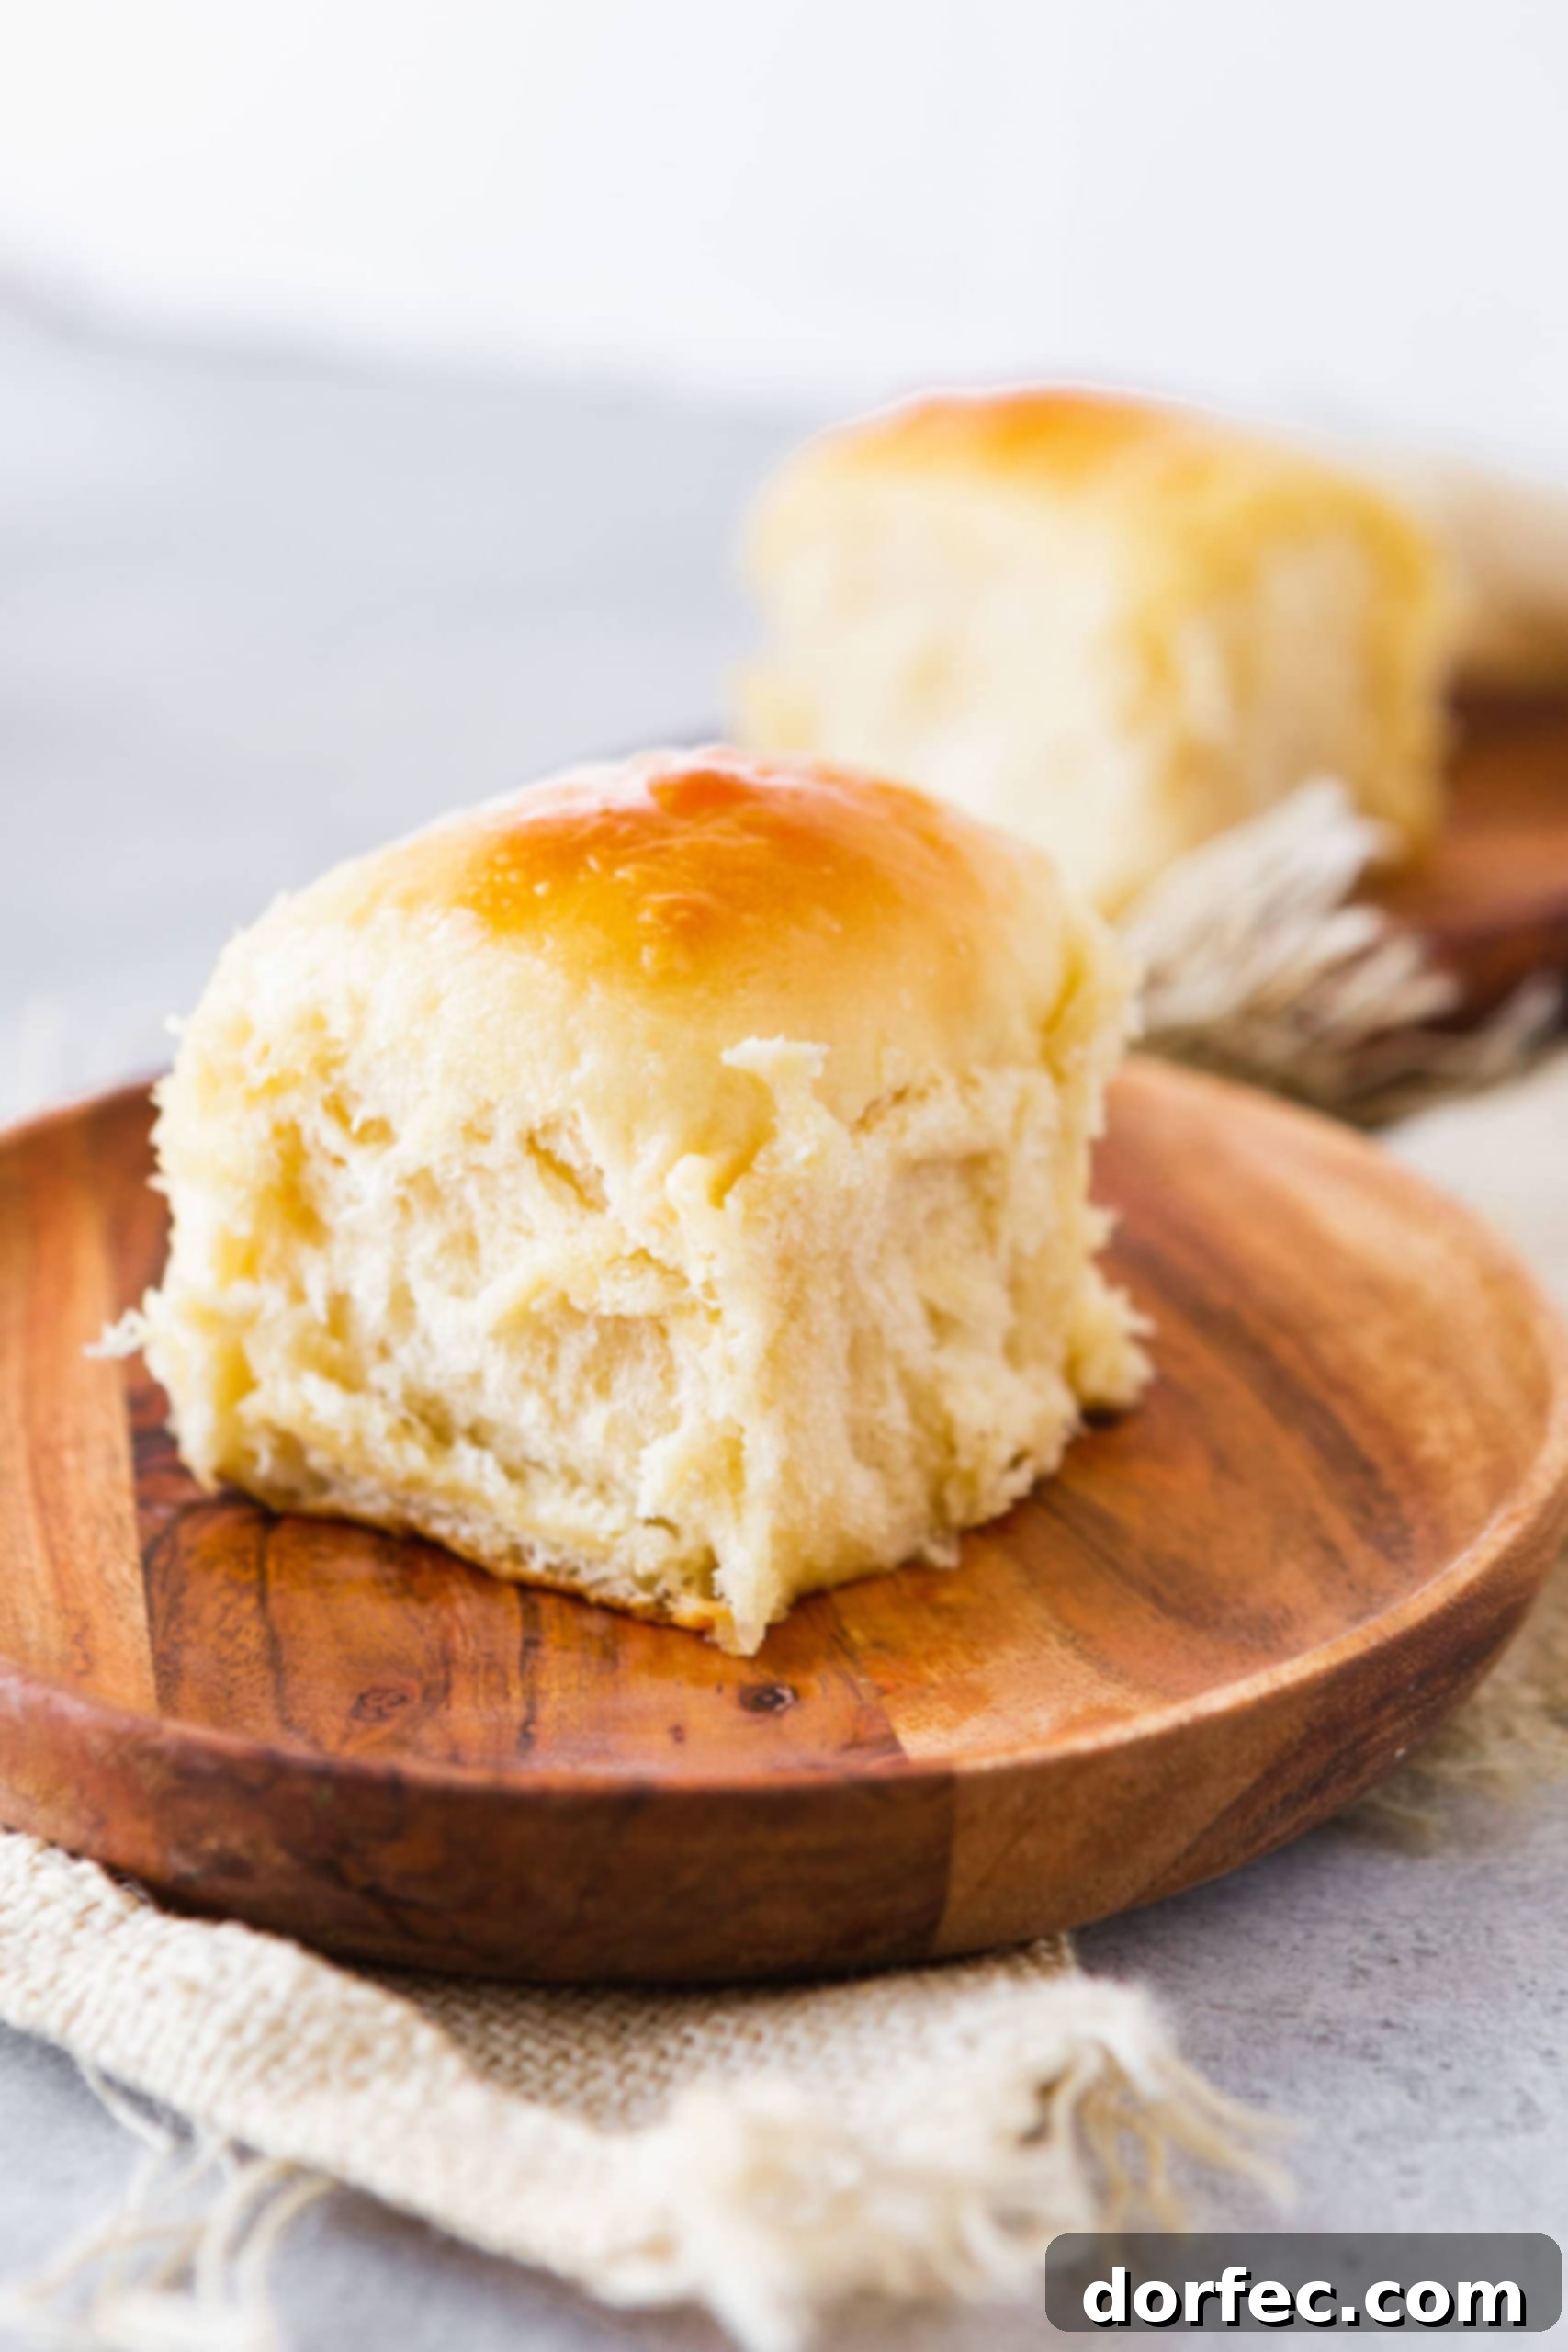
Welcome to the enchanting world of baking, where warmth, aroma, and irresistible flavors come alive right in your kitchen. Today, we’re diving into a recipe that promises pure joy with every bite: **Homemade Hawaiian Sweet Rolls**. These fluffy, slightly sweet, and unbelievably tender rolls are a culinary masterpiece, perfected with the tropical essence of pineapple juice. Forget dry, bland bread; these are the softest, most delightful rolls you’ll ever make, sure to become a staple in your household.
More than just a side dish, these versatile sweet rolls are perfect for a myriad of uses. Imagine them as the ideal foundation for gourmet sliders, complementing savory fillings with their delicate sweetness. They pair beautifully with everything from our savory Hawaiian turkey burger sliders to classic French dip sliders, or even hearty cheeseburger sliders. Their soft texture makes them incredibly forgiving and enjoyable for any sandwich creation.
Unveiling the Magic: What Makes Hawaiian Rolls So Special?
Hawaiian sweet rolls are iconic for a reason. Their signature slight sweetness and incredibly soft, airy texture set them apart from traditional dinner rolls. The secret lies in a few key ingredients that infuse the dough with a distinctive tropical flavor and enhance its tenderness. The primary ingredient responsible for this unique character is pineapple juice, which not only imparts a subtle fruity sweetness but also contributes significantly to the rolls’ moisture and fluffy crumb. Honey is another crucial component, adding a deeper, nuanced sweetness and contributing to the beautiful golden-brown crust. Together, these elements transform a simple bread recipe into an extraordinary experience, reminiscent of a warm, inviting island breeze.
While seemingly exotic, the baking process for these rolls mirrors that of many classic bread recipes, requiring just a few special additions to achieve their signature taste and texture. Don’t be intimidated by their gourmet reputation; with a little care and attention to the ingredients, you’ll be baking perfect Hawaiian rolls in no time.
Essential Ingredients for Baking Perfect Hawaiian Rolls
Creating these delightful rolls begins with a carefully curated list of ingredients. Each plays a vital role in achieving the rolls’ characteristic flavor, texture, and rise. Here’s what you’ll need to gather for your baking adventure:
For the Rolls Dough
- Instant Yeast: The leavening agent that gives the rolls their incredible rise and airy texture. Instant yeast is convenient as it can be mixed directly with dry ingredients without prior activation.
- Milk: Provides richness and moisture to the dough, contributing to its tender crumb.
- Water: Essential for hydration, working with the milk to create the perfect dough consistency.
- Pineapple Juice: This is the star ingredient, imparting the signature sweet and tangy Hawaiian flavor and contributing to the rolls’ moistness.
- PRO TIP: Always use canned pineapple juice for this recipe. Fresh pineapple juice contains enzymes that can break down the gluten structure in the dough, preventing it from rising properly and resulting in dense, heavy rolls. Canned juice has been pasteurized, deactivating these enzymes.
- Sugar: Feeds the yeast, aids in browning, and enhances the overall sweetness of the rolls.
- Honey: Adds a complex sweetness that complements the pineapple, contributing to a rich flavor and a beautiful golden crust.
- Unsalted Butter: Enriches the dough, providing flavor and contributing to a soft, melt-in-your-mouth texture. Using unsalted butter allows you to control the overall salt content of the recipe.
- Fine Sea Salt: Balances the sweetness, enhances flavor, and regulates yeast activity.
- Vegetable Oil: Adds extra moisture and helps keep the rolls soft and fresh for longer.
- Evaporated Milk: A concentrated form of milk that adds richness and a creamy texture to the dough, making the rolls extra tender.
- Egg: Contributes to the rolls’ structure, color, richness, and softness.
- All-Purpose Flour: The primary structural component of the dough, providing the gluten needed for elasticity and rise. The quantity may vary slightly based on humidity and how the flour is measured.
For the Golden Honey Butter Glaze
- Butter: Forms the base of the glaze, adding a rich, savory counterpoint to the sweetness.
- Honey: Infuses the glaze with a luscious, sweet finish and helps achieve that irresistible sheen and extra flavor.
Exact measurements for each ingredient, along with detailed step-by-step instructions, are provided in the comprehensive recipe card that follows this post, ensuring you have all the information needed for a successful bake.
Mastering Substitutions: Common Questions Answered
Baking can sometimes require improvisation, especially when certain ingredients aren’t readily available. Here are some solutions to common ingredient questions you might have for this Hawaiian rolls recipe:
Evaporated Milk Alternatives
If you don’t have evaporated milk on hand, you have a couple of excellent options to create a suitable substitute that will still yield wonderfully tender rolls. You can easily make your own by simmering 2 1/4 cups of regular milk (whole milk works best for richness) over medium-low heat until it reduces down to about 1 cup. This process concentrates the milk, mimicking the properties of evaporated milk. Alternatively, a combination of half-and-half and whole milk can also work in a pinch, though the richness might be slightly different. Aim for a ratio that approximates the creaminess of evaporated milk.
The Importance of Canned Pineapple Juice (Pro Tip Revisited)
We cannot stress enough the importance of using canned pineapple juice for this recipe. While fresh pineapple juice might seem like a healthier or more natural choice, it contains bromelain, a powerful enzyme that breaks down proteins. In bread making, this enzyme will attack the gluten structure in your dough. Gluten is what gives bread its elasticity and allows it to trap gases and rise into a light, airy loaf. If the gluten is broken down, your rolls won’t rise properly, resulting in a dense, heavy, and likely unappetizing product. Canned pineapple juice, however, undergoes a heating process (pasteurization) during canning that effectively deactivates these enzymes, making it safe and ideal for baking. So, for the perfect fluffy Hawaiian rolls, stick to canned pineapple juice!
Step-by-Step: Crafting Your Homemade Hawaiian Sweet Rolls
Baking these rolls is a rewarding process that transforms simple ingredients into golden, fluffy perfection. Follow these detailed steps to ensure a successful and delicious outcome:
The Dough Preparation
- Scald the Milk: In a medium saucepan, gently warm the milk over medium heat. Watch it carefully; you want it to just begin foaming around the edges, indicating it’s hot but not boiling. Boiling can kill the yeast and scald the milk too much, affecting flavor. Remove from heat immediately.
- Melt in the Richness: Add the unsalted butter, water, sugar, and honey to the warm milk in the saucepan. Stir continuously until the butter is completely melted and all the ingredients are well combined. It’s crucial to let this mixture cool down to lukewarm (between 105-115°F or 40-46°C) before proceeding. If it’s too hot, it will kill the yeast; too cold, and the yeast won’t activate.
- Activate the Yeast: Once the liquid mixture is lukewarm, sprinkle the instant yeast evenly over its surface. Give it a gentle stir to combine. Pour the entire mixture into the bowl of your stand mixer. Let it rest undisturbed for about 3 to 5 minutes. You’ll know the yeast is active and healthy when a noticeable foamy layer appears on the surface, resembling a creamy head on a beverage. This foam is a sign that your yeast is alive and ready to work its magic.
- Integrate Wet Ingredients: To the yeast mixture in the stand mixer, add the remaining wet ingredients: vegetable oil, fine sea salt, evaporated milk, and the whisked egg. Stir briefly with the dough hook attachment on low speed until everything is just combined.
- Create the Dough: Now, it’s time to add the all-purpose flour. Begin by adding about 8 cups of flour to the mixer bowl. Attach the dough hook and mix on low speed. The dough will start to come together, appearing shaggy at first. Gradually add the remaining flour, about half a cup at a time, continuing to mix until the dough pulls away from the sides of the bowl and forms a cohesive, slightly sticky ball around the dough hook. Be careful not to add too much flour; the dough should be soft and pliable, not stiff. Knead for 5-7 minutes on medium-low speed until smooth and elastic.
- First Rise (Bulk Fermentation): Remove the dough ball from the mixer bowl. Lightly grease the bowl with a little vegetable oil, return the dough to the bowl, and turn it once to coat. Cover the bowl tightly with plastic wrap or a clean kitchen towel. Place it in a warm, draft-free spot (like a slightly warm oven that’s turned off, or near a sunny window). Allow the dough to rise for approximately 1 to 1.5 hours, or until it has visibly doubled in size. This first rise develops flavor and texture.
Shaping and Second Rise
- Prepare for Shaping: Once the dough has doubled, gently punch it down to release the air. Lightly flour your clean work surface, then turn the dough out onto it.
- Shape the Rolls: Divide the dough into equal portions, typically yielding 24-36 rolls, depending on desired size. For uniform rolls, you can weigh each piece (around 1.5-2 oz each). Take each portion and gently roll it into a smooth, tight ball. Pinch the bottom seams together to ensure a smooth top.
- Second Rise (Proofing): Arrange the shaped dough balls onto a lightly greased baking sheet or into a baking dish, leaving a small space between each roll (they will expand). Cover the baking sheet loosely with a clean kitchen cloth or plastic wrap. Let the rolls rise in a warm spot for another 30-45 minutes, or until they are noticeably puffy and almost doubled in size again. During this second rise, prepare your honey butter glaze (instructions below). Just before baking, gently brush the tops of the risen rolls with a generous layer of the melted honey butter.
Baking and Glazing
- Bake to Golden Perfection: Preheat your oven to 350°F (175°C). Bake the rolls for 18-25 minutes, or until they are beautifully golden brown on top and cooked through. The exact time may vary based on your oven and the size of your rolls.
- Final Glaze: As soon as you remove the hot rolls from the oven, brush their tops generously with the remaining honey butter glaze. This final application adds a glossy finish, locks in moisture, and enhances their incredible flavor. Let them cool slightly before serving, if you can resist!
Crafting the Irresistible Honey Butter Glaze
- Melt and Combine: In a small saucepan over medium heat, combine the butter and honey. Stir constantly until the butter is completely melted and the mixture is smooth and well blended. Set aside, keeping it warm if possible, until ready to use.
For precise measurements of all ingredients, please refer to the recipe card below.
Perfect Pairings: What to Serve with Hawaiian Rolls
The sweet and savory balance of Hawaiian rolls makes them incredibly versatile, pairing beautifully with a wide array of dishes. While they are a star on their own, here are some phenomenal meal suggestions to elevate your dining experience:
- Hawaiian-Inspired Feasts: My absolute favorite meal with these rolls is slow cooker Kalua pork, served alongside a refreshing tropical fruit salad and fragrant coconut rice. The rolls perfectly soak up the juicy pork flavors while adding a touch of sweetness. For another island favorite, they are exceptional with grilled Hawaiian chicken, balancing its savory and tangy notes.
- Holiday and Comfort Meals: These rolls are a fantastic addition to almost any holiday spread or comforting family dinner. Imagine them gracing your table with a succulent honey baked ham or a majestic prime rib. Their soft texture and hint of sweetness provide a wonderful contrast to rich meats. They also make a delightful accompaniment to hearty soups and stews, like a creamy Zuppa Toscana, perfect for dipping.
- Everyday Versatility: Don’t reserve them just for special occasions! Use them as elevated sandwich buns for your everyday lunches or as the base for mini-sandwiches for parties. They are especially delightful for sliders, whether filled with pulled pork, chicken, or classic deli meats. For breakfast, a warm Hawaiian roll with a smear of butter or a dollop of jam is pure bliss. They can even be transformed into a delicious bread pudding for a unique dessert!
Storing Your Homemade Hawaiian Rolls for Maximum Freshness
To keep your homemade Hawaiian rolls as delicious as possible, proper storage is key. When stored correctly, these rolls will maintain their incredible softness and flavor for several days.
Once completely cooled, store the baked rolls in an airtight container, plastic wrap, or a large bread bag at room temperature. They will remain wonderfully fresh and soft for up to 5-7 days. For longer storage, Hawaiian rolls freeze exceptionally well. Wrap them tightly in plastic wrap, then place them in a freezer-safe bag or container. They can be frozen for up to 1 month without significant loss of quality. To thaw, simply let them sit at room temperature for a few hours, or gently warm them in a low oven for a few minutes until soft and fragrant again.
Freezing Unbaked Hawaiian Roll Dough
Yes, you can absolutely freeze bread dough! This is a fantastic time-saving tip for preparing delicious homemade rolls whenever the craving strikes. If you choose to freeze the dough before baking, it will keep for a longer period, typically up to 6 months.
Here’s how to do it: After the first rise and shaping the dough into individual balls (as described in step 8 of the recipe), arrange them on a baking sheet lined with parchment paper, ensuring they don’t touch. Place the entire baking sheet in the freezer for a couple of hours, or until the dough balls are firm and frozen solid. Once frozen, transfer the individual dough balls to a freezer-safe plastic bag, removing as much air as possible, or an airtight container. This initial flash-freeze prevents them from sticking together.
When you’re ready to bake, simply move the frozen dough balls from the freezer to the refrigerator the night before. This allows them to slowly thaw overnight. The next day, set the thawed rolls on your counter to let them come to room temperature and complete their second rise (proofing) until doubled in size, as per the recipe instructions. Then, proceed with brushing them with honey butter and baking as usual. This method ensures you always have homemade goodness ready to go!
In a world saturated with store-bought options, the undeniable charm and superior taste of homemade Hawaiian rolls stand out. They are more than just bread; they are a labor of love, a sensory delight, and a testament to the simple pleasures of baking. Whether serving them alongside a grand holiday feast, transforming them into creative sliders, or simply enjoying them warm with a smear of butter, these rolls promise a taste of pure, carb-loving heaven.
So, if you’re looking for soft, fluffy homemade rolls that are like edible pillows, bursting with a subtle sweetness and a hint of tropical paradise, then these **Hawaiian rolls** absolutely need to be the next recipe on your baking list. They’re not just rolls; they’re an experience.
Explore More Delicious Homemade Roll Recipes:
- Pumpkin Dinner Rolls
- One Hour Rolls
- Orange Rolls
- Cheesy Herb Rolls
- Hoagie Rolls
- Potato Rolls
- Sweet Potato Rolls
Visual Guide: How to Make Homemade Hawaiian Sweet Rolls (Video)
Watch this helpful video for a visual walkthrough of the process, making it even easier to bake these perfect Hawaiian rolls at home!
Homemade Hawaiian Rolls
Ingredients
- 2 Cups Milk
- 1/4 Cup Butter, unsalted
- 1 Cup Water
- 1 Cup Pineapple Juice
- 1/4 Cup Sugar
- 1/2 Cup Honey
- 3 Tablespoons Yeast, instant
- 1/4 Cup Vegetable Oil
- 2 Tablespoons Sea Salt, fine
- 3/4 Cup Evaporated Milk
- 1 Egg, large, whisked
- 11-13 Cups Flour
Honey Butter
- 4 Tablespoons Honey
- 1/2 Cup Butter
Instructions
-
In a saucepan over medium heat, add the milk and cook until just starting to foam around the edges and is warmed. Do not boil.2 Cups Milk
-
Gently place the butter, water, pineapple juice, sugar, and honey in the pan and stir until the butter has melted and then allow to cool to lukewarm.1/4 Cup Butter, 1 Cup Water, 1 Cup Pineapple Juice, 1/4 Cup Sugar, 1/2 Cup Honey
-
Sprinkle the yeast and stir to combine. Dump into a standing mixer and allow to rest for 3-5 minutes or until foamy.3 Tablespoons Yeast
-
Pour the oil, salt, evaporated milk and egg and stir to combine.1/4 Cup Vegetable Oil, 2 Tablespoons Sea Salt, 3/4 Cup Evaporated Milk, 1 Egg
-
Add in 8 cups of flour and using a dough hook attachment, mix the dough until it begins coming together.11-13 Cups Flour
-
Carefully pour in a cup of flour more until the dough is coming together in a ball around the hook.11-13 Cups Flour
-
Remove the bowl from the mixer and cover with a cloth to rise for 1 hour or until doubled.
-
Heavily sprinkle flour on your work surface and turn the dough out.11-13 Cups Flour
-
Flip it over so all of the dough has flour on it and isn’t sticky.11-13 Cups Flour
-
Shape the dough into balls.
-
Place on a cookie sheet to rise.
-
Let rise until doubled. Brush the tops with honey butter.
-
Bake for 20-25 minutes at 350 degrees.
-
Remove from the oven and gently rub honey butter all over the tops again.
-
Store in plastic wrap or bread bags for up to 1 week or freeze for up to 1 month.
Honey Butter
-
Combine honey and butter in a sauce pan over medium heat and stir until melted together, set aside.1/2 Cup Butter, 4 Tablespoons Honey
-
Apply the honey butter to the rolls after the second rising in the pan and again after baking.
Nutrition
Nutrition information is automatically calculated, so should only be used as an approximation.
If you loved baking and tasting these delightful Hawaiian rolls, we encourage you to engage with our community! Please feel free to leave a comment below with your feedback, tips, or any creative ways you served them. Your insights are invaluable!
Remember to subscribe to our FREE Oh Sweet Basil NEWSLETTER and receive easy recipes delivered directly to your inbox every day!
When you try a recipe, please use the hashtag #ohsweetbasil on INSTAGRAM for a chance to be featured in our stories! FOLLOW OH, SWEET BASIL ON FACEBOOK | INSTAGRAM | PINTEREST | TWITTER FOR ALL OF OUR LATEST CONTENT, RECIPES AND STORIES.